
If you want to install macOS on your Mac but don’t have a working system right now, don’t worry — even a Windows machine will allow you to create a bootable macOS USB without needing help from any apps in macOS. The whole thing is easy enough, perfect for newbies and everything else in between, and supports macOS versions from Sonoma, Ventura to Monterey through Big Sur and Catalina or more.
On this step by step guide, I’ll demonstrate how to create a macOS bootable USB on windows.
What You’ll Need Before You Start
Here is what you need to make your macOS bootable USB in windows:
- A PC running Windows 10 or Windows 11
- A USB Flash Drive (not less than 16.0 GB in prompt, better use 32GB)
- macOS DMG file (e.g.: Sonoma 14, Ventura 13, Monterey 12)
- TransMac (15-day free trial)
- Stable internet connection
Step 1: Check if Your USB Drive is Using GPT Partition Style
First and foremost, the most crucial step is confirm whether your USB drive uses GPT partition style for it’s because macOS relies on GPT. Many USBs still use MBR, which you can’t use for a macOS install.
Here’s how to check:
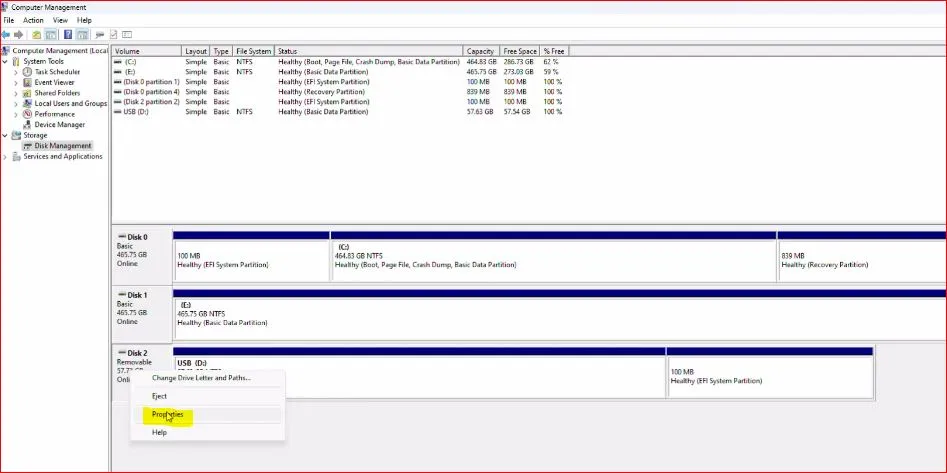
Right-click Start Menu and select Disk Management.
Find your USB drive on the list (make absolutely sure you’re choosing the right one).
Right-click the disk `label’ (e.g. Disk 1, Disk 2 etc) and choose Properties.
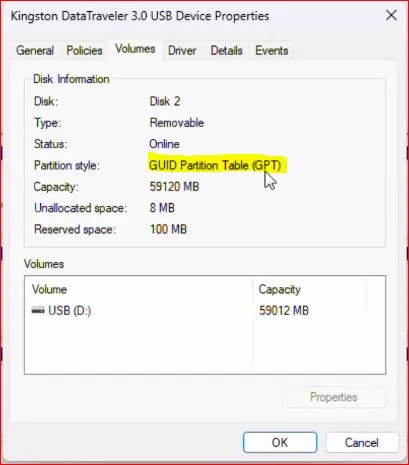
Go to Volumes tab.
Check Partition Style:
- GPT (GUID Partition Table) – Good to go
- MBR (Master Boot Record) – You must convert it
If your USB drive is showing MBR, you will need to convert it into GPT, because macOS needs GPT partition system.
So follow these steps:
- Open Command Prompt asAdministrator
- Click Start, type cmd
- Right-click on Command Prompt → select Run as administrator
- Now type the following commands one by one:
diskpart
list disk
select disk X
clean
convert gpt
create partition primary
exit
Replace X with your USB disk number
(Be very careful — selecting the wrong disk will erase your data.)
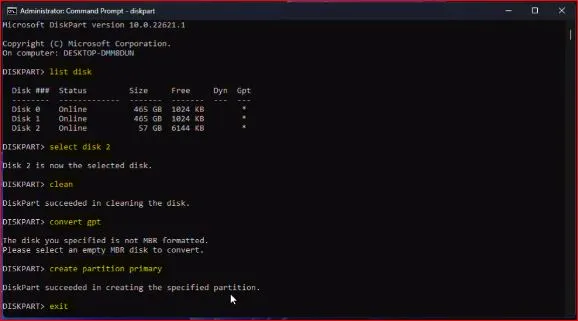
Note: If your USB is actually MBR, then after the command convert gpt, it will show:
“Disk successfully converted to GPT format.”
After conversion, your USB is now GPT and ready for the next step.
Step 2: Download the macOS Installer Image (DMG File)
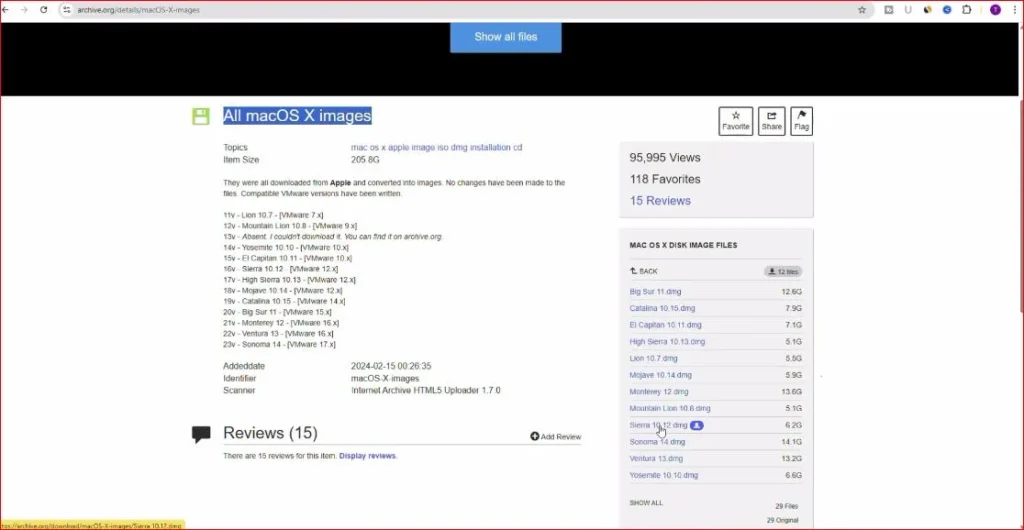
Now we need the installer image for macOS. We’ll use Archive.org, a safe digital library that hosts original macOS images.
Once you open the page on the right-hand side, you’ll find “Mac OS X Disk Image”. Open it — and you’ll see all available versions of macOS in .DMG format. Choose the version you need.
IMPORTANT — Jot a mental note to remember this:
Your Mac can’t use an installer that is older than the macOS version your device shipped with. Example: If your Mac is now running Big Sur, you can’t manually install Mojave or Sierra. You will need to be running Monterey, Ventura, Sonoma, or later.
Choose accordingly. Here I’m downloading macOS Sonoma 14. Click on the file — download should start immediately.
Keep patience… the file size is around 14GB, so it might take time depending on your internet speed.
Step 3: Download and Install TransMac (Free 15-Day Trial)
To write the macOS DMG file to your USB drive, we will use a tool called TransMac.
Here’s how:
Open your browser and search for download TransMac.
From the search results, click the official site.
When the site opens, click tmsetup.zip.
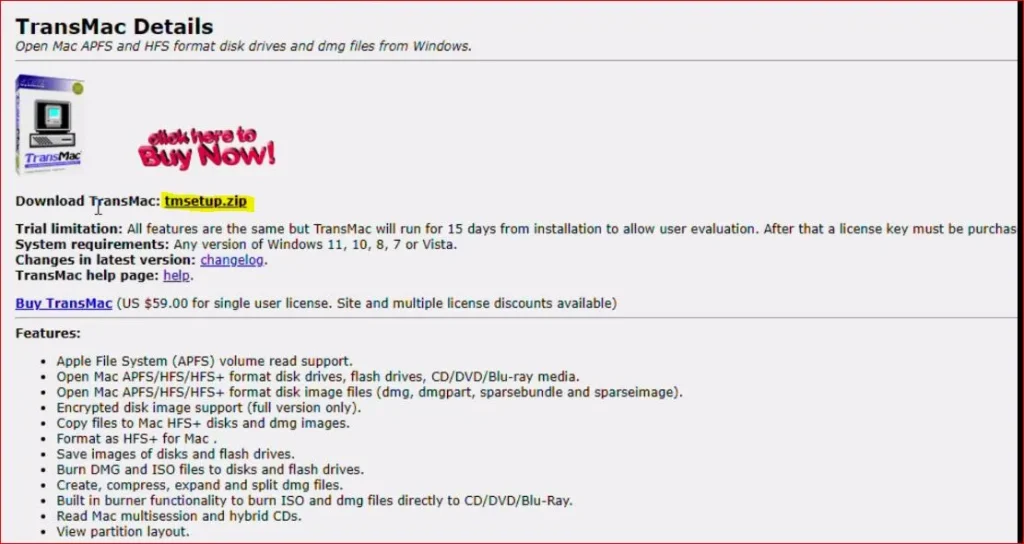
It will download instantly — it’s a small file.
This is a ZIP file → unzip it.
Double-click setup.exe and follow the on-screen instructions.
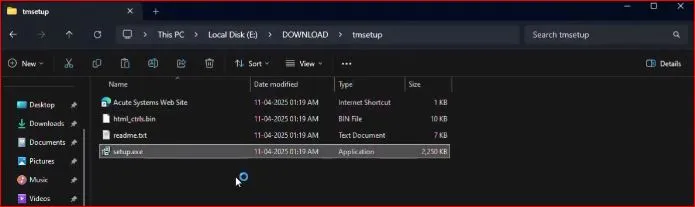
Even though TransMac is a paid software, it gives a 15-day free trial, which is more than enough for our task.
Step 4: Create the macOS Bootable USB Using TransMac
Now comes the main part — restoring the DMG file to your USB. Follow these steps carefully:
Right-click TransMac and choose Run as Administrator.
On the left panel, find your USB drive.
Right-click the USB → select Format Disk for Mac.
After formatting completes, again right-click USB → Restore with Disk Image.
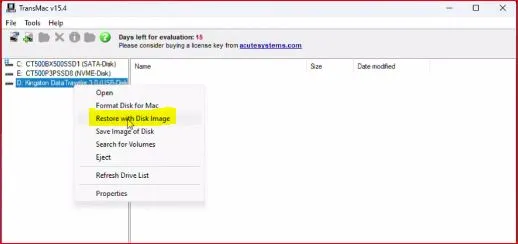
Browse and select your macOS .DMG file.
Click OK and wait for the restore process to finish.
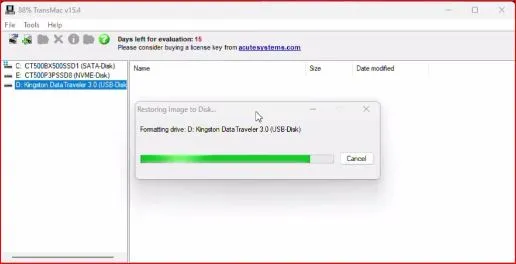
This part takes time depending on USB speed (USB 3.0 recommended). Once completed — congratulations! Your macOS bootable USB is ready.
If you prefer learning visually, here’s the complete video guide on how to create a macOS bootable USB on Windows.
Step 5: Boot Your Mac Using the USB Installer
Now take the USB drive to your Mac and follow these steps:
For Intel Macs:
- Insert USB
- Turn on Mac and immediately press Option (⌥)
- Choose Install macOS
- Follow on-screen instructions
For Apple Silicon (M1/M2/M3) Macs:
- Insert USB
- Press and hold Power button
- Select Startup Options
- Choose USB Installer
- Start installation
Conclusion
It’s easier than ever to create a macOS bootable USB on Windows! The combination of the right DMG file, a GPT-formatted USB drive and a small, easy to use program like TransMac is all you need to create a full installer. Use it for reinstalling macOS, to repair a drive or diagnose a Mac that no longer starts up.
If you think this is helpful, please share it with friends who may need.
Also Read: How to Create a Partition on Mac
Frequently Asked Questions (FAQ)
How do I create a macOS bootable USB on Windows?
You can create a macOS bootable USB on Windows using TransMac. Just format your USB as GPT, load the macOS DMG file, and restore it to the USB.
Can I create a macOS bootable USB on Windows without a Mac?
Yes. You don’t need a Mac. You only need a Windows PC, TransMac software, and a macOS DMG file to create a macOS bootable USB on Windows.
Which macOS versions can I use for creating a bootable USB on Windows?
You can use Sonoma, Ventura, Monterey, Big Sur, and other versions as long as they are not older than the version your Mac originally shipped with.
Why do I need GPT format to create a macOS bootable USB on Windows?
Because macOS requires the USB drive to use the GUID Partition Table (GPT) to boot properly. MBR drives won’t work on modern Macs.
Is TransMac free for creating a macOS bootable USB on Windows?
TransMac is paid software, but it offers a 15-day free trial, which is more than enough to create a macOS bootable USB on Windows.