
We all worry about ensuring that our personal files are safe on our computer. It’s possible that you have work documents, family photos or private notes you’re not able to let others see. Without downloading any outside third-party apps, you can lock folder without software in windows 11 using below built-in tricks.
In this guide, I’ll show you two easy methods:
- Using a batch script with Notepad
- Using Windows built-in compression tools -ZIP with password protection
Both are free, easy and you don’t need to be at all technical.
Why Lock a Folder Without Software?
Before we get into the why, let’s take a quick look at why you might want to use this approach:
- You wouldn’t download a sketchy app that slows your PC.
- You simply need privacy from family members or colleagues.
- You’re looking for an free, integrated solution without needing to install third-party tools.
The good news is — Windows gives you all the options you need.
Method 1 – Lock Folder Without Software Using a Batch Script
This is the popular trick that uses a little Notepad magic.
Step 1 – Create a New Folder
- Right-click on your desktop.
- Choose New > Folder.
- Name it something like Private.
Step 2 – Open Notepad and Copy the Script
Paste this script into Notepad:
cls
@ECHO OFF
title Folder Locker
if EXIST “Control Panel.{21EC2020-3AEA-1069-A2DD-08002B30309D}” goto UNLOCK
if NOT EXIST Private goto MDLOCKER
:CONFIRM
echo Are you sure you want to lock the folder? (Y/N)
set /p “cho=>”
if %cho%==Y goto LOCK
if %cho%==y goto LOCK
if %cho%==N goto END
if %cho%==n goto END
echo Invalid choice.
goto CONFIRM
:LOCK
ren Private “Control Panel.{21EC2020-3AEA-1069-A2DD-08002B30309D}”
attrib +h +s “Control Panel.{21EC2020-3AEA-1069-A2DD-08002B30309D}”
echo Folder locked
goto END
:UNLOCK
echo Enter password to unlock your folder:
set /p “pass=>”
if NOT %pass%==YourPasswordHeregoto FAIL
attrib -h -s “Control Panel.{21EC2020-3AEA-1069-A2DD-08002B30309D}”
ren “Control Panel.{21EC2020-3AEA-1069-A2DD-08002B30309D}” Private
echo Folder unlocked successfully!
goto END
:FAIL
echo Invalid password
goto END
:MDLOCKER
md Private
echo Private created successfully
goto END
:END
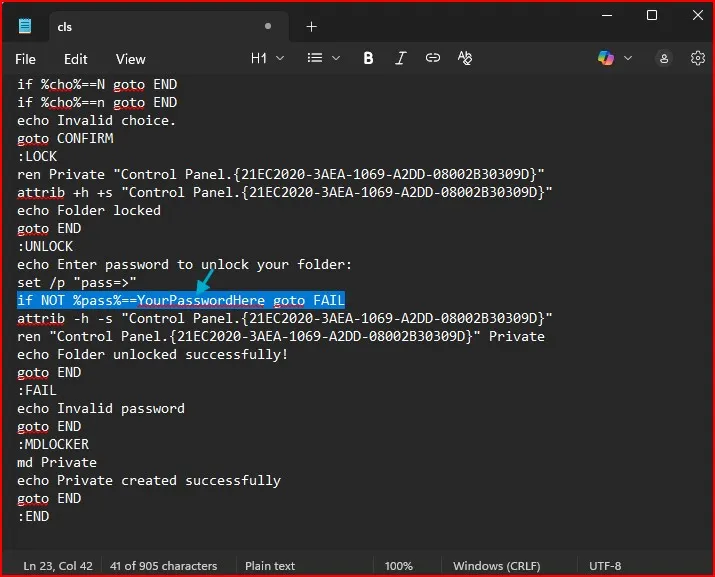
Step 3 – Replace the Password
Find this line:
if NOT %pass%==YourPasswordHeregoto FAIL
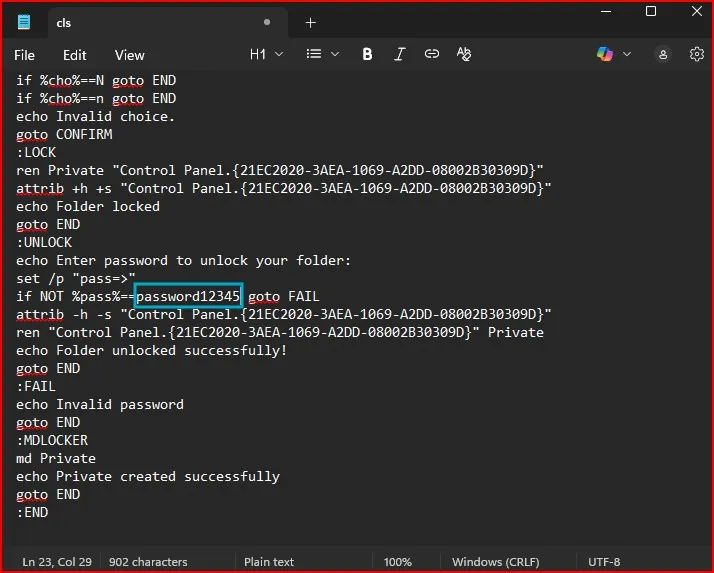
Replace YourPasswordHere with your own password.
if NOT %pass%==password12345goto FAIL
Step 4 – Save the Script
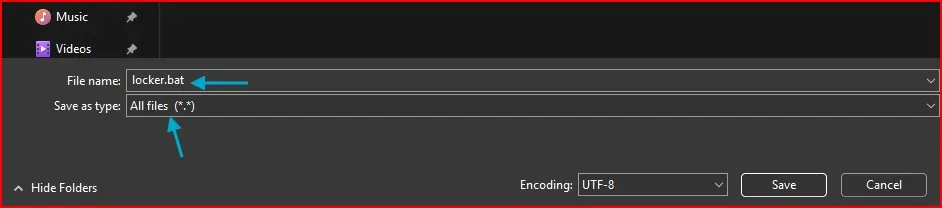
- Click File > Save As in Notepad.
- In the “Save as type” dropdown, select All Files.
- Save it with the name: locker.bat inside the same folder.
Step 5 – Lock and Unlock
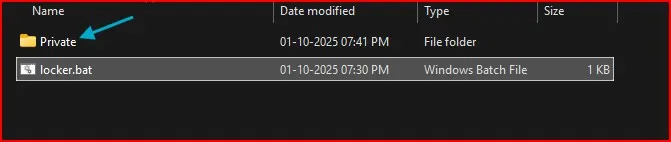
- Double-click on locker.bat.
- A new folder named Private will appear automatically.
- Move all your personal files into this Private folder.
Now, double-click locker.bat again, type Y, and the folder will vanish (it’s hidden and locked).
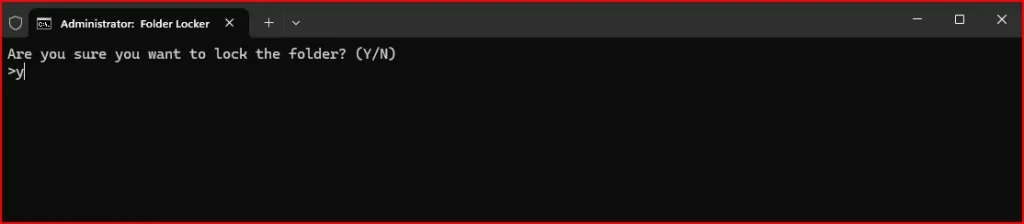
To unlock, run locker.bat, enter your password, and your files are back!

Method 2 – Lock Folder Using Windows Built-in Compression Tools
Windows has a built-in compression tool that lets you zip a folder. While it doesn’t allow traditional password protection like WinRAR, you can use encryption (EFS) to tie access to your Windows account.
Step 1 – Zip the Folder
- Find the folder you want to lock.
- Right-click on it and select Send to > Compressed (zipped) folder.
This creates a ZIP file containing your folder.
Step 2 – Encrypt the Zip File
Now, here’s the catch: Windows built-in tool only compresses, it doesn’t add password protection directly.
How to do it:
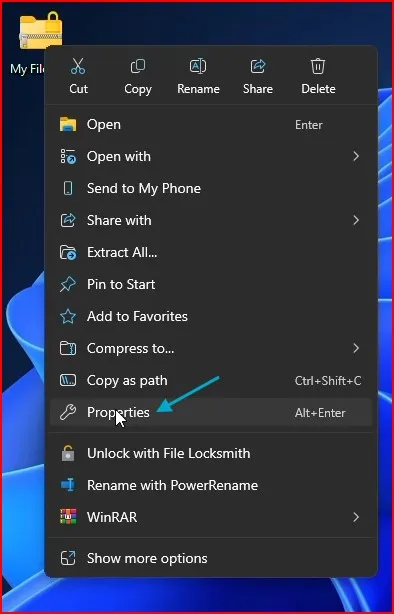
Right-click the new ZIP file → choose Properties.
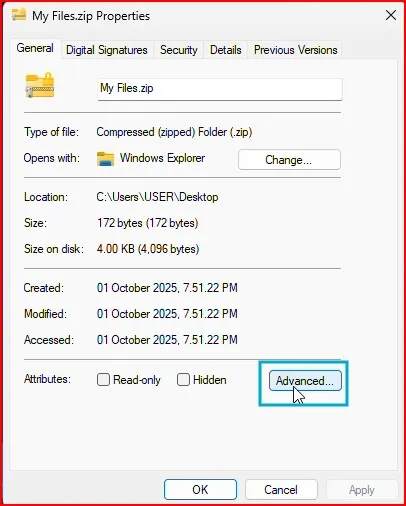
Go to the General tab → click Advanced.
Tick Encrypt contents to secure data → Apply → OK.
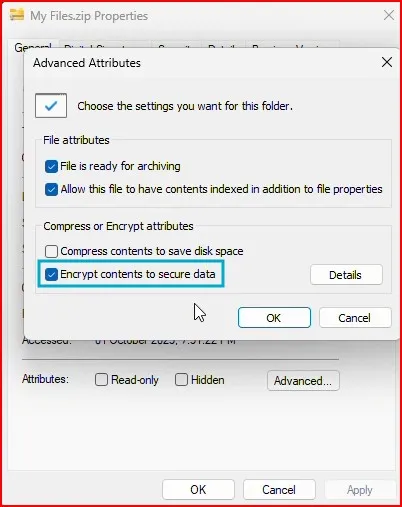
Now, the folder is protected by your Windows login. Only your account can open it.
Note: If you log in with another account, the folder won’t open. If someone copies the zip to another PC, they also can’t access it.
Which Method Should You Use?
- Batch Script Method: Good for quick locking and hiding. Works on all editions of Windows.
- Compression Method: Best if you want actual encryption. Works better on Windows Pro.
If you simply want to lock a few files out of sight, the batch approach is fine. But for true protection, stick with the built-in encryption feature within the compression program.
Final Thoughts – Lock Folder Without Software in Windows 11
Knowing how to lock folder without software windows 11 is a useful trick for everyone’s privacy.
- The batch file method is simple, fun, and works for everyone.
- The compression + encryption option is would be more secured if your version of windows support it
Either way, there’s no reason to burden your PC with third-party software. What you want is already there in windows.
If you’re someone who likes organizing and securing files in Windows, you may also enjoy my guide on How to Mount Folder as a Drive in Windows.
Frequently Asked Question (FAQ)
Can I lock folder without software in Windows 10 too?
Yes! Both methods work in Windows 10 as well.
Which is safer, the batch script or compression method?
Compression with encryption is more secure, but the script method is easier.
Will this protect me from hackers?
No, this is more for privacy. For professional security, check BitLocker.
Can I change the password later?
Yes, simply edit the batch script or re-encrypt the ZIP file.
What happens if I delete the locker.bat file?
The folder remains hidden, but unlocking becomes harder. Always keep a copy.