
Ever thought you could open the common folder as a drive? Well, you’re in luck! Mount folder as a drive is surprisingly simple in Windows 11. If you want to make your way to a particular folder quickly or make your work process faster, this comes handy to save a lot of time. In this article, we will show you how to mount a folder as a drive in Windows 11, step by step with a simple-to-follow guide that even a non-tech wizard can follow.
Why Would You Want to Mount Folder as a Drive?
Before getting into the steps, let’s touch upon why this is such a useful feature. Some examples where be convenient to mount a folder as a drive include:
Quick access: Mount folder as a drive makes it easier to access when you’re using it repeatedly — no need to keep navigating through different directories.
Software configuration: Some application uses a drive letter to access certain files. If you mount folder as a drive, the application will work seamlessly.
Organizational Simplification: For keeping vital data at easy reach without cluttering existing drive topology.
How to mount Folder as a Drive in Windows 11
Now, let’s get into how we do this. Here’s how you can mount folder as a drive in Windows 11:
Step 1: Select the Folder you want to mount
Choose the folder you want to mount as a drive. Ensure this is a directory you routinely access or need for a given purpose.
For example, let’s say you have a folder called Projects located at C:\Users\USER\Desktop\PROJECT.
Step 2: create a shortcut file
You need to create a shortcut file to mount folder as a drive in Windows 11. To do this Right-click on a blank space on desktop and select New > Shortcut.
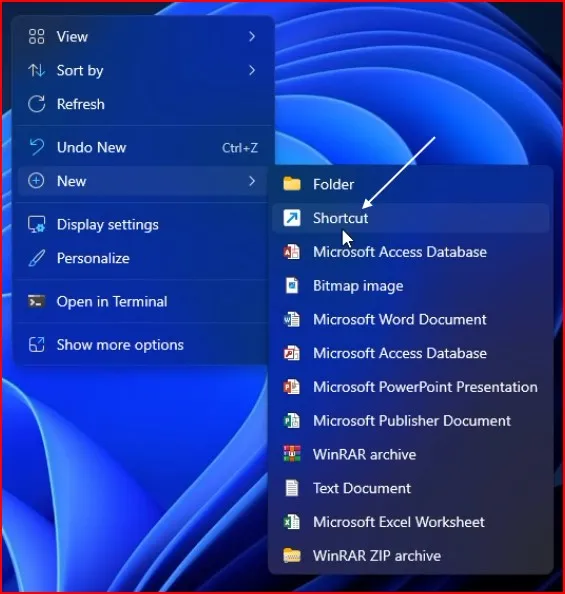
You need to type the location of the item that I have mentioned above with subst command. This is a built-in Windows command that makes this magic happen. Its name is short for “substitute,” and it allows you to assign a drive letter to a particular folder.
Here’s the Syntax: subst [Drive Letter]: [Folder Path]
For example, to mount the PROJECT folder as drive X:, you need to type:
subst X: ” C:\Users\USER\Desktop\PROJECT “ Click Next to continue.
You can learn more about the subst command and its parameters in the Microsoft Documentation.
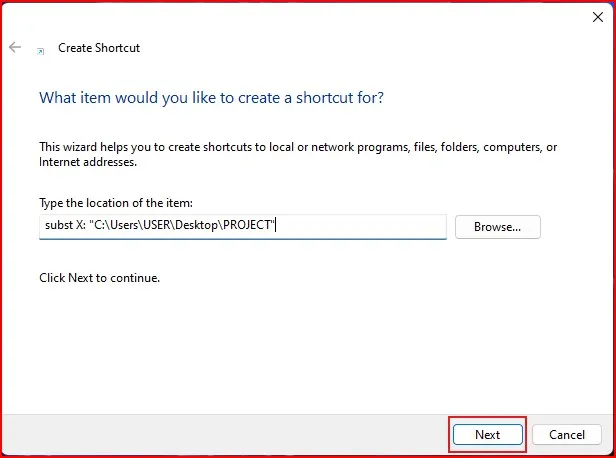
Note: In the above command, ‘X’ represents the drive letter you wish to assign and ensure drive letter is not already taken. And, replace ‘C:\Users\USER\Desktop\PROJECT’ with path to the folder you would like to mount as a drive
You need to select the full path of that particular folder by right click on that and select Copy as path.
Enter a name for the shortcut in the shortcut window, and then click the Finish button.
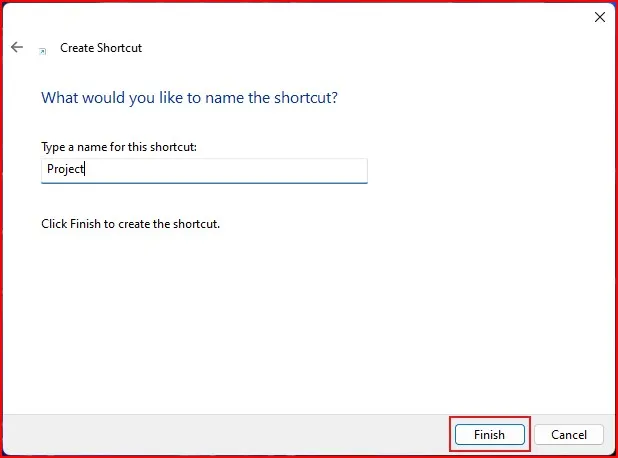
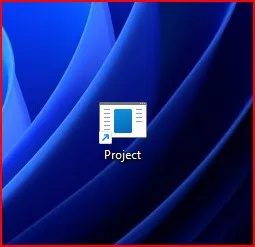
You’ll find a new shortcut on your desktop. To set up your folder as a virtual drive, double-click on it. If the folder doesn’t mount, right-click the shortcut and choose Run as administrator.
Step3: Verify the Mounted Drive
To check if the folder has been successfully mounted as a drive:
- Open File Explorer from the Start Menu.
- Look for the new drive letter on the left side of the window. For example, in our case, the letter is “X“.
- Double-click the drive to make sure it opens the folder you previously selected.
To disconnect the virtual drive, simply restart your computer.

Step4: Make It Permanent
If you need this folder to be always mounted as a drive, the steps need to be repeated, or you can use the following step.
Since the drive created with subst is not permanent, it will not appear after you restart your PC. Thus, you need to create a batch file:
Create a Batch File:
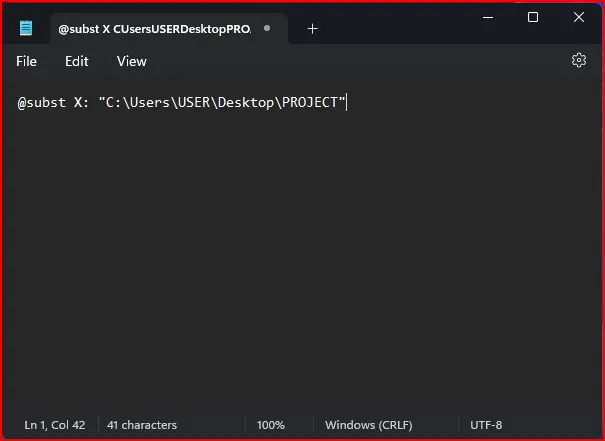
Open Notepad and type the subst command.
For example: @subst X: ” C:\Users\USER\Desktop\PROJECT ”
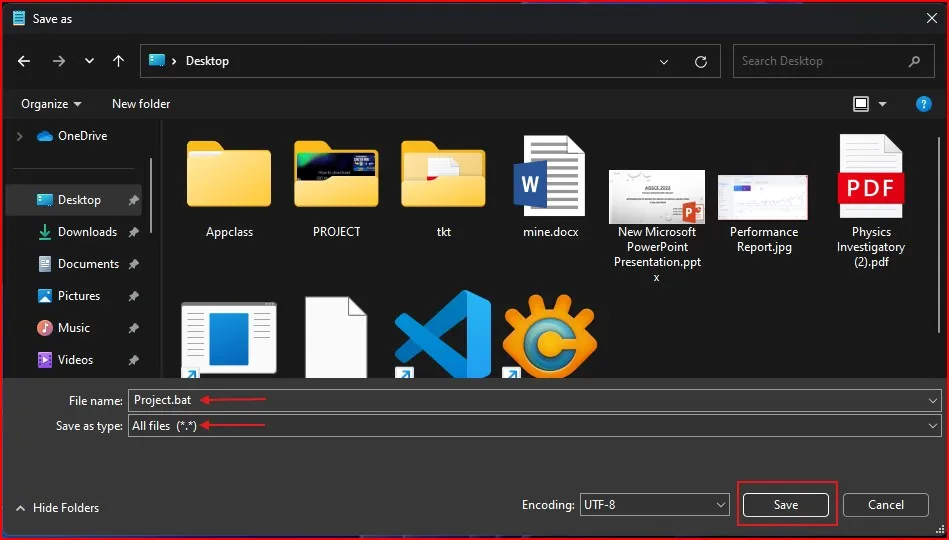
Save the file with a .bat extension, such as Project.bat
Add to Startup:
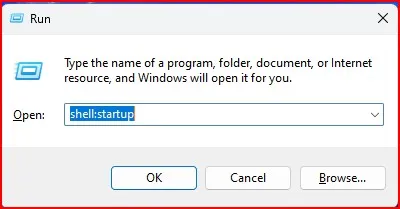
Press Windows + R and type shell:startup.
After that, you will need to copy the .bat file to the Startup folder.
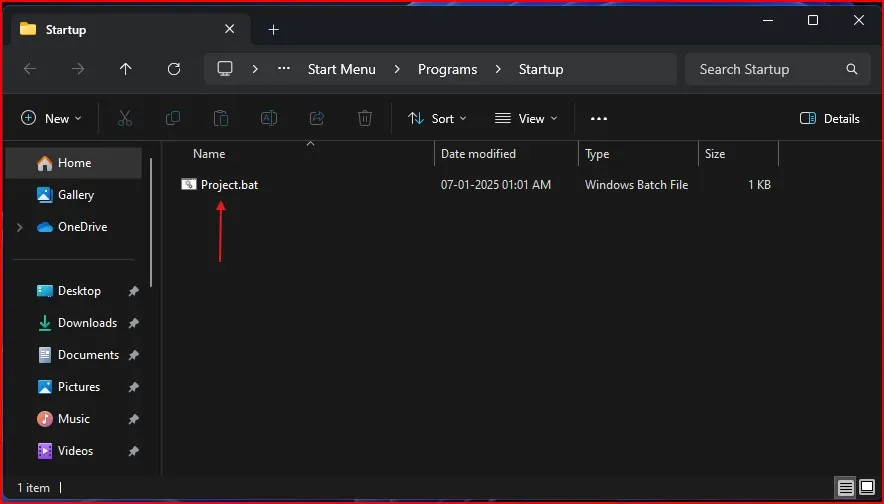
This ensures the folder is mounted as a drive every time you start your PC.
How to Remove Mounted Drive
If don’t need the folder to be mounted anymore, you can easily unmount it. Open Command Prompt as Administrator.
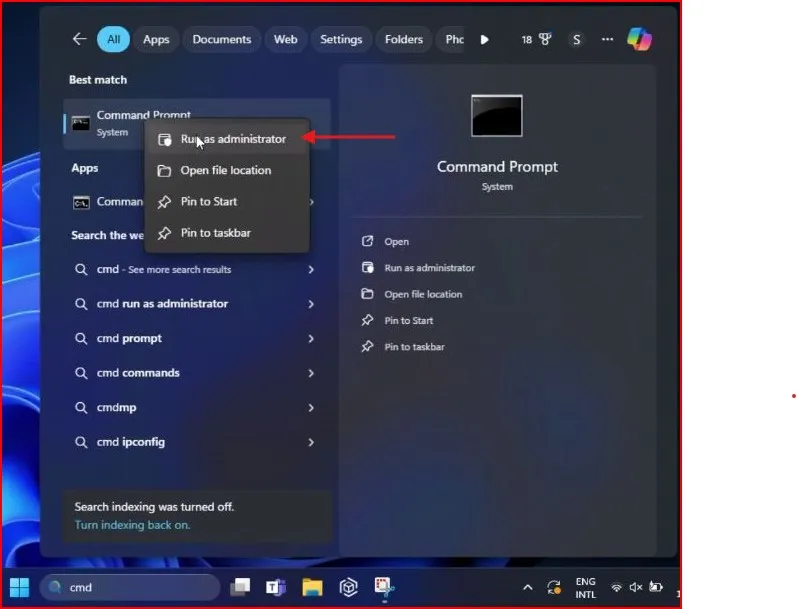
Enter the following command:
subst [Drive Letter]: /D
For example, if you want to remove the Drive X, enter the following command:
subst X: /D
Press Enter and the drive will be removed.
Tips and Tricks for Using Mount folder as a Drive:
Create Shortcuts: For drives you use more often, get desktop shortcuts for even faster access.
Drive letters: Select drive letters that are not already in use.
Security: When mounting a folder, make sure it doesn’t contain sensitive data if the PC is used by not only you.
To analyze how this impacts your PC’s performance, you might want to learn How to Generate a System Performance Report on Windows 11 (Step-by-Step Guide).
Troubleshooting Common Issues
Here are a few options if the folder doesn’t mount as a drive:
Access Denied: Try running Command Prompt as an admin.
Missing Drive: If the mapped drive isn’t showing up in File Explorer, make sure the folder path and drive letter you specified are correct.
Drive Disappears After Restart: You need to create a batch file to run after startup, so you can have permanent mappings.
Conclusion
And there you have it! Mount folder as a drive a simple but powerful Windows trick that can make your digital life a little bit more convenient: mount folder as a drive in Windows 11. Whether you’re trying to simplify your workflow or conform to certain software requirements, this feature is a total game-changer.
Give it a whirl today, and please do let us know how it treats you in the comments below. And do not forget to share this guide with your friends if you found this helpful. Happy computing!
Frequently Asked Question (FAQ)
Can I map a folder on another drive (like D: instead of C:) as a virtual drive?
Yes, a folder from any drive can be mapped.
Why does the mapped drive vanish after logging out or restarting?
The subst command creates mappings that last only for the current user session. To keep the mapping, you can create a batch file with the subst command and place it in your system’s Startup folder.
Is there an easier method to manage folder-to-drive mappings?
Indeed, third-party applications like Visual Subst offer a graphical interface to map folders to virtual drives. These tools also allow you to save mappings and ensure they persist after reboots, making the task simpler.
What occurs if the original folder is deleted after being mount folder as a drive?
If the original folder is removed or moved, the mapped drive will stop working. Trying to access it will cause an error since the drive relies on the original folder’s presence and location.
Can a network folder or shared drive be mapped as a virtual drive using subst?
No, the subst command is limited to local folders. To map a network folder as a drive, use File Explorer’s Map Network Drive option:
1. Right-click on This PC and select Map network drive.
2. Provide the network folder path and choose a drive letter.
Is there a limit to the number of drives that can be mapped?
Yes, there is a limit based on the available drive letters (A: to Z:). Since some letters are reserved (e.g., C: for the system drive), the exact number of drives you can map depends on which letters remain unassigned.