
VirtualBox lets you install and use another operating system inside Windows 11, so you can try Linux, Ubuntu, or another operating system without touching your main system.
In this guide, I’ll walk you through how to install VirtualBox on Windows 11with all the important steps you actually need.
What Exactly Is VirtualBox?
VirtualBox is software you run on your computer that creates a computer inside your computer.
This “virtual computer” works exactly like a real one. You can install operating systems — like Linux or Ubuntu, even another copy of Windows — inside it. It’s all handled in a controlled environment, so your actual Windows 11 files, settings, and programs will remain completely untouched.
This is the simplest and safest method for newcomers to get hands-on with new operating systems.
Why So Many People install VirtualBox on Windows 11
From my experience, people usually install VirtualBox on windows 11 for very practical reasons:
- They want to learn Linux but are not ready to replace Windows
- They want to test software without risk
- They are studying IT, networking, or cybersecurity
- They want to avoid dual booting
If any of this sounds familiar, VirtualBox is a perfect starting point.
Things to Check Before You Start
Before install VirtualBox on windows 11, take a quick minute to check these basics:
- A Windows 11 PC
- Minimum 4 GB RAM (8 GB works much better)
- At least 20 GB free disk space
- Internet connection
- Virtualization enabled in BIOS
Most modern systems already have virtualization enabled. If VirtualBox refuses to start later, this is usually the first thing to check.
Step 1: Download VirtualBox for Windows 11
Open your web browser and go to the official VirtualBox website: https://www.virtualbox.org
Once the page opens, click on Downloads.
Here, you will notice different platform options like Windows, macOS, Linux, and Solaris. Choose the option based on your operating system. Since we are installing on Windows 11, click on Windows Hosts.
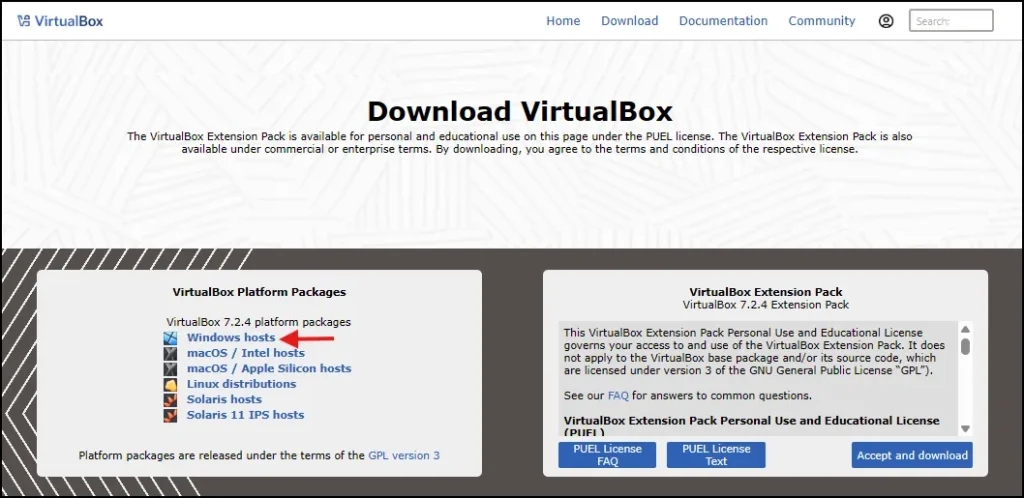
The download will start automatically. Wait until it finishes.
Step 2: Start the Installation Process
Go to your Downloads folder and double-click the VirtualBox setup file.
If Windows shows a User Account Control message, don’t panic. This is normal. Just click Yes.
The VirtualBox Setup Wizard will open. Click Next to continue.

Step 3: End-User License Agreement
At this point, a License Agreement page will appear.
Here, you don’t need to read everything line by line. Simply select I accept the terms in the License Agreement, then click Next to move forward.

Step 4: Installation Options
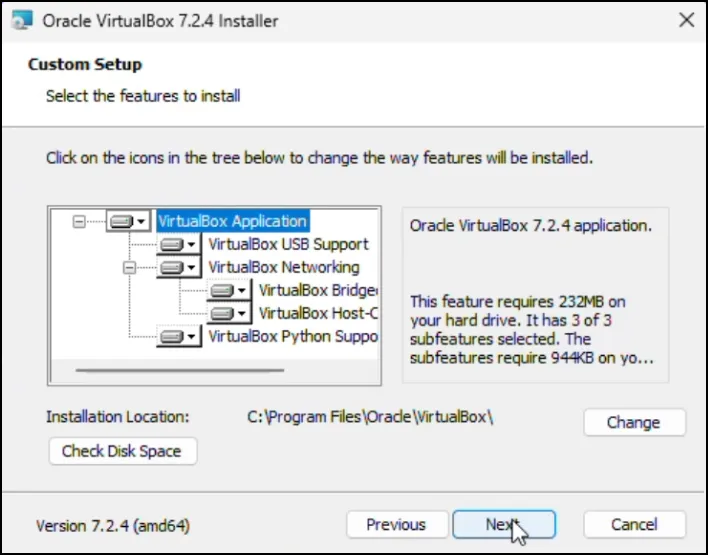
On this custom setup screen, you’ll see several options related to features and shortcuts.
Many beginners get confused here and think they must change something. In reality, the default settings work perfectly fine for most users. You can also change the Installation location from here.
Simply click Next.
Step 5: Network Warning Explained
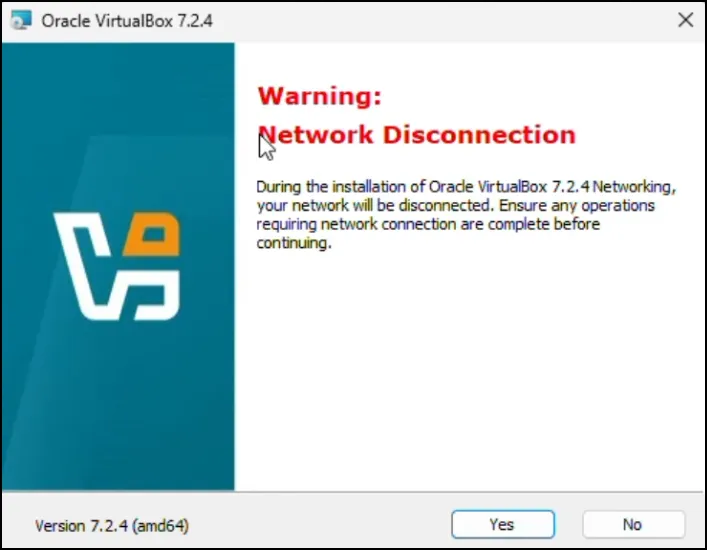
Now you’ll see a network warning message.
This warning just means that your internet connection may disconnect for a few seconds during installation. This happens because VirtualBox installs its own network drivers.
This is completely normal. Click Yes and continue.
Step 6: Custom Setup Options (Shortcuts Explained)
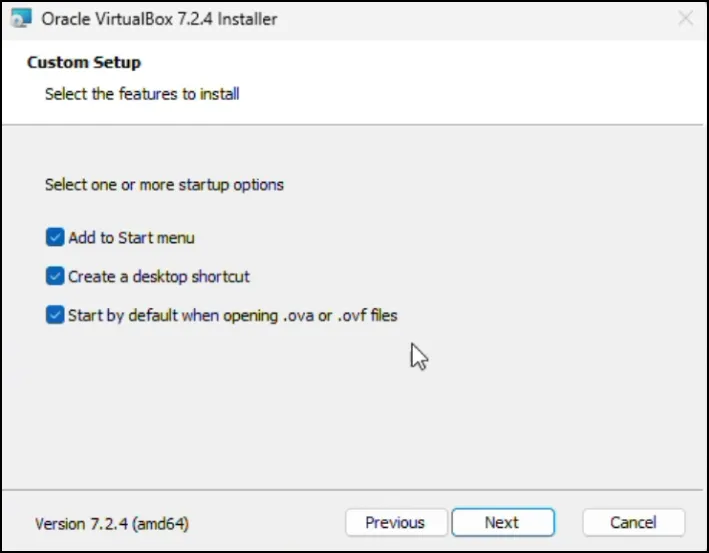
Now you’ll see the Custom Setup page.
Here, VirtualBox shows options like:
- Creating a Start Menu entry
- Adding a Desktop shortcut
- Adding a Quick Launch shortcut (if available)
For most users, it’s best to leave these options checked. This makes VirtualBox easier to find and open later.
You don’t need to change anything here unless you have a specific reason.
Once you’re done, click Next to continue.
Step 7: Install VirtualBox
Click on Install.
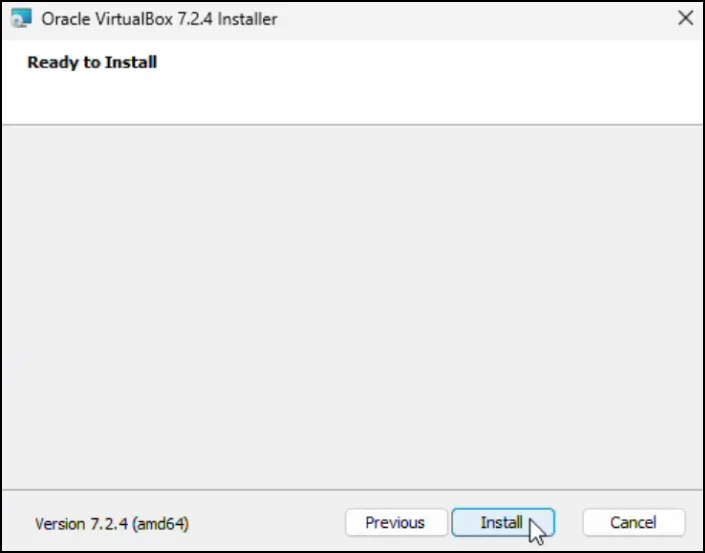
The installation will now begin. It normally takes a minute or two. Your screen may flicker slightly in this process — that’s normal, too.
Once installation has finished, click Finish.
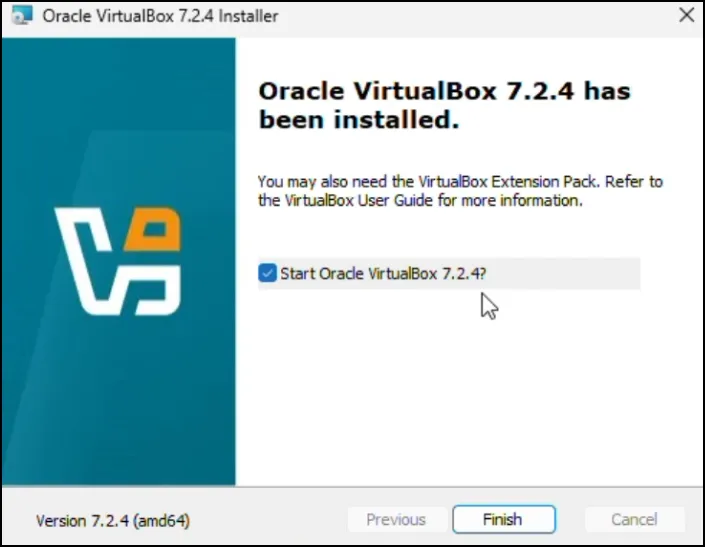
VirtualBox should now open automatically.
How to Confirm VirtualBox Is Installed Correctly
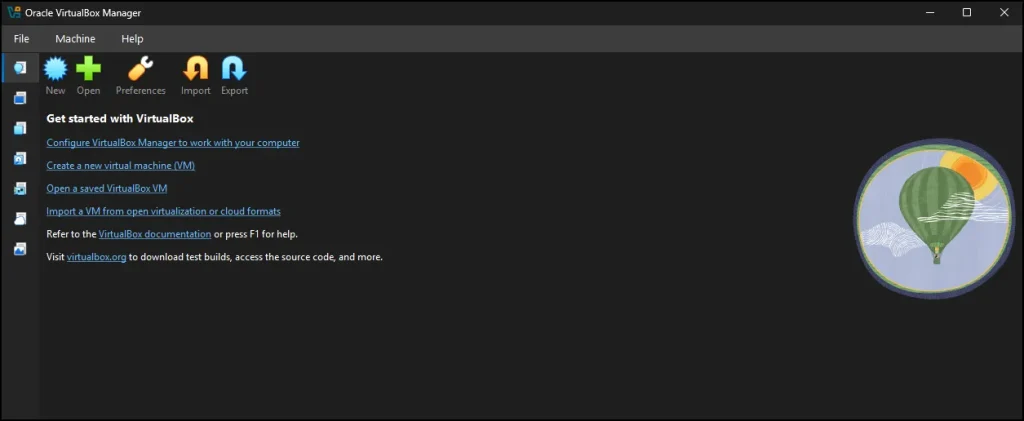
If you get a window with Oracle VM VirtualBox Manager, congratulations!
In other words, you’ve installed VirtualBox correctly on your Windows 11 system and it’s good to go.
Most people quit at this point. But there’s one more optional step that I highly recommend.
VirtualBox Extension Pack (Optional but Highly Recommended)
Installing the VirtualBox Extension Pack is not mandatory. VirtualBox will work without it.
However, based on real-world use, skipping it often causes problems later, especially with:
- USB devices not working
- Webcam not detected
- Limited device support
So while optional, installing it now saves headaches later.
Download the Correct VirtualBox Extension Pack
Go back to the VirtualBox Downloads page.
Scroll down until you see VirtualBox Extension Pack.
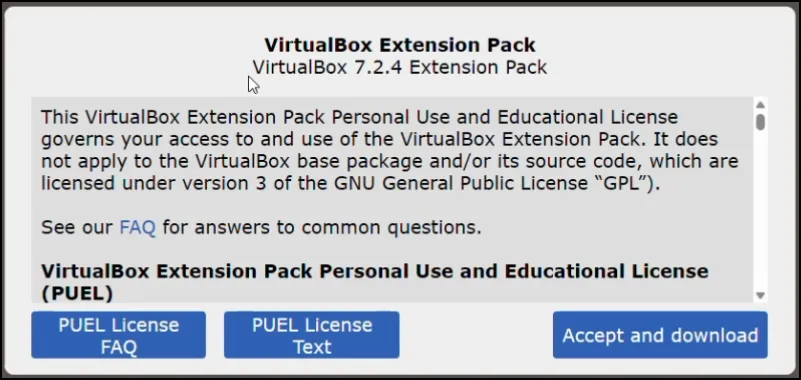
Important rule: the VirtualBox Extension Pack version must match your VirtualBox version. If you installed VirtualBox 7.2.4, download Extension Pack 7.2.4.
Install the VirtualBox Extension Pack
Open VirtualBox Manager.
Click Tools and select Extensions.
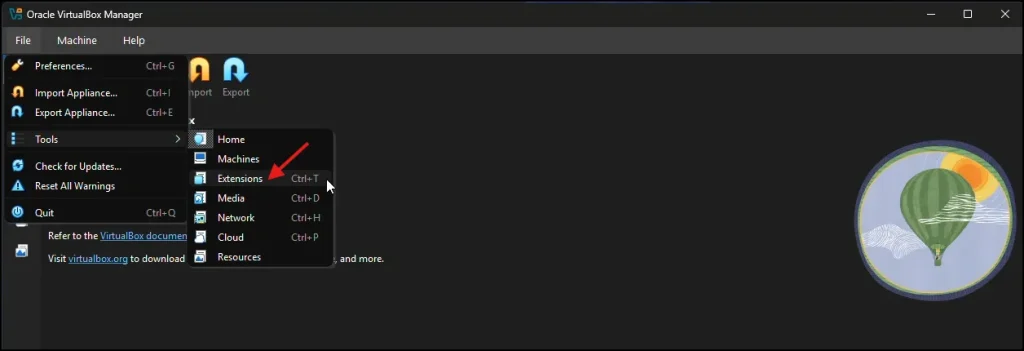
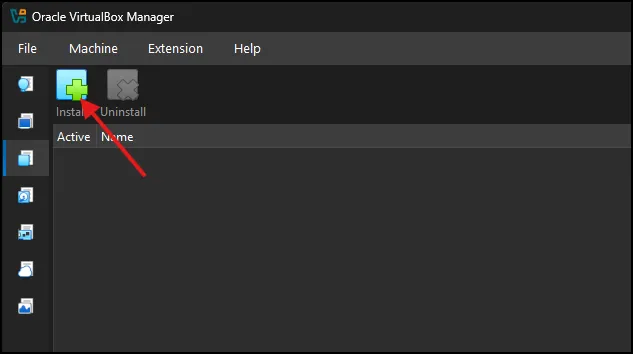
Click on the “Add” icon, browse to the Extension Pack file you downloaded and open it.
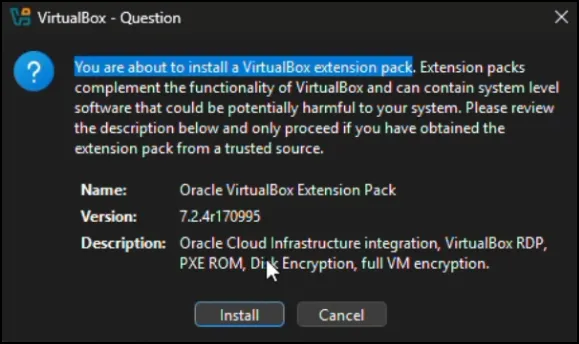
It showing, you are about to install a VirtualBox extension pack, just click on Install.
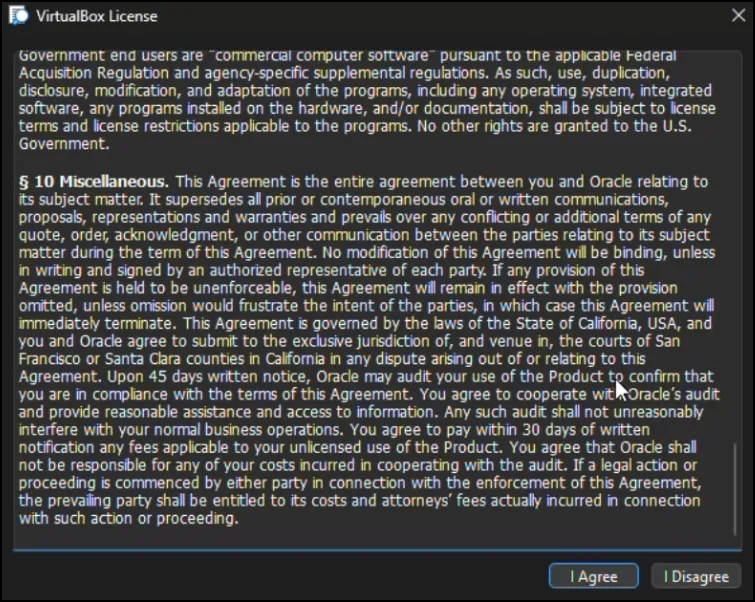
Read the license, then scroll down and select I Agree.
If Windows prompt for permission to run the file, Click Yes.
You will then see that the Extension Pack is listed with same version number as you installed.

What You Can Do After Installation
Now your VirtualBox setup is complete.
If you want to install any operating system like Linux or Ubuntu, you’ll need to download its ISO file first. Think of the ISO file as an installation DVD.
Inside VirtualBox, you can create a new virtual machine and select this ISO file during setup.
Final Thoughts
The process of installing VirtualBox on Windows 11 may seem complicated, but if you walk through it step by step, even a new user will find it very do-able.
And now you’ve got VirtualBox (and the Extension Pack) installed; you have a safe to play environment for learning, testing and messing around with other operating systems without crashing your Windows installation.
And if you’d rather watch instead of read, you can check out the complete video tutorial where I go through each step visually as well.
Frequently Asked Question (FAQ)
Is VirtualBox free to use?
Yes, VirtualBox is completely free for personal and educational use.
Is the VirtualBox Extension Pack mandatory?
No, it is not mandatory, but it is recommended for features like USB and webcam support.
Can I install Linux or Ubuntu on VirtualBox?
Yes, you can install Linux, Ubuntu, and many other operating systems using their ISO files.
Does VirtualBox affect my main Windows 11 system?
No, everything runs inside a virtual environment and does not change your main system.
What should I do if VirtualBox does not start?
Check if virtualization is enabled in BIOS and make sure Hyper-V is disabled on Windows 11.