
If you are planning to Install Ubuntu on VirtualBox Windows 11 and afraid of any harm to the system then don’t worry about it. It’s one of the safest and easiest ways to try Linux because it doesn’t require you to modify your existing Windows files.
A lot of beginners who want to learn Ubuntu don’t want to erase Windows or struggle with a dual-boot configuration. VirtualBox eliminates this problem entirely.
Why Install Ubuntu on VirtualBox?
VirtualBox lets you run another operating system inside your computer using a virtual machine. This means:
- Your Windows 11 system remains safe
- No dual boot or partitioning needed
- You can test Ubuntu freely
- Perfect for learning Linux or practice
Ubuntu 24.04 LTS is a long-term support release, so it’s stable, user-friendly and supported with updates for years to come.
What You Need Before You Start
Before we begin, make sure you have:
- A Windows 11 PC
- At least 16 GB RAM recommended (8 GB also works)
- VirtualBox installed (Download link: https://www.virtualbox.org/wiki/Downloads)
- Ubuntu 24.04 LTS ISO file
- At least 40 GB free disk space
Note: I’ve already made a separate video showing how to download and install VirtualBox.
Step 1: Download Ubuntu 24.04 LTS ISO
Go to official Ubuntu website and grab the Ubuntu 24.04 LTS ISO. VirtualBox will use this ISO file to boot the Ubuntu installation inside your new virtual machine.
After its downloaded, keep it somewhere easy to find, such as your Downloads folder.
Step 2: Create a New Virtual Machine in VirtualBox
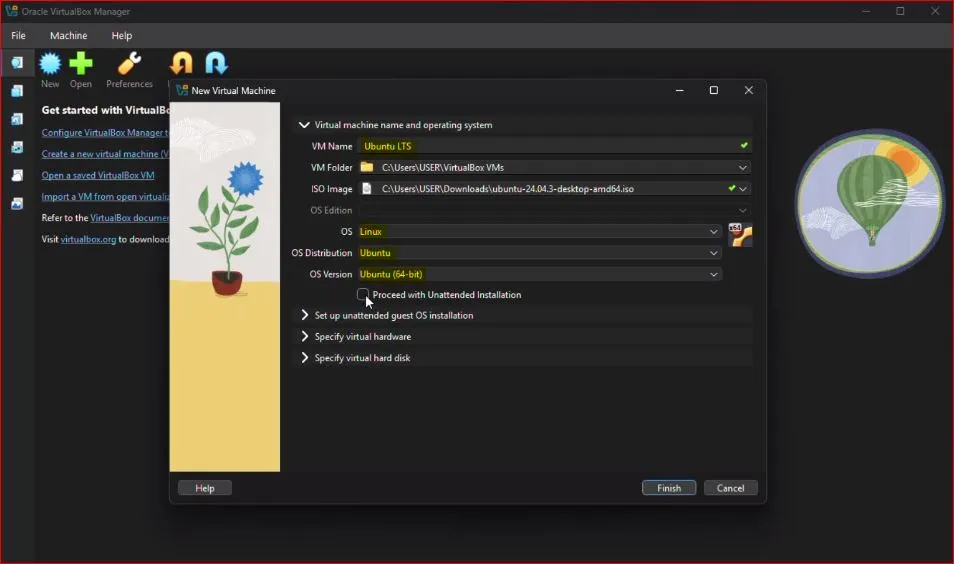
Open VirtualBox and click on New.
- Name: Ubuntu LTS or anything you want
- Type: Linux
- Version: Ubuntu (64-bit)
Click Next.
Step 3: Assign RAM and CPU
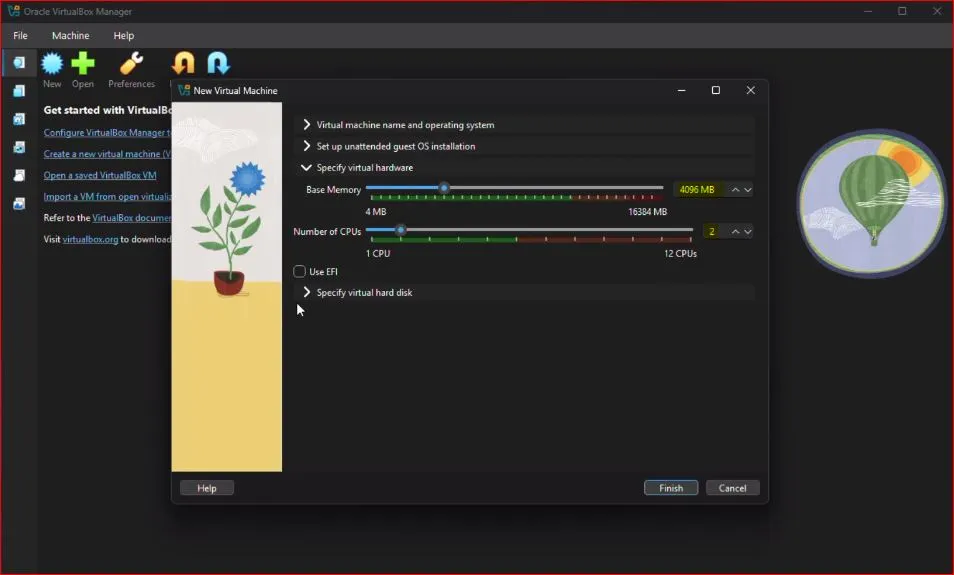
Now expand Specify Virtual Hardware.
Base Memory (RAM)
Ubuntu needs a minimum of 2 GB RAM, but since my system has 16 GB RAM, I’m setting it to 4 GB. This gives smooth performance without stressing the system.
You can set 6 GB if you want extra smoothness, but make sure the slider does not cross the red line.
Processor (CPU)
Assign 2 CPUs if possible. This improves responsiveness. You can assign more depending on how many CPU cores your system has.
Once done, click Next.
Tip: Don’t over-allocate RAM or CPU. Always leave resources for Windows.
EFI Setting
I’ll keep the Enable EFI option unchecked. This ensures a smoother and more trouble-free Ubuntu installation for beginners.
Step 4: Create Virtual Hard Disk
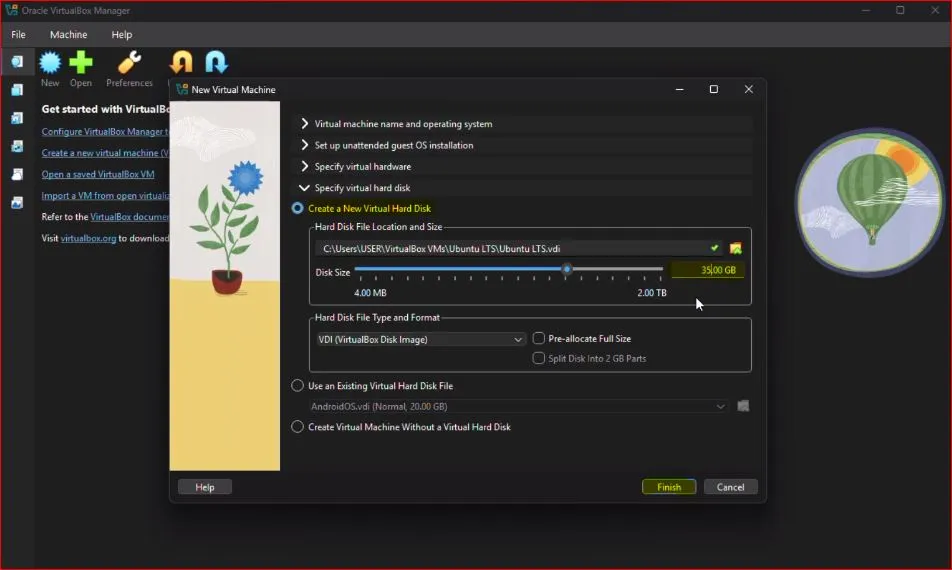
Choose Specify Virtual Hard Disk.
I’m setting the disk size to 35 GB, which is more than enough for Ubuntu. Ubuntu doesn’t need much space, so no changes are required here.
Click Finish.
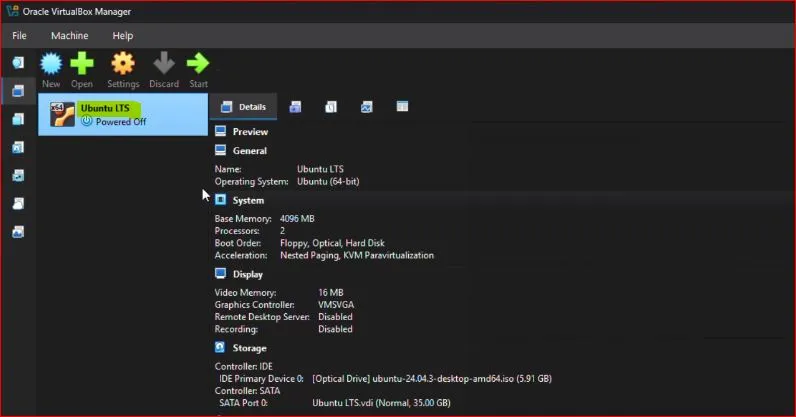
You’ll now see Ubuntu LTS listed on the left side of VirtualBox.
Step 5: Start the Ubuntu Installer
Select your Ubuntu virtual machine and click Start.
VirtualBox will boot from the Ubuntu ISO file. Wait a few seconds while Ubuntu loads.
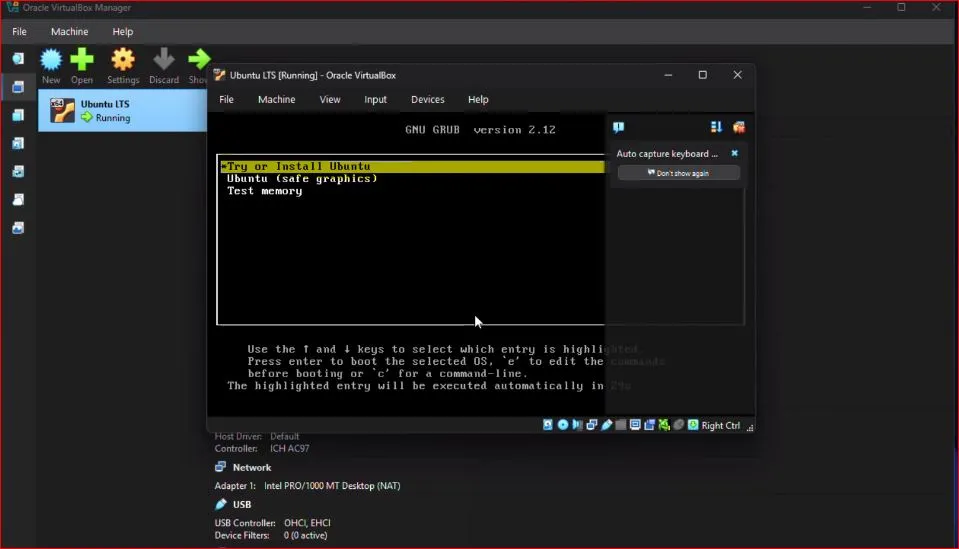
When the Ubuntu screen appears, double-click Try or Install Ubuntu.
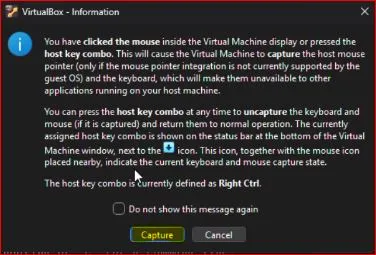
If a message pops up asking to capture the mouse, click Capture.
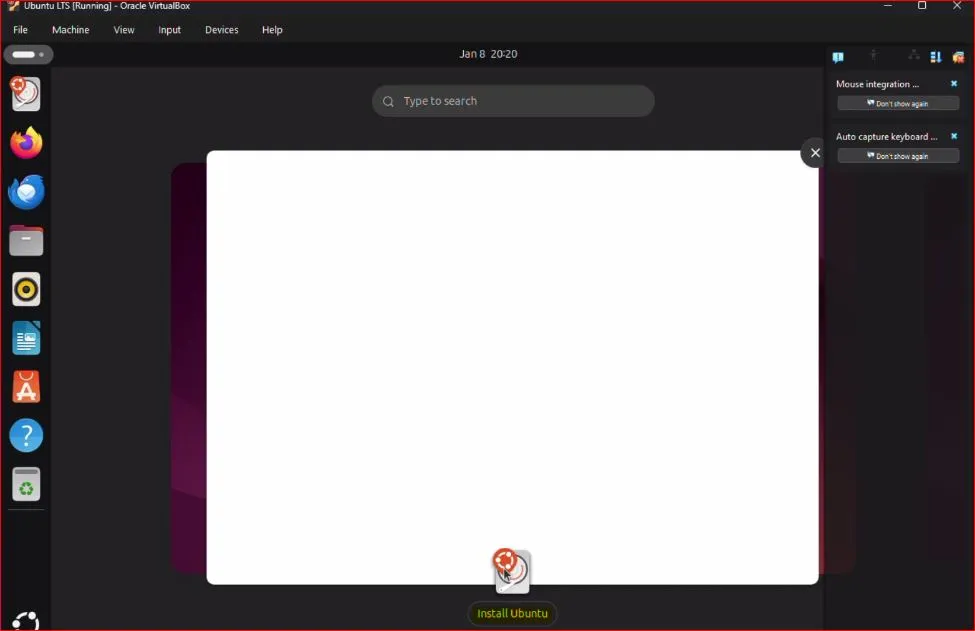
Step 6: Begin Ubuntu Installation
Click Install Ubuntu.
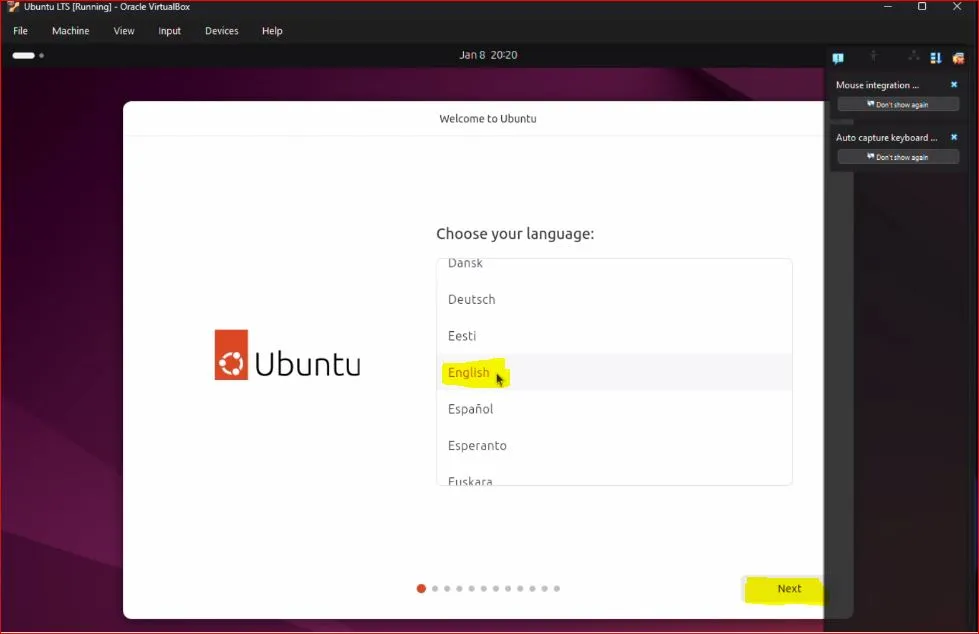
Language Selection
Choose your preferred language and click Next.
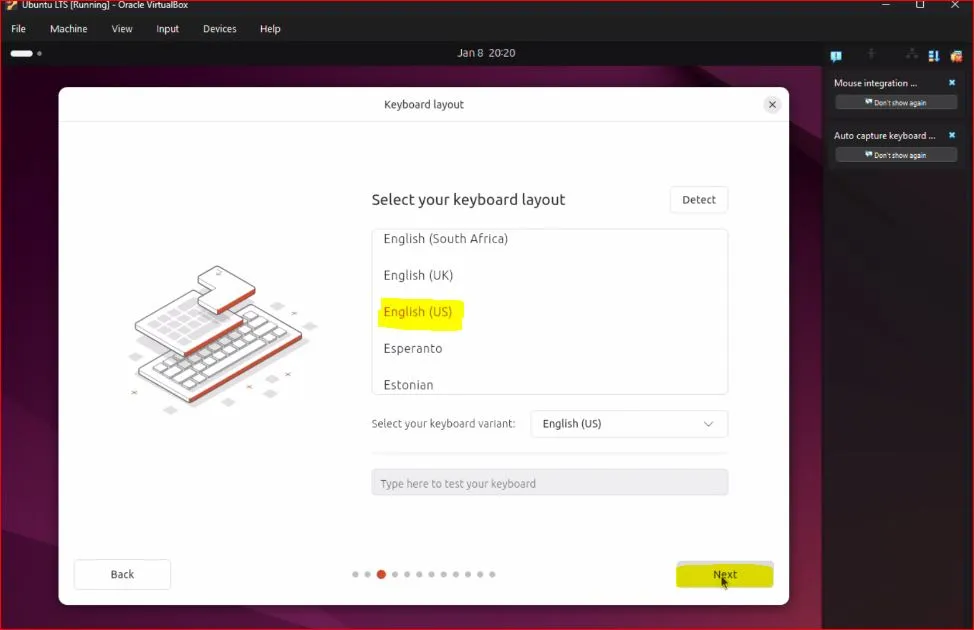
Keyboard Layout
Select English (US) and click Next.
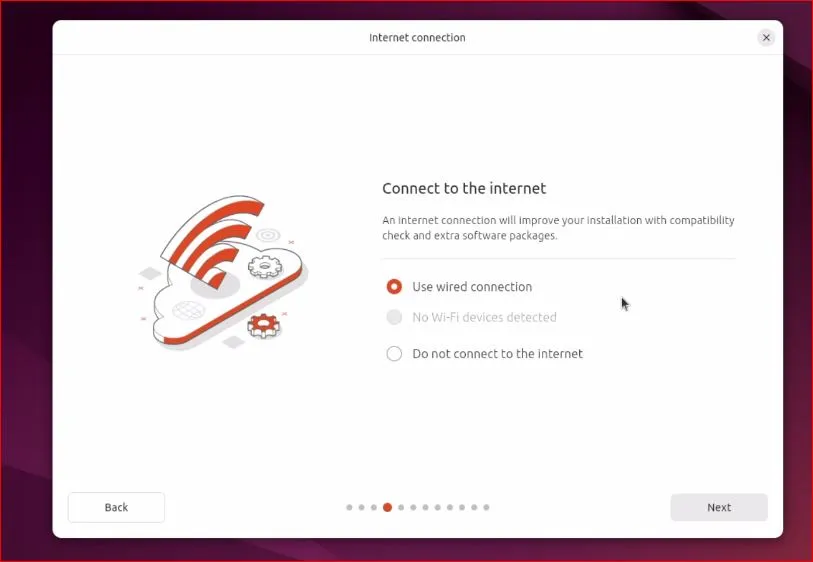
Internet Connection
Select Wired connection and click Next.
If an installer update appears, you can skip it or click Update Now. Once done, close the installer and start the installation again with the same steps.
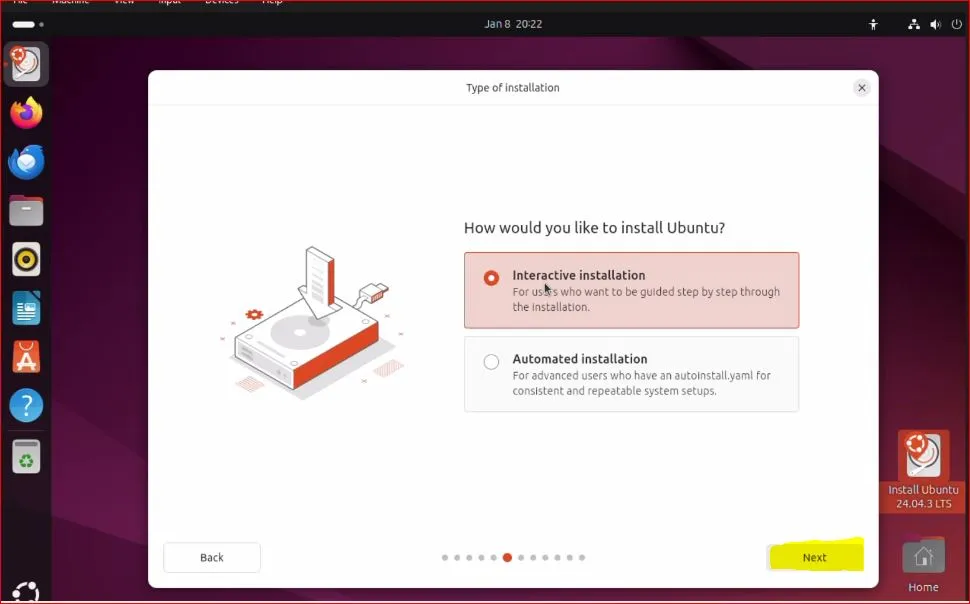
Step 7: Installation Type & Software Selection
Choose Interactive installation for a step-by-step setup.
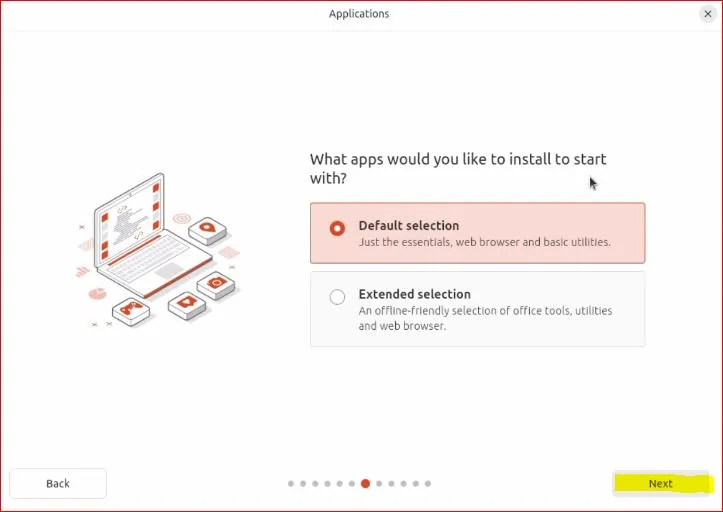
Software Selection
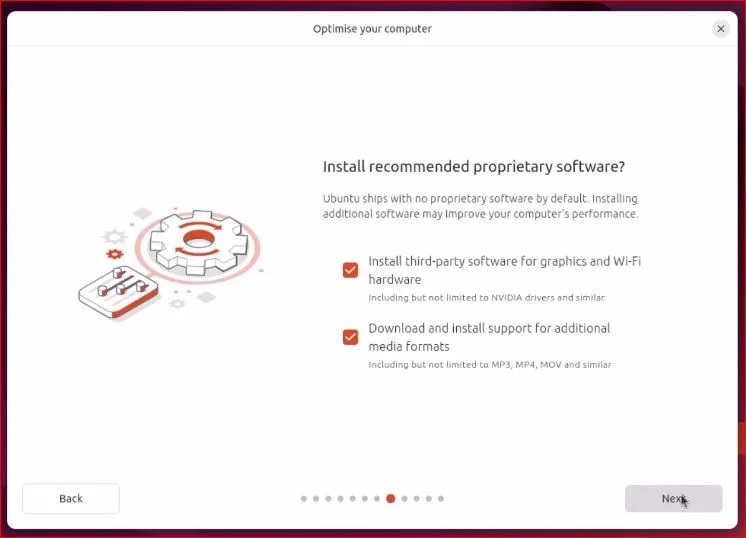
Keep Default selection. This installs essential applications and keeps the system clean.
Additional Options
Select both options:
- Install third-party software for graphics and Wi-Fi
- Download and install support for additional media formats
Click Next.
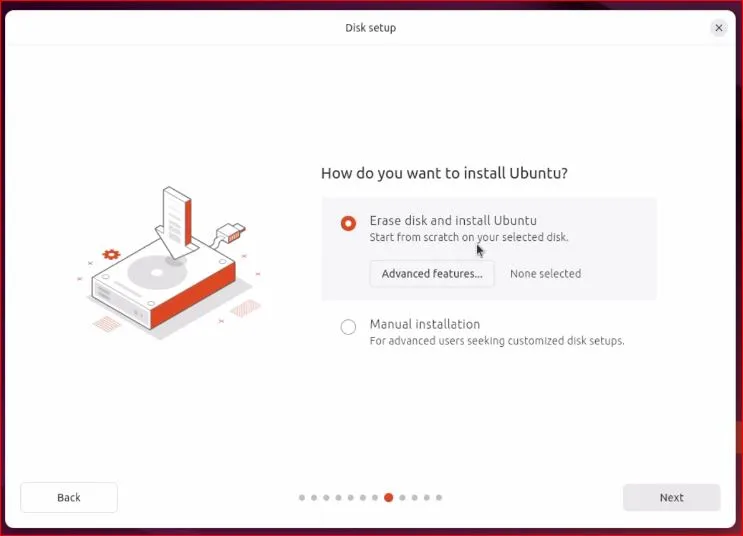
Step 8: Disk Setup (Important)
Select Erase disk and install Ubuntu.
This sounds scary, but don’t worry—only the virtual disk is affected, not your Windows system.
Click Next.
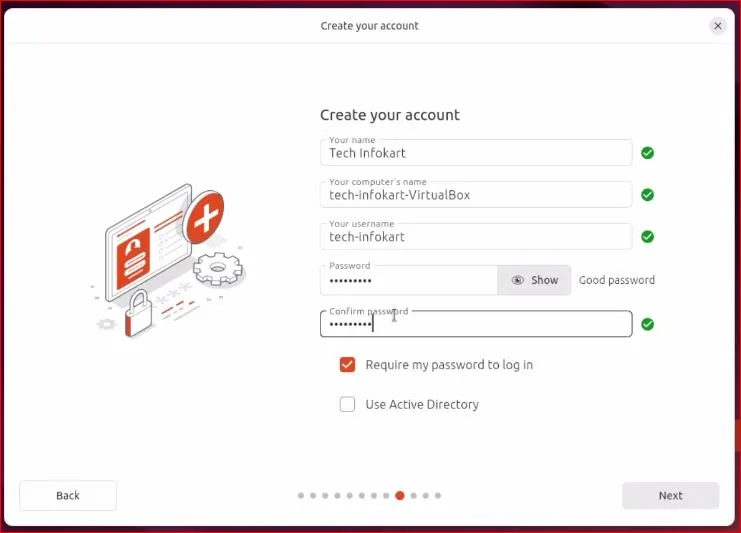
Step 9: Create Your Ubuntu User Account
Enter:
- Your name
- Computer name
- Username
- Password
Click Next.
Set your location and click Next.
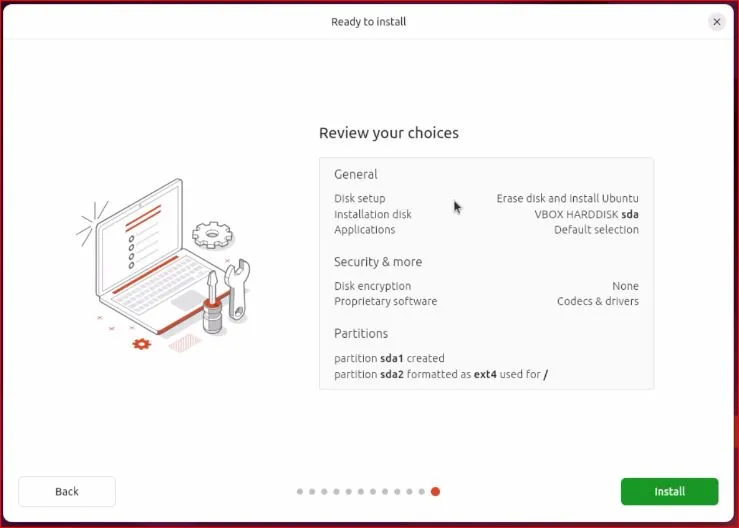
Review your settings and click Install.
Step 10: Wait for Installation to Complete
The installation may take 20–30 minutes, depending on your system speed.
Just wait patiently—no action is needed during this time.
Step 11: Restart and First Login
Once installation completes, click Restart Now.
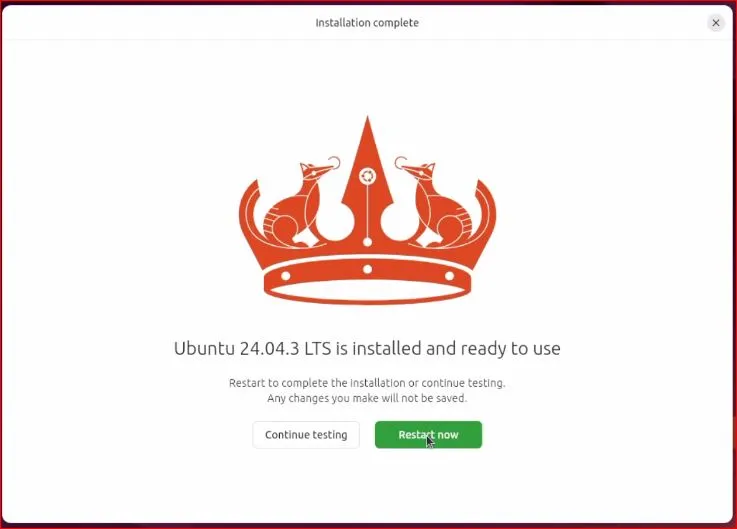
After reboot, log in using the password you created earlier.
You’ll see the Ubuntu desktop.
Follow the on-screen setup:
- Click Next for basic settings
- Skip Ubuntu Pro for now
- Choose Don’t share system data
- Click Finish
Final Result
That’s it you have finished installing Ubuntu on VirtualBox Windows 11. Now, Ubuntu 24.04 LTS should be working great inside VirtualBox, and your Windows system is untouched and safe.
Now you can explore the Ubuntu desktop, open settings, install apps, and start learning Linux without disturbing anything on your main computer.
Also Read: How to Install VirtualBox 7.2.4 on Windows 11
Frequently Asked Question (FAQ)
Is it safe to install Ubuntu on VirtualBox Windows 11?
Yes, it is completely safe. When you install Ubuntu on VirtualBox Windows 11, everything runs inside a virtual machine, so your Windows files, apps, and data remain untouched.
Do I need a powerful PC to install Ubuntu on VirtualBox Windows 11?
No. A basic system with at least 8 GB RAM can handle it well. For smoother performance when you install Ubuntu on VirtualBox Windows 11, 16 GB RAM and 2 CPU cores are recommended.
Will installing Ubuntu on VirtualBox affect my Windows 11 installation?
Not at all. When you install Ubuntu on VirtualBox Windows 11, Ubuntu runs separately inside VirtualBox and does not modify your actual Windows operating system.
How much disk space is required to install Ubuntu on VirtualBox Windows 11?
Ubuntu itself needs very little space. Allocating around 30–40 GB of virtual disk space is more than enough to install Ubuntu on VirtualBox Windows 11 comfortably.
Can I uninstall Ubuntu later if I don’t need it?
Yes. If you ever want to remove it, simply delete the virtual machine from VirtualBox. This instantly removes Ubuntu without affecting Windows 11.