
If you’ve installed Windows 11 on a second SSD or hard drive for testing, you may now see a boot menu every time your PC starts. Once you’re done with that second installation, the extra boot option just becomes annoying, and the old Windows installation continues to occupy valuable storage space.
I recently had the same situation on one of my PCs, and removing it turned out to be much easier than I expected. In this guide, I’ll show you exactly how to remove dual boot in Windows 11, safely delete the second Windows installation, and reuse that drive for storage without affecting your main Windows installation.
Before You Begin
Before we are doing any changes, we must first check a few things.
- You should definitely be logged into the Windows that you want to keep on your computer.
- If you have important files stored on the second Windows installation, back them up first.
- Read each step carefully before formatting any drive. Formatting the wrong drive will permanently erase your data.
Step 1: Check Which Windows Installation You’re Using
we need to first find out which Windows is running on the system.
- Press Windows + R on your keyboard.
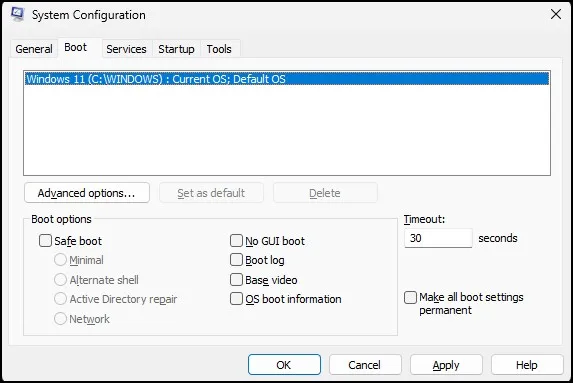
- Type msconfig and press Enter.
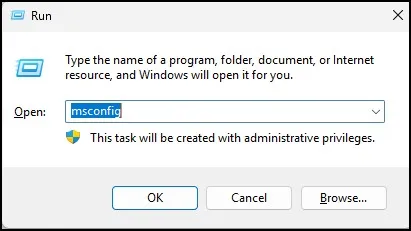
- Open the Boot tab.
You’ll now see one or more Windows entries.
The entry marked Current OS is the Windows installation you’re currently using. This is the one you should keep.
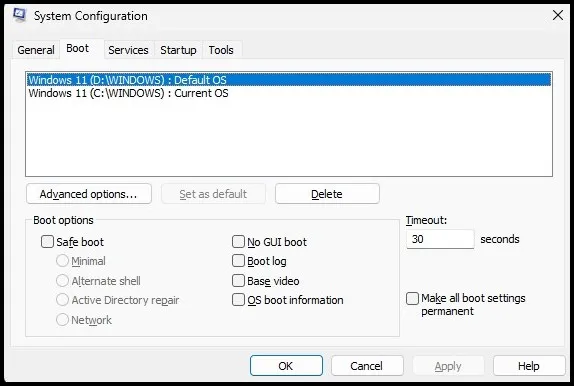
If you notice two Windows entries, don’t worry. Basically, Windows sometimes keeps the old boot entry even after the second installation is removed.
Step 2: Remove Dual Boot in Windows 11
Now it’s time to remove dual boot in Windows 11.
Inside the same Boot tab:
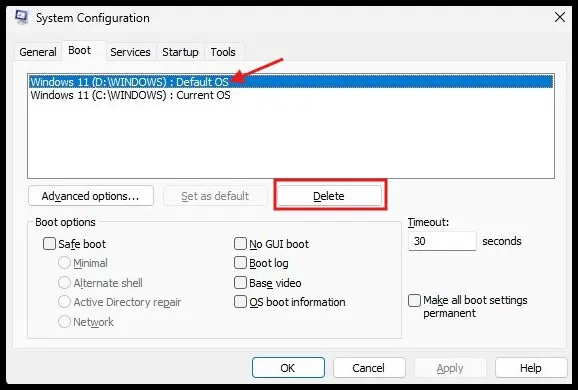
- Select the Windows entry you no longer need.
- Click Delete.
- Click Apply.
- Click OK.
- Restart your computer.
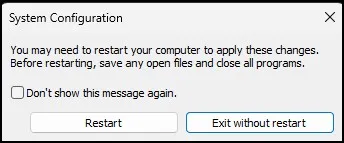
After restarting, the Windows Boot Manager screen should no longer appear.
That’s pretty much it for removing the extra boot menu.
Step 3: Verify Which Drive Contains Windows
The old Windows is still sitting on the second drive only, even though we are not seeing the boot menu anymore.
Before you delete the second Windows installation, it’s important to verify where your boot files are kept.
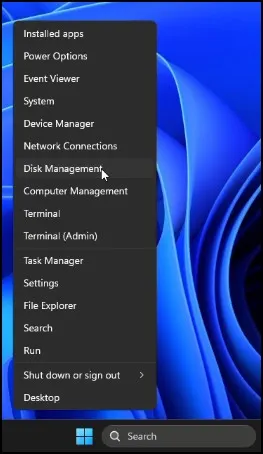
- Press Windows + X.
- Click Disk Management.
Look for your main Windows drive.
Normally you’ll see:
- EFI System Partition
- C: drive marked as Boot
- Recovery Partition
If these partitions are on your primary SSD, you’re good to continue.
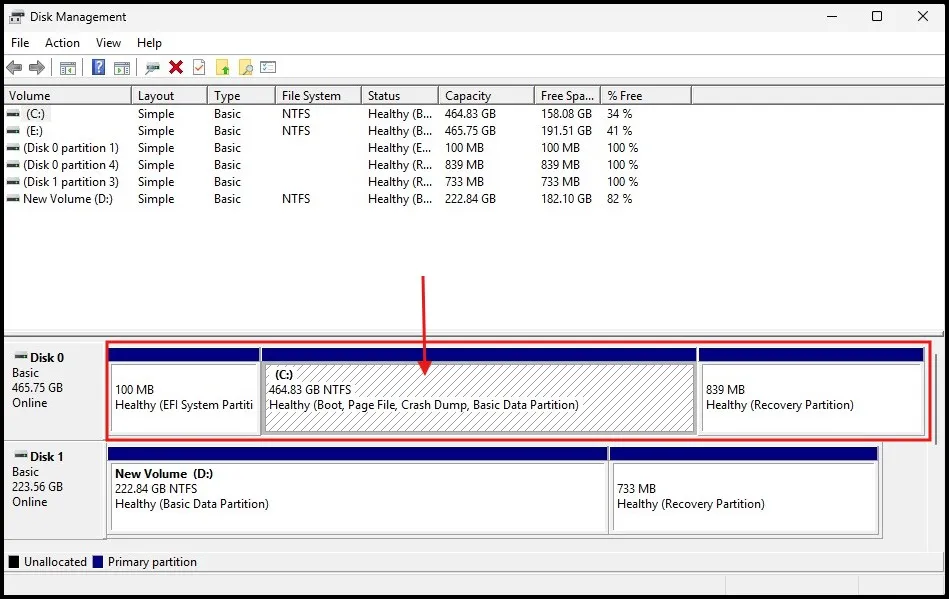
This step is kind of important because you don’t want to accidentally erase the drive Windows is actually booting from.
Step 4: Delete the Second Windows Installation
As per the confirmation that your main Windows installation is safe, you can delete the second Windows installation.
If the old Windows is sitting on a different SSD or hard drive:
- Open Disk Management.
- Right-click the partition containing the old Windows installation.
- Choose Format if you simply want to erase the files.
Or, if you want a completely clean drive:
- Right-click the partition.
- Select Delete Volume.
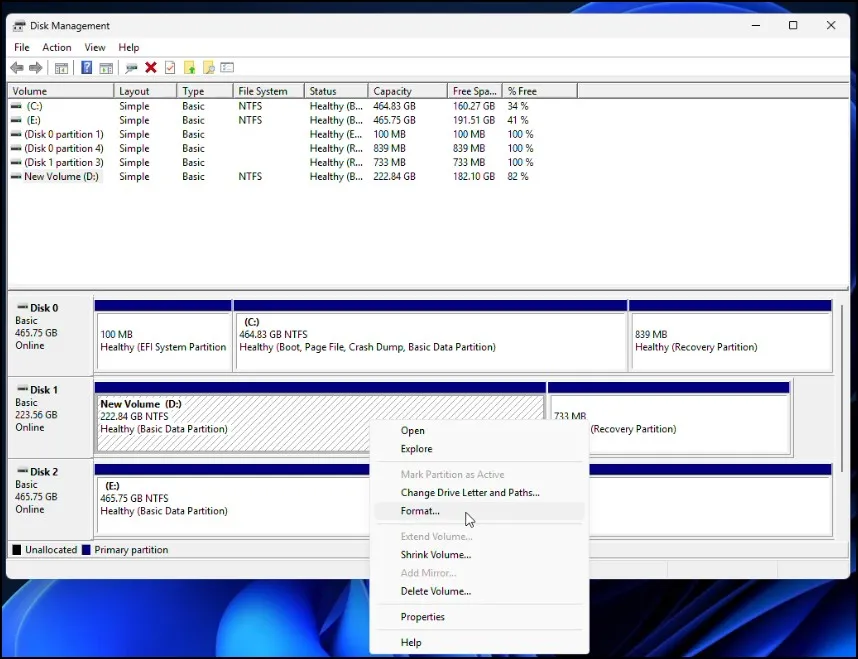
- Confirm the warning.
The partition will become Unallocated Space.
Step 5: Create a New Storage Partition
After deleting the old partition, you can use the drive regarding file storage
Here’s how:
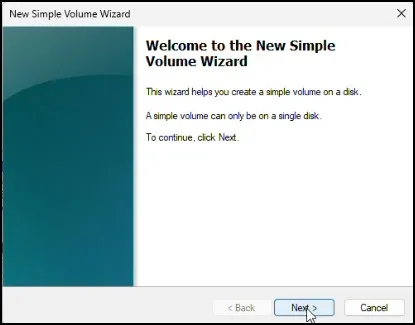
Right-click the Unallocated Space. Select New Simple Volume.
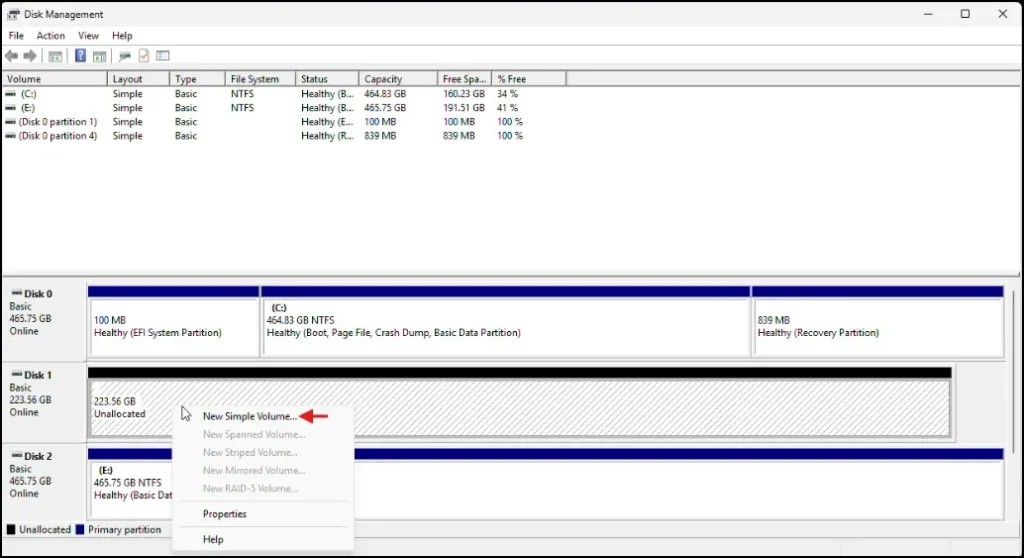
Click Next.
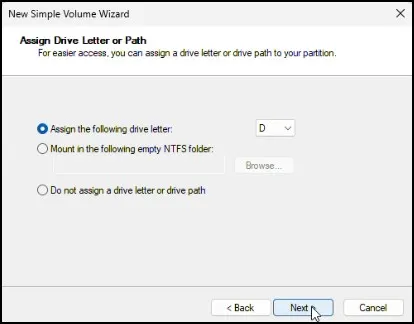
Assign a drive letter.
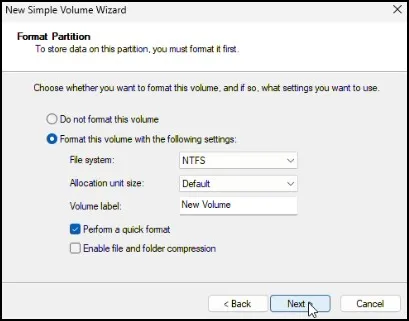
Choose NTFS as the file system.
Finish the wizard.
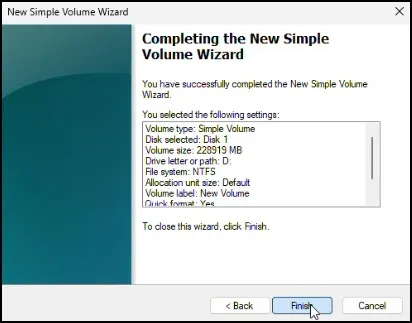
Your drive is now ready to use as normal storage.
Optional: Completely Wipe the Old Drive Using DiskPart
If you want to remove all partitions, including the recovery partition, Windows is having one built-in tool called DiskPart for doing this work.
First you need to open Command Prompt as an Administrator only, then run this following command one by one:
- Type diskpart and press Enter. It will open the DiskPart utility, which lets you manage disks and partitions using command-line commands.
- Type list disk and press Enter to see all the storage drives connected to your computer.
- Then, type select disk 1 (for my case) and press Enter to choose the desired drive. Make sure the disk number and the drive you want to erase are that same before you continue.
- Now type clean and press Enter. This command will fully delete all partitions and data from the selected drive only.
- Finally, type exit and press Enter to close DiskPart and return to the normal Command Prompt window.
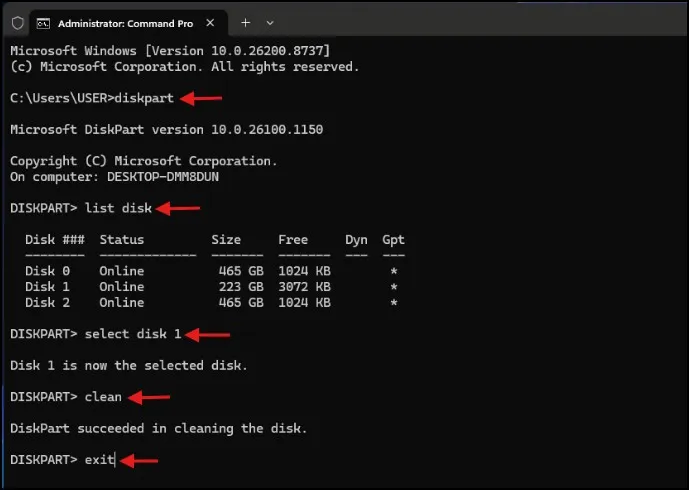
Important: replace Disk 1 with the correct disk number. Basically, verify everything before running the clean command because it will permanently delete all partitions on that drive.
After the process finishes:
- Open Disk Management.
- Create a New Simple Volume.
- Format it as NTFS.
You’ll now have the entire SSD available again.
How to Confirm Everything Worked
Restart your computer.
If everything went well:
- Windows starts directly without showing the boot menu.
- Only one Windows installation appears in MSConfig.
- The second SSD is available as a normal storage drive.
At this point, you’ve successfully remove dual boot in Windows 11 and delete the second Windows installation without affecting your primary Windows setup.
Conclusion
if you are not needing that second Windows anymore, you should definitely remove dual boot in Windows 11 so your PC will start faster and things will not get confusing. Once you actually confirm your main Windows is booting properly, you can definitely delete the second Windows installation and use the drive for storage only. If you follow each step carefully, it is definitely a simple process only, and after that your system will start Windows properly like it should.
Also Read: How to Create a Partition on Mac
Frequently Asked Questions
Is it safe to remove dual boot in Windows 11?
Yes. As long as you’re removing the old Windows entry and formatting the correct drive, your primary Windows installation will remain unaffected.
Will formatting the second drive delete my main Windows?
No, provided you select the correct disk. Always verify the drive size and partitions before formatting.
Can I remove dual boot without formatting the second drive?
Yes. Removing the boot entry only hides the boot menu. The old Windows files will still occupy space until you delete or format the drive.
Why do I still see two Windows options after deleting one?
A duplicate boot entry may still exist in the Boot Configuration Data (BCD). Open msconfig again and verify the remaining entries.
Can I use the second SSD again after deleting Windows?
Absolutely. Once you’ve deleted the second Windows installation and formatted the drive, you can use it as a normal storage drive.