
Have you ever lent your USB key to somebody and seen important files getting deleted or modified? Or say you need to have a copy of sensitive information on your pendrive and don’t want others to be able to inadvertently edit it. If yes, then making your USB drive write-protected is a very smart idea.
In this guide, I’ll show you how to make USB write protected Windows 11 using three simple and practical methods.
What Does Write Protected USB Mean?
When you write protect a USB drive, it becomes read-only.
This means:
- Files can be opened and copied from the USB
- Files cannot be deleted or modified
- No new files can be copied to the USB
In short, your data stays safe.
This feature is very useful in offices, schools, cyber cafés, and even for personal use.
Why Should You Make USB Write Protected in Windows 11?
Here are some common and real-life reasons:
- To prevent accidental deletion of important files
- To protect documents from being edited
- To avoid virus or malware infection
- To safely share USB drives with others
- To keep backup data untouched
If any of these sound useful to you, then follow the methods mentioned below.
Method 1: Make USB Write Protected Windows 11 Using Command Prompt (CMD)
This is one of the best and widely used methods.
Steps:
- First plug your USB drive to the computer
- Press Windows + S, type CMD
- Right-click on Command Prompt and choose Run as administrator
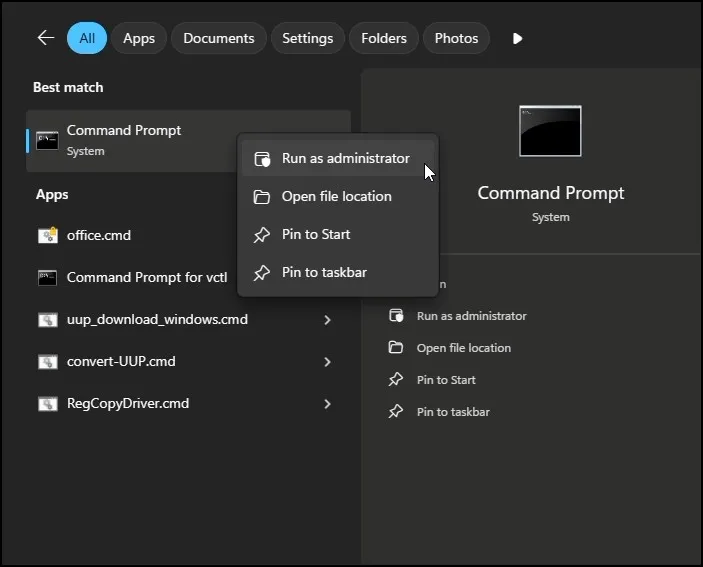
Now enter each of the following commands, pressing Enter after each:
diskpartlist diskYou will see a list of disks connected to your pc. Identify your USB drive by checking its size.
select disk X(Replace X with your USB disk number)
attributes disk set readonlyexit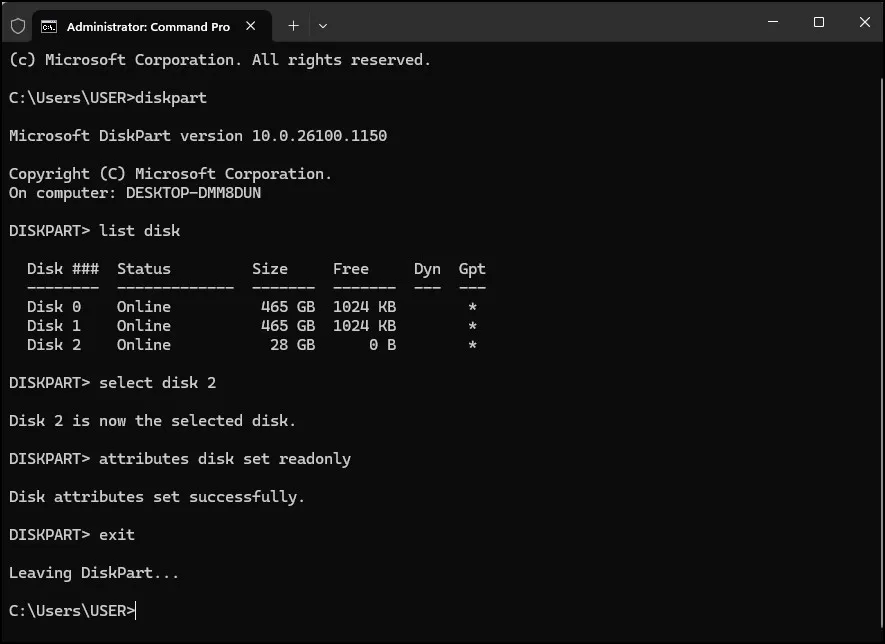
That’s it. You’ve now got your USB drive mode as read-only. If you attempt to copy or delete files, Windows will prevent those actions.
Microsoft also explains DiskPart commands and how read-only disk settings work in its official documentation.
Method 2: Make USB Drive Read Only Using Registry Editor
If you comfortable with system-level method, Registry Editor is a good option.
Step 1: Open Registry Editor
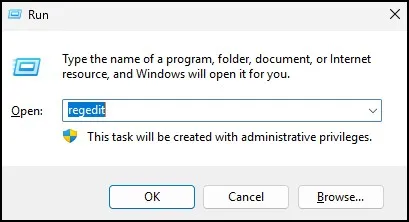
- Press Windows + R
- Type regedit and press Enter
Step 2: Navigate to the Path
HKEY_LOCAL_MACHINE\SYSTEM\CurrentControlSet\Control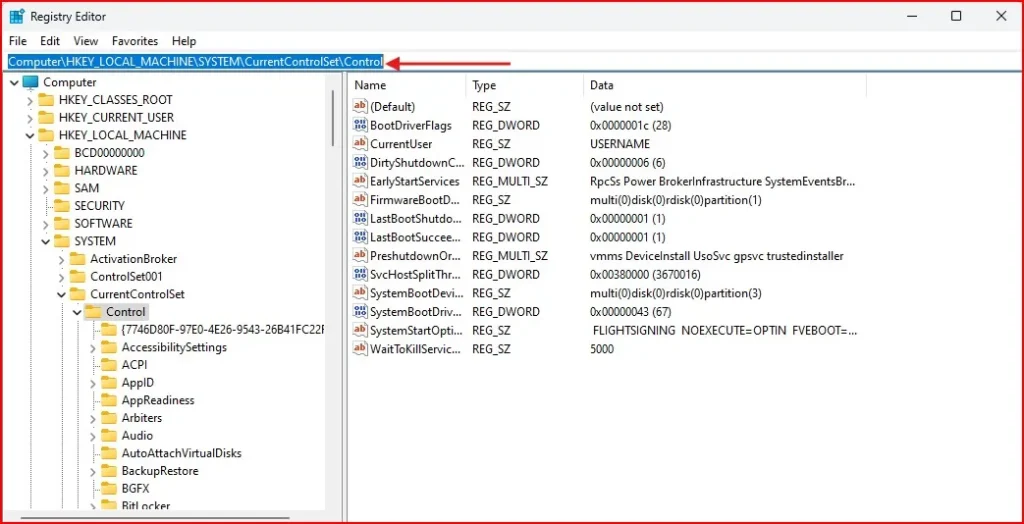
Step 3: Create StorageDevicePolicies (If Missing)
If StorageDevicePolicies is not present:
- Right-click on Control folder
- Click New → Key
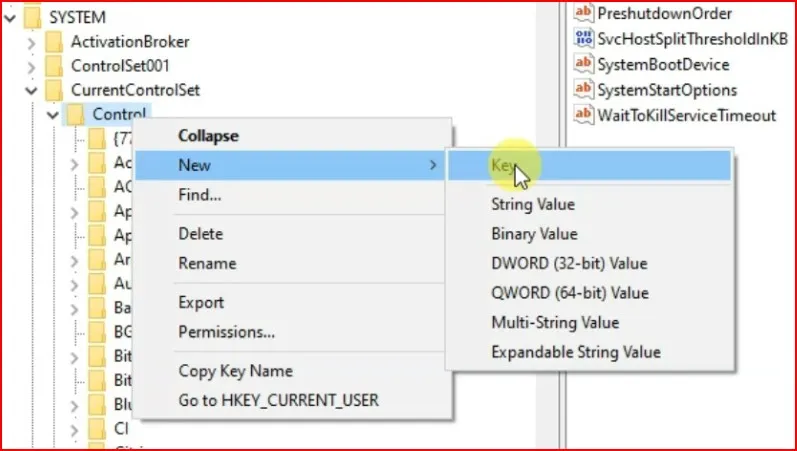
- Name it:
StorageDevicePolicies
Step 4: Create WriteProtect DWORD
- Click on StorageDevicePolicies
- Right-click on empty space on right side
- Select New – DWORD (32-bit) Value
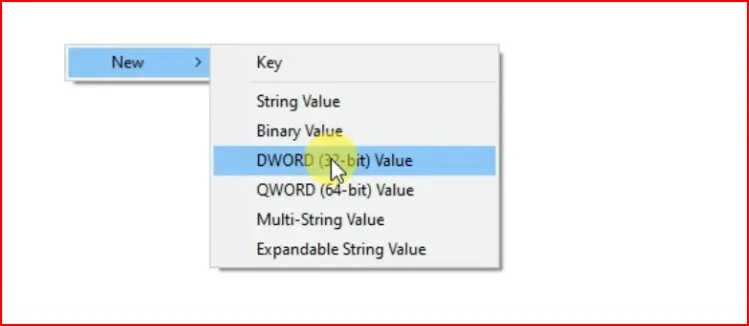
- Name it:
WriteProtect
- Double-click it and set Value data to 1
- Click OK
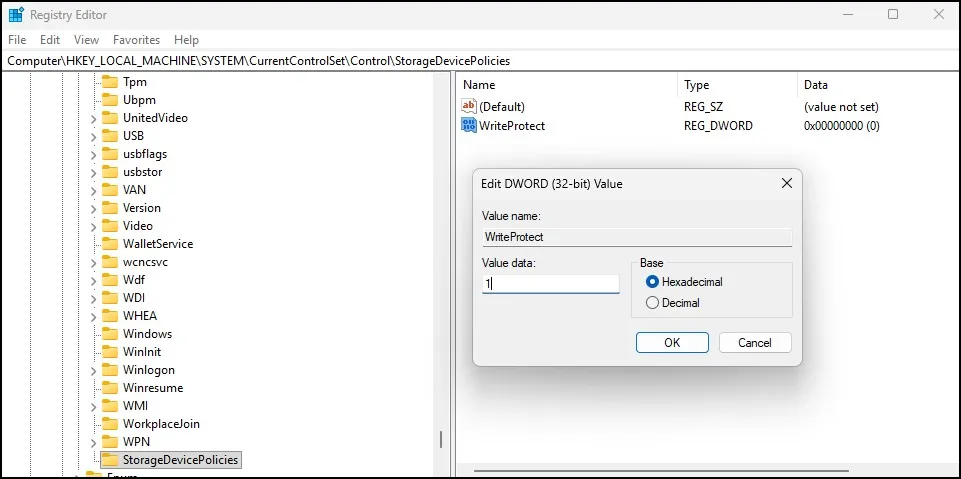
Value meaning:
- 1 = Enable write protection
- 0 = Disable write protection
After that you need to restart your PC and reconnect the USB drive.
Now your USB is write-protected.
Method 3: Use Group Policy Editor (Windows 11 Pro Only)
This method works only if you haveWindows 11 Pro and higher editions.
Steps:
- Press Windows + R
- Type gpedit.msc and press Enter
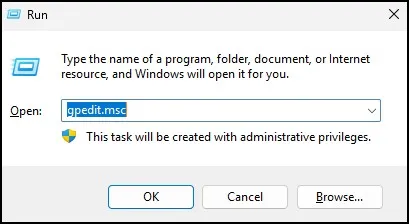
- Navigate to:
Computer Configuration - Administrative Templates - System - Removable Storage Access- Find Removable Disks: Deny write access
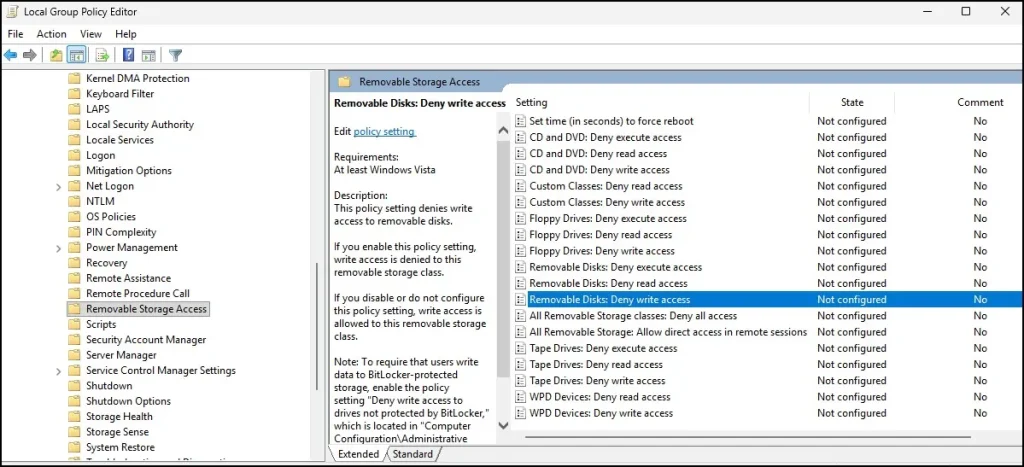
- Double-click it
- Select Enabled
- Click Apply → OK
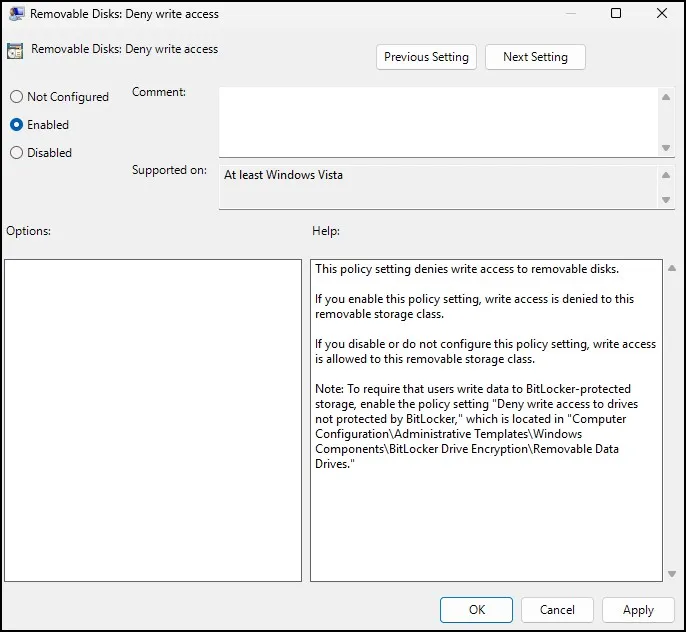
This will block writing to all removable USB drives.
If at any point you want to remove write protection from the USB drive again, it’s no problem. I have already written a guide on step by step how to fix the write protected USB error.
Final Thoughts
It’s one of the simplest ways to ensure your data is safe: Making a USB drive write protected. Whether you’re using CMD or Registry Editor or Group Policy, it’s very easy and works.
If you regularly exchange USB drives or store important files, knowing how to make USB write protected Windows 11 can pay off massively.
You can always remove the protection later. Try the method that works best for you and keep your data safe.
Frequently Asked Question (FAQ)
Can I copy files from a write protected USB?
Yes, you can read and copy files from it, but you cannot modify or delete them.
Is this method safe?
Yes, all methods are safe when done correctly.
Will write protection prevent viruses?
It helps reduce risk, but it is not a replacement for antivirus software.
Does write protection work on all USB drives?
Yes, most standard USB drives support this feature.