
1. Introduction to Virtualization and VirtualBox
1.1 What is Virtualization?
Virtualization is a technology that allows you to create virtual versions of physical computing resources, enabling a single physical machine to operate as multiple virtual machines (VMs). Each VM runs its own operating system and applications isolated from each other, yet sharing the underlying hardware resources.
Key benefits of using VMs include:
- Cost Efficiency: Virtual machines allow you to maximize resource utilization, reducing the need for additional hardware.
- Isolation: Different operating systems can run simultaneously without interfering with each other, which is excellent for testing software.
- Flexibility: You can easily create, delete, and configure VMs to suit your development or testing needs.
1.2 What is VirtualBox?
VirtualBox is a powerful open-source virtualization software developed by Oracle. It allows users to run multiple operating systems on a single physical machine. Compared to other virtualization platforms, such as VMware or Hyper-V, VirtualBox stands out for its user-friendly interface and cross-platform functionality.
Some notable features of VirtualBox include:
- Support for a wide range of guest operating systems (Windows, Linux, macOS, etc.).
- Snapshot functionality, enabling you to capture the state of a VM.
- Extensive configuration options for networking, storage, and resources.
1.3 Use Cases for Virtual Machines
Virtual machines serve various purposes, including:
- Running Multiple Operating Systems: Ideal for software testing or when you want to explore different environments without a dedicated machine.
- Testing Software in Isolated Environments: Developers can evaluate how applications work across different setups safely.
- Learning and Development Opportunities: Virtual machines are fantastic for experimenting with new OS features or learning new skills without affecting your main system.
2. Preparing Your System for VirtualBox
2.1 System Requirements
Before you install VirtualBox, it’s essential to ensure your system meets the requirements. Here are the minimum and recommended specifications:
- Minimum Requirements:
- 4 GB RAM
- 20 GB free disk space
- Compatible 64-bit processor
- Recommended Requirements:
- 8 GB RAM or more
- 50 GB free disk space
- Processor with Intel VT-x or AMD-V capabilities
Understanding processor virtualization support is critical, as these features allow the VM to run more efficiently.
2.2 Installing VirtualBox
To install VirtualBox, follow these simple steps:
Step1. Go to the VirtualBox Download Page.

Step2. Select the version compatible with Windows 11 and download it.

Step3. Open the downloaded file and The Setup Wizard will open. Just click Next to continue

Step4. On the next screen, you need to accept the terms in the license agreement, then click on Next.

Step5. By default, VirtualBox will install in the C: drive. You can change it if needed, but for most users, the default location is fine. Click Next again to continue.
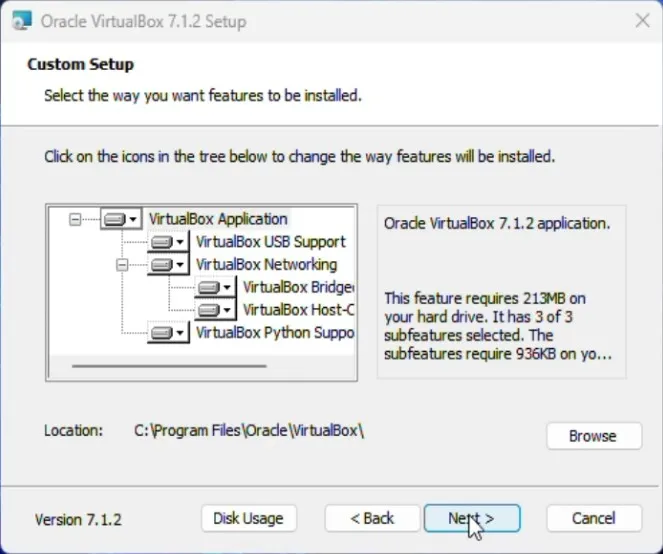
Step6. Here you may get a network warning saying that your network feature will be briefly interrupted. This is because VirtualBox installs virtual network adapters. Just click Yes to proceed

Step7. During installation, you might see a message like: Missing dependencies/Python Core/win32api. Proceed with installation now? Simply click Yes to continue with the installation.

Step8. On the next screen, you’ll see Custom Setup options where you can choose additional features like Create a Start Menu entry, Create a desktop shortcut, Create a shortcut for the Quick Launch etc. You can keep all these options checked to easily access VirtualBox from multiple places on your system. Then click on Next.
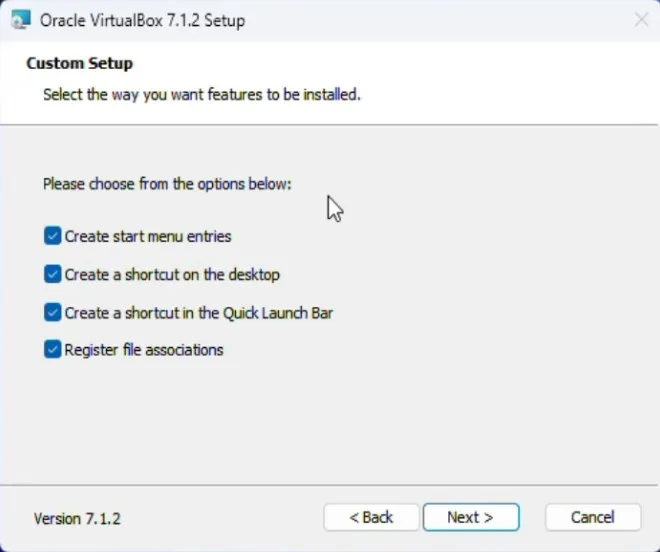
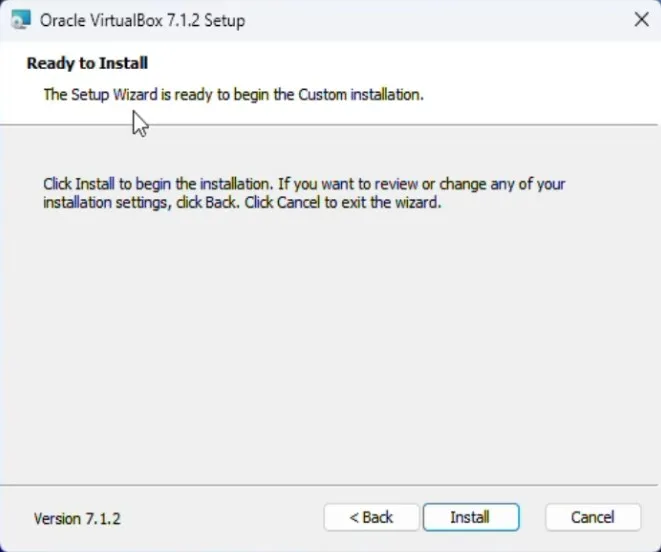
Step9. Finally Click Install to begin the installation process.
After installation, ensure VirtualBox runs correctly by launching it to see if it opens without errors.
2.3 Configuring Hardware Virtualization
To fully leverage VirtualBox, you’ll need to enable virtualization support in your computer’s BIOS/UEFI settings. Here’s how:
- Restart your computer and enter the BIOS/UEFI setup (commonly by pressing F2, F10, or Delete during boot).
- Look for options related to virtualization (Intel VT-x or AMD-V) and ensure they are enabled.
- Save and exit the BIOS settings, then restart your system.
After this, you can verify the functionality by opening VirtualBox and ensuring it recognizes the virtualization support.
To ensure virtualization is fully enabled on your Windows 11 PC, check out my previous guide: How to Enable Virtualization in Windows 11 PC: A Step-by-Step Guide 2024. This post covers the entire process in detail, so you’re all set for using VirtualBox effectively.
3. Creating Your First Virtual Machine
3.1 Launching VirtualBox
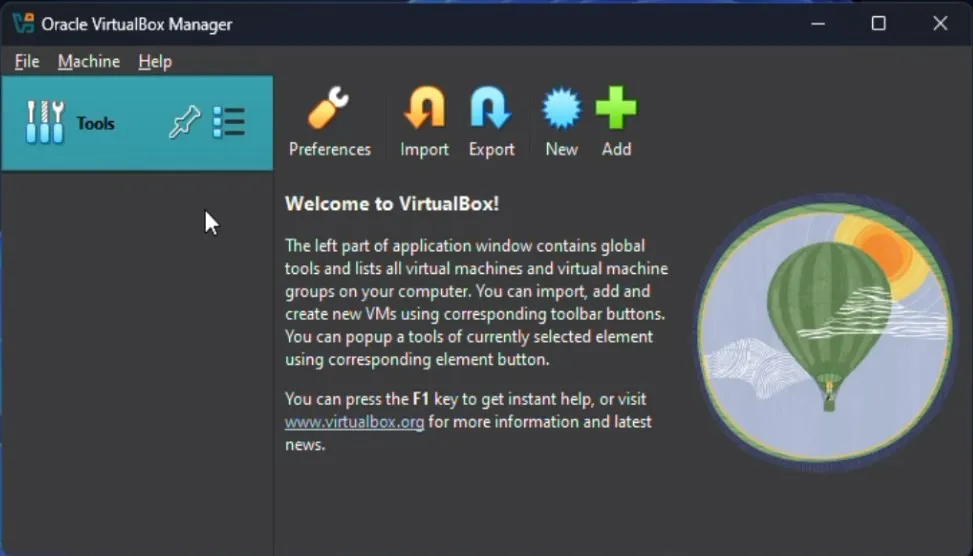
When you first launch VirtualBox, you’ll see a straightforward user interface that includes:
- Machine list: Displays all your virtual machines.
- Toolbar: Provides access to various functions such as creating a new VM or adjusting settings.
Take a moment to explore; it’s user-friendly, even for beginners.
3.2 Step-by-Step VM Creation
Creating your first virtual machine is straightforward:
- Click on the “New” button.
- Enter a name for your VM, and select the type and version of the OS you’re intending to install.
- Allocate memory (RAM) – consider at least 2 GB for basic operations.
- Set up a virtual hard disk. The default VDI format works well, allowing you to choose between dynamically allocated or fixed size.
- Select your installation media (an ISO image or physical DVD).
3.3 Configuration Adjustments and Settings
You can tweak your VM settings further:
- CPU Allocation: Go to System > Processor and adjust the number of cores allocated.
- Network Settings: Navigate to Network settings to choose between NAT (good for internet access) or bridged (for more direct network access).
- Display Options: Under Display, you can adjust the video memory and enable 3D acceleration.
Customizing these settings will help optimize your VM’s performance based on your specific needs.
4. Installing an Operating System on the Virtual Machine
4.1 Preparing Bootable Media
To install an operating system, you need to create bootable media:
- Download an OS installer, like a Linux distribution or Windows ISO.
- If using a USB drive, use tools like Rufus to make it bootable, or if using an ISO, ensure it’s correctly selected during VM setup.
Check compatibility with your chosen OS before proceeding.
4.2 Booting the Virtual Machine
- Select your VM in VirtualBox and click ‘Start.’
- You may enter BIOS settings (by pressing F12 or Esc) to select your boot device if it doesn’t automatically choose your installation media.
- Follow the prompts to troubleshoot any boot issues.
4.3 Completing the OS Installation
As you go through the installation prompts:
- Follow the on-screen instructions specific to your OS.
- Install any necessary drivers (VirtualBox may provide tools that simplify this).
- Once installed, configure your system preferences and updates.
This process mirrors setting up a physical computer, providing an intuitive experience.
If you prefer a video guide, watch the complete step-by-step tutorial here! This video will show you exactly how to install VirtualBox.
5. Managing and Optimizing Your Virtual Machine
5.1 Taking Snapshots and Cloning
Snapshots are a crucial feature for managing your VM:
- To take a snapshot, select your VM, then go to Machine > Take Snapshot. This action saves the current state of your VM, allowing you to revert back if needed.
- Cloning can help create a duplicate copy of your VM for testing or backup purposes in Machine > Clone.
5.2 Performance Optimization Tips
To keep your VM running smoothly:
- Ensure you allocate sufficient resources—consider increasing CPU and RAM limits based on your host capabilities.
- Adjust graphical settings for enhanced performance, especially if running graphic-intensive applications.
- Optimize network settings to ensure better connectivity and speed.
5.3 Troubleshooting Common Issues
Sometimes, you might encounter problems:
- Boot failures: Double-check boot order and media connection.
- Network issues: Ensure your network settings are configured correctly.
- Software compatibility: Look for VM additions or updates that might address compatibility challenges.
Resolving these issues often involves a bit of trial and error, so don’t hesitate to consult the VirtualBox community for support.
Conclusion
Setting up a virtual machine on Windows 11 using VirtualBox is a valuable skill that opens many doors to software testing, learning, and running different operating systems. With the steps outlined above, you’re well on your way to leveraging this powerful tool in your computing arsenal.
What is the difference between a virtual machine and a physical machine?
A virtual machine runs on a virtualized environment and shares resources with the host machine, while a physical machine operates independently with its own dedicated resources.
Can I run multiple virtual machines simultaneously on Windows 11?
Yes, Windows 11 can handle multiple virtual machines, but make sure your hardware can manage the load to avoid performance issues
Is there a free alternative to VirtualBox?
Yes, there are other free options like VMware Player and Hyper-V, but they may have different features and limitations.
How do I remove a virtual machine safely?
Select your VM in VirtualBox, click on Machine > Remove, and choose “Also delete all files.” This will ensure that the VM and its associated files are completely removed.
What should I do if my VM is running slowly?
Check your resource allocations (CPU and RAM) and ensure proper virtualization settings are enabled. Additionally, you might try optimizing your guest OS for better performance.