
If your older PC doesn’t meet by Windows 11’s strict hardware standards, but you’re not ready to purchase new equipment yet. The good news? You can skip Windows 11 TPM requirement and install/upgrade to Windows 11 on unsupported PC without losing files or programs.
This guide is ideal for tech savvy users looking to install or upgrade Windows 11 without TPM on a PC not meeting the official system requirements. You’ll learn practical workarounds that let you skip Windows 11 hardware check and get the latest operating system running on your current machine.
Why Your PC Shows “This PC Can’t Run Windows 11”
Your PC requires a Trusted Platform Module (TPM) 2.0 chip to formally upgrade to Windows 11 without running into TPM issues, but Microsoft’s installer vigorously checks for this security hardware as part of its inspection process. When you try a normal install on an incompatible PC, Windows 11’s compatibility checker quickly sees the absent TPM and halts your progress.
There are stringent system requirements for Windows 11 from Microsoft. The system will prevent the upgrade if your computer lacks TPM 2.0, Secure Boot or a supported processor.
You can easily verify this by downloading the PC Health Check application from official Microsoft website. If it says your processor isn’t supported or Secure Boot is absent, then your PC is considered “unsupported.” But that doesn’t necessarily mean you’re stuck with Windows 10 forever.
Step-by-Step: Upgrade to Windows 11 on Unsupported PC (No Data Loss)
Step 1: Download Windows 11 ISO File
- Open your browser.
- Search for Windows 11 download.
- Open the official Microsoft website.
- Scroll to Download Windows 11 Disk Image (ISO).
- Select Windows 11 Multi-Edition ISO.
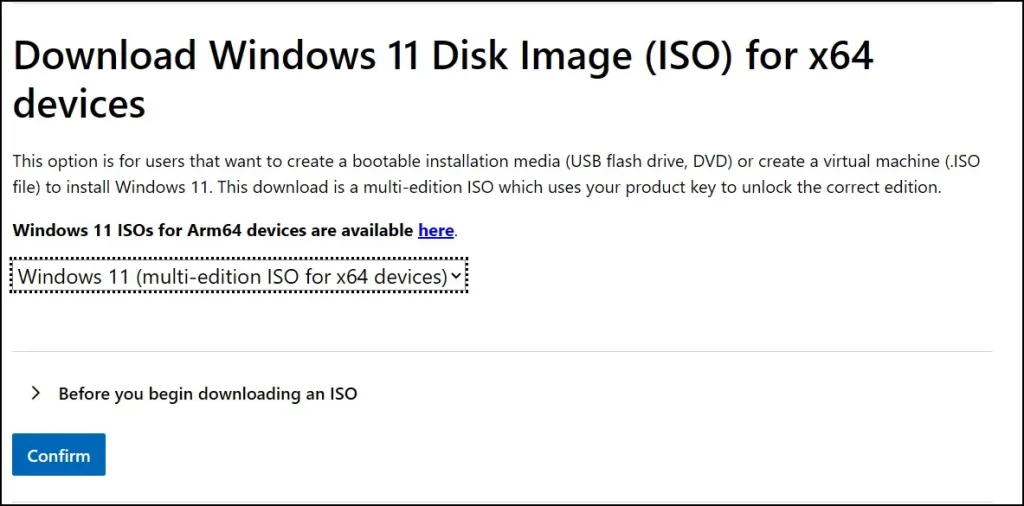
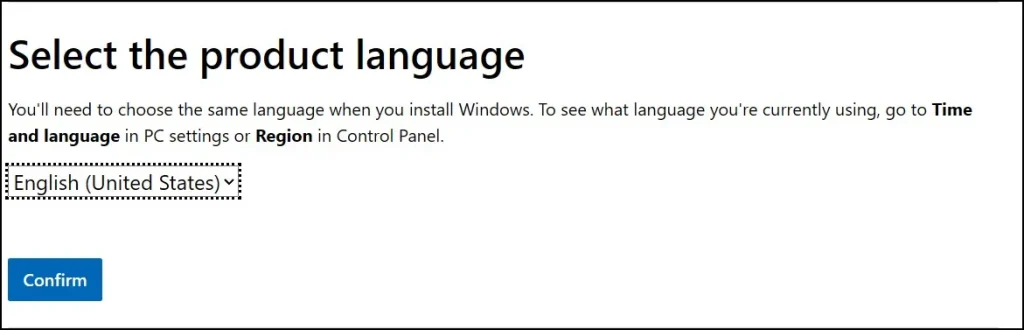
- Choose your language.
- Click 64-bit Download.
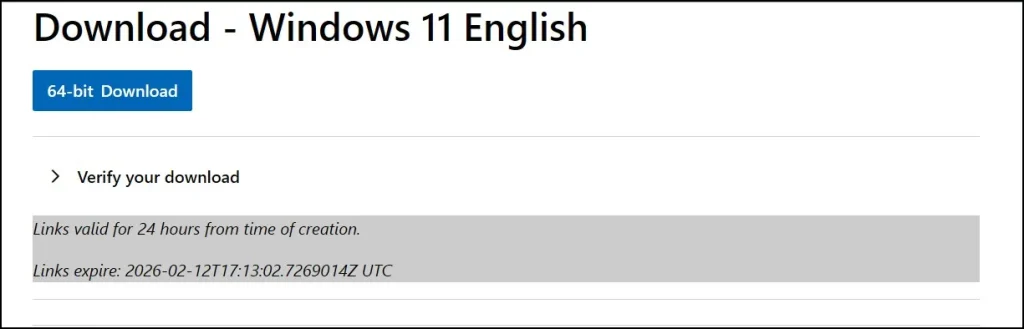
The file size is around 7GB, so it may take some time.
Step 2: Mount the ISO File
Once downloaded:
- Go to your Downloads folder.
- Right-click the ISO file.
- Click Mount.
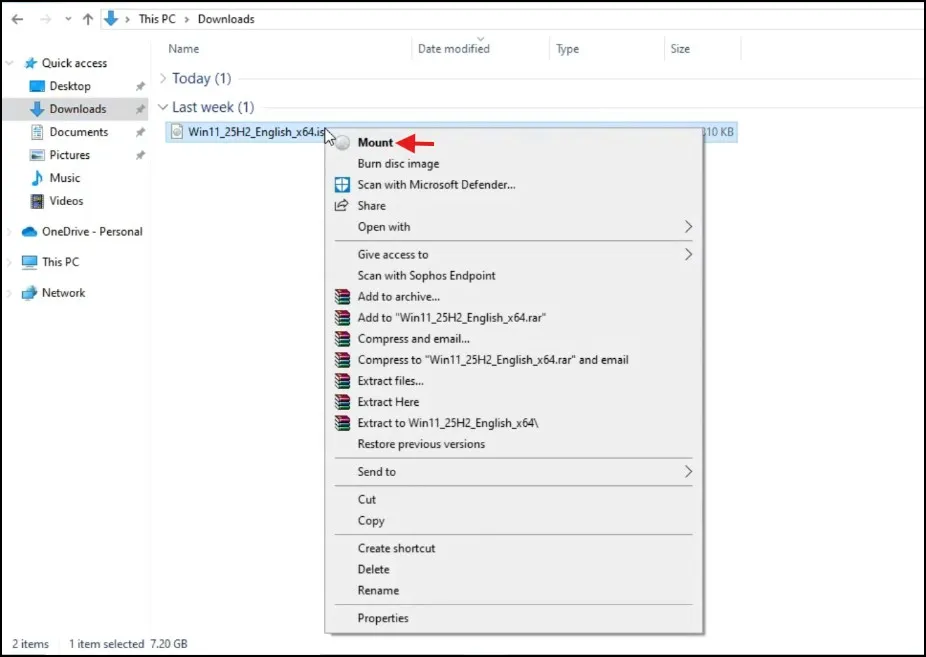
This creates a virtual DVD drive on your PC.
Open This PC and note the drive letter (like D:, E:, or F:). You’ll need it in the next step.

Step 3: Use Command Prompt to Bypass TPM & Secure Boot Check
Now comes the important trick.
- Click Start.
- Type Command Prompt.
- Right-click and choose Run as administrator.
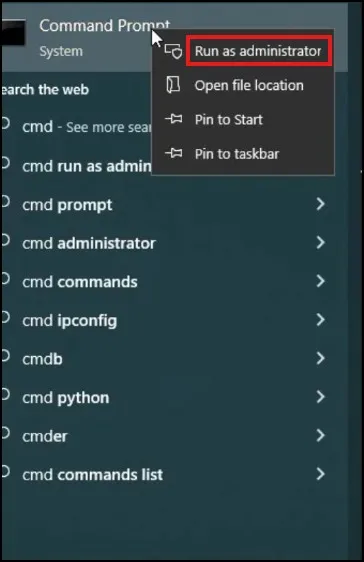
In the black window:
Type your drive letter followed by a colon
Example: E: and press Enter
Then type this command: setup.exe /product server
Press Enter.
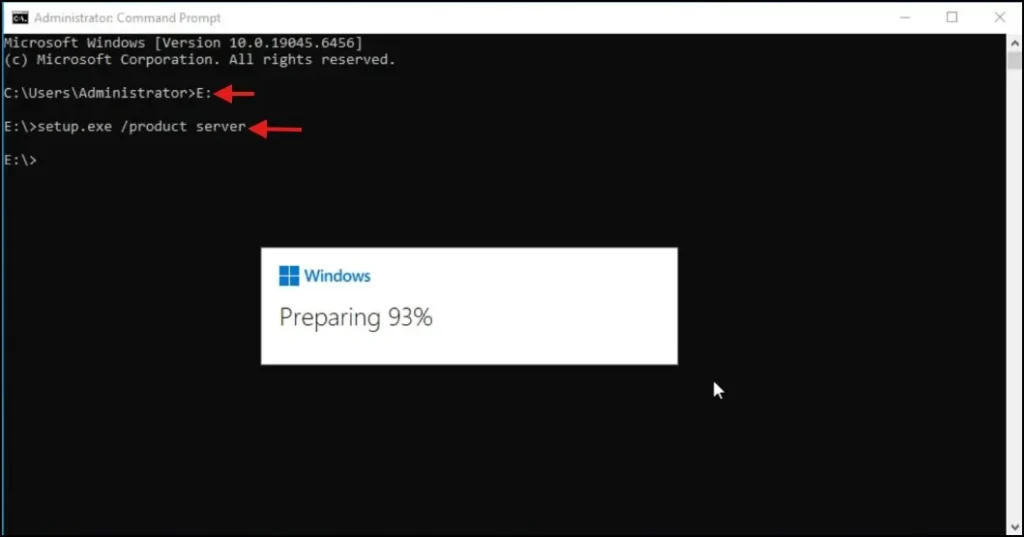
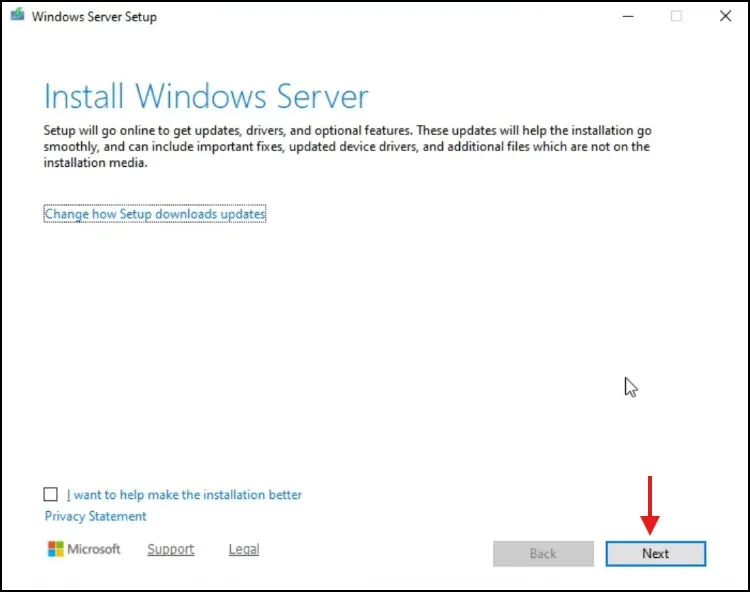
You may see “Install Windows Server” — don’t panic.You’re still installing Windows 11. This method simply bypasses TPM 2.0 and Secure Boot checks.
Step 4: Continue the Installation
Now follow the setup process:
- Click Nexton Install Windows server
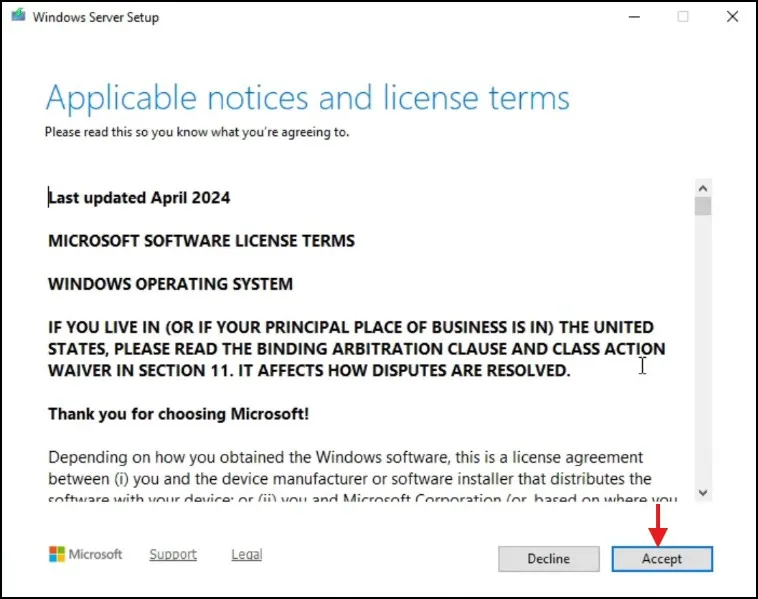
- Accept the license terms
- Make sure Keep files, settings and apps is selected (very important!)
If this option is selected, your data will remain safe.
Click Install.
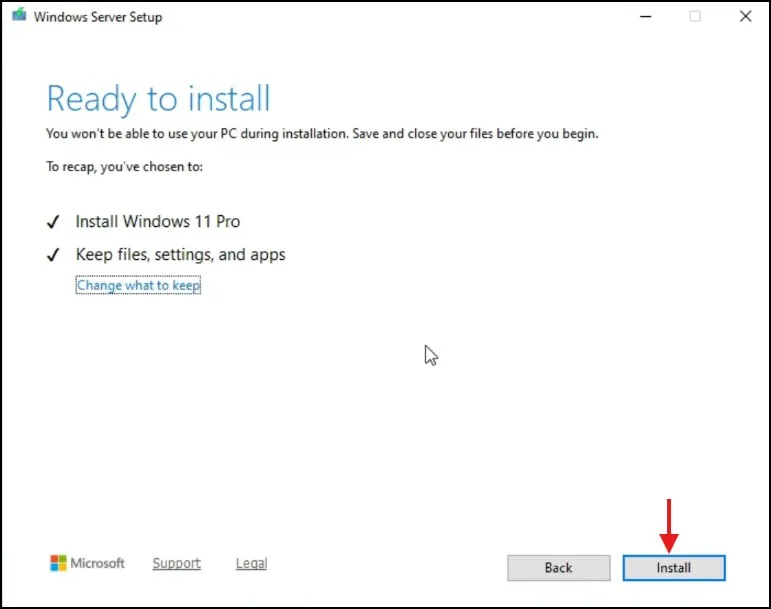
Your PC will restart multiple times. This is completely normal.Do not turn off your system.
Step 5: Confirm Windows 11 Installation
Once installation completes:
- Press Windows + R
- Type:winver
- Press Enter.
You should now be able to see Windows 11 with the latest version number.
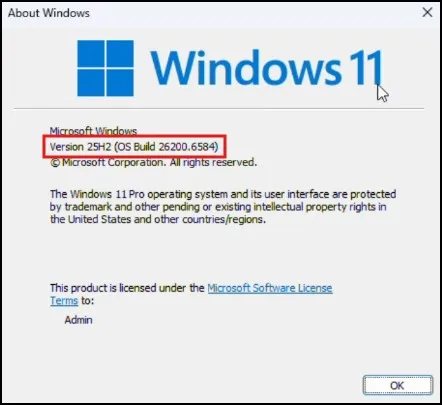
You can also see if it’s activated in Settings. In most cases it will remain activated with a digital license.
Congratulations! You’ve done it, you installed Windows 11 on unsupported hardware
Using Rufus to Bypass TPM and Secure Boot Checks
Another straightforward way to download Windows 11 on unsupported PC is by using Rufus. Rufus is a free utility that allows you to make a bootable USB drive from the Windows 11 ISO file.
Once you download and launch Rufus, choose your Windows 11 ISO file and you’ll then find an option to bypass the TPM 2.0, Secure Boot, and RAM requirements. Check those options and then create the USB drive.
When the bootable USB is created, reboot your computer, boot from USB and start installing. This is particularly helpful if you’d rather use a clean install than an in-place upgrade.
Final Thoughts
If your system shows that it doesn’t meet the official requirements, don’t panic. You don’t have to rush out and buy a new computer every time TPM 2.0 or Secure Boot is missing. Using the right method, you can upgrade to Windows 11 on unsupported PC without losing your files, apps and settings. Just be sure to follow each step precisely and take back up before you begin. Doing it this way not only makes your older PC look and feel new, but it provides access to new features while letting you continue using everything just how you had left it.
Frequently Asked Questions (FAQs)
Will I lose my files if I upgrade this way?
No, if you select Keep files, settings and apps, your data stays safe.
Is TPM required for this method?
No. This method bypasses the TPM 2.0 requirement.
Will Windows 11 updates work on unsupported PCs?
Yes, most updates work normally. However, Microsoft doesn’t officially guarantee support.
Is this a clean install?
No. This is an in-place upgrade, so everything remains as it was.
Can I go back to Windows 10?
Yes, within 10 days of upgrading, you can roll back from Settings.