
The clock is ticking for Windows 10 users. Microsoft has officially announced that Windows 10 will reach its end of life on October 14, 2025. Moreover, after this date, we are seeing that Windows 10 will only stop getting security updates, bug fixes, and technical support.
What this means is that continuing to use Windows 10 will actually jeopardize your computer and personal data. The most secure and intelligent course of action is to upgrade to Windows 11 25H2, ensuring you are not only protected with the latest updates but also equipped with modern security capabilities. That’s why I’m writing this guide, which will help you do it safely and without losing your files or installed programs.
Essential Pre-Upgrade Checks
Before you actually start upgrading, you definitely need to make sure your system is properly prepared:
- You should actually update your Windows 10 to version 22H2 and definitely install all the new patches too. This actually gives the most steady base for making upgrades. It definitely works best for building improvements.
- You should surely verify that your Windows 10 license is correctly activated. Moreover, proper activation ensures your system functions without any restrictions. You can only check this by going to Settings > Update & Security > Activation.
- Microsoft surely provides free upgrades to Windows 11 for compatible systems through in-place installation. Moreover, this process keeps all user files and most system settings unchanged.
Verifying System Compatibility
Windows 11 cannot run on all computers itself. Further, many older systems lack the required specifications. Your PC must meet these minimum requirements itself for further functioning:
- Basically you need a 64-bit processor that runs at 1GHz or faster with 2 cores, the same as most modern computers
- you need 4GB RAM or more
- you need 64GB storage or more
- You need UEFI firmware that has the same Secure Boot feature to protect your system.
- Trusted Platform Module (TPM) version 2.0 for further security operations.
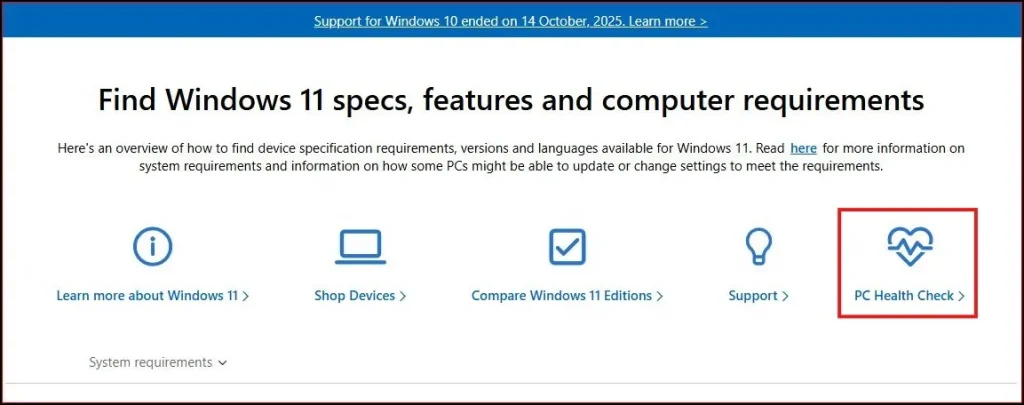
Microsoft actually provides a simple way to check this.
- Open your browser and search for Windows 11 system requirements
- Download the PC Health Check app from Microsoft
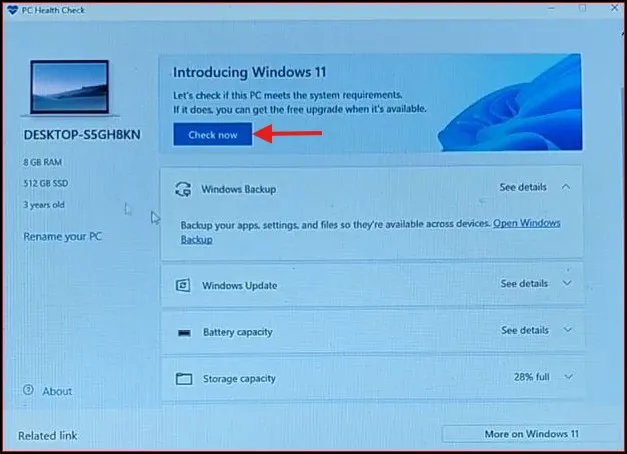
- Install and open the app
- Click Check now
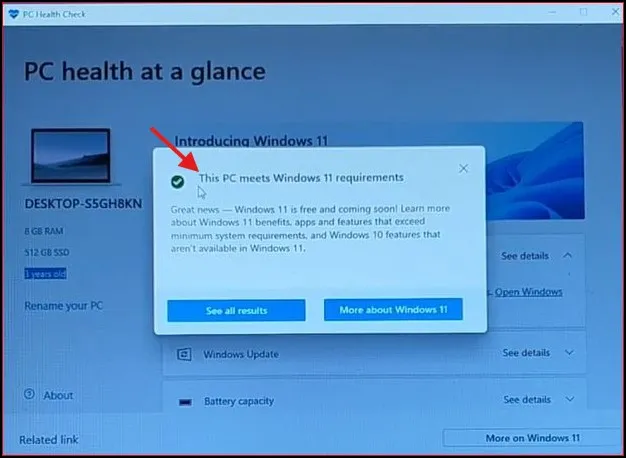
When you see a green confirmation message, your PC is surely ready for use.
If your computer doesn’t meet these requirements, no need to worry. You can only use Windows 10 till its end date and then you should think about enrolling in Microsoft’s Extended Security Updates program for continued protection.
How to Upgrade to Windows 11 25H2 (Without Data Loss)
Method 1: Upgrading via Windows Update
You can actually upgrade your Windows 10 PC to Windows 11 25H2 using the Windows Update tool that is already on your computer. This is definitely the easiest way to do it.
As per this method, you need very little technical knowledge and most work happens automatically. Regarding the process, the system handles everything by itself.
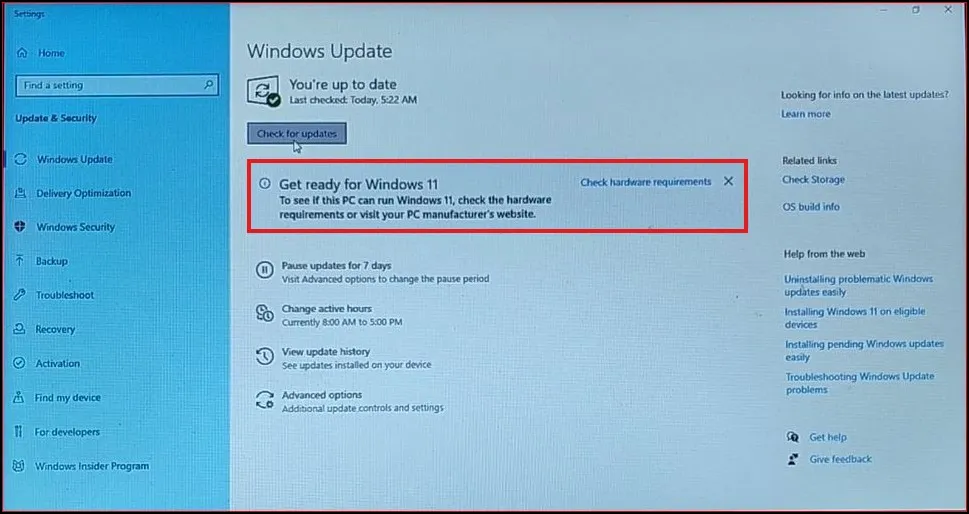
- Click the Start menu and further select the gear icon to open Settings itself.
- You need to go to Update & Security option from the Settings menu only.
- Select Windows Update from the left sidebar.
- Click the Check for updates button and wait while the system searches for available updates. Moreover, this process will automatically find any new updates that are ready for installation.
- If your system is eligible, you will definitely see a message saying it is available. Look for the Download and install option below the Windows 11 update notification.
- Click this button to further download the installation files itself. This process will actually take 30 minutes to several hours, depending on your internet speed. It will definitely vary based on how fast your connection is.
- Once the download completes, you will get a prompt to restart your computer. Save any open work first and click Restart now.
Your computer will further upgrade to Windows 11 version 24H2 itself automatically first. As per this installation completion, the system will install one enablement package regarding switching your system to version 25H2.
Method 2: Using the Windows 11 Installation Assistant
If Windows Update doesn’t show the upgrade option, you can use Windows 11 Installation Assistant regarding direct installation method:
- Open your web browser and go to the official Microsoft Windows 11 download page.
- You need to scroll down and find the “Windows 11 Installation Assistant” section.
- You need to click the Download Now button to download the
Windows11InstallationAssistant.exefile.
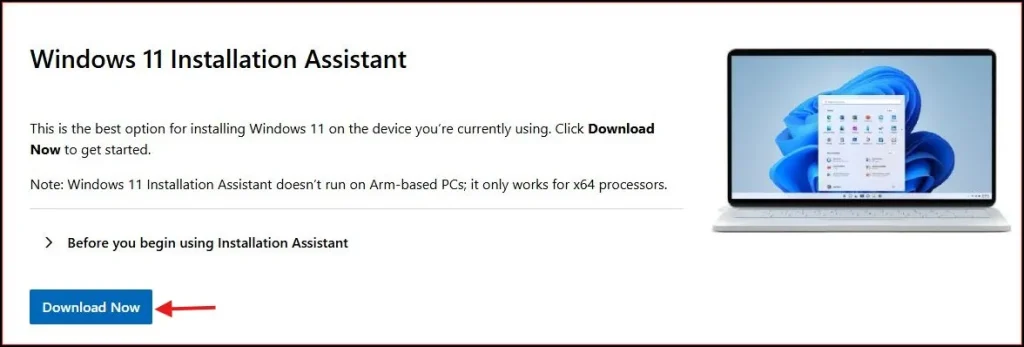
- After downloading, find the file in Downloads folder and double-click on it to open further, which will start the installation process itself.
- The Installation Assistant will first check only if your PC meets the requirements for Windows 11.
- If your system qualifies further, click the Accept and install button to start the upgrade process itself.
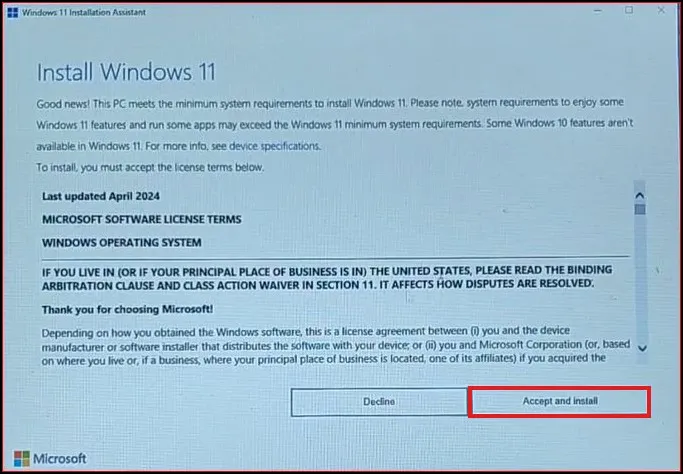
- The tool will download required files of about 4GB and prepare your system.
- Your computer will restart multiple times during Windows 11 installation and further configure the system itself. This process actually takes 30-90 minutes and definitely depends on your hardware.
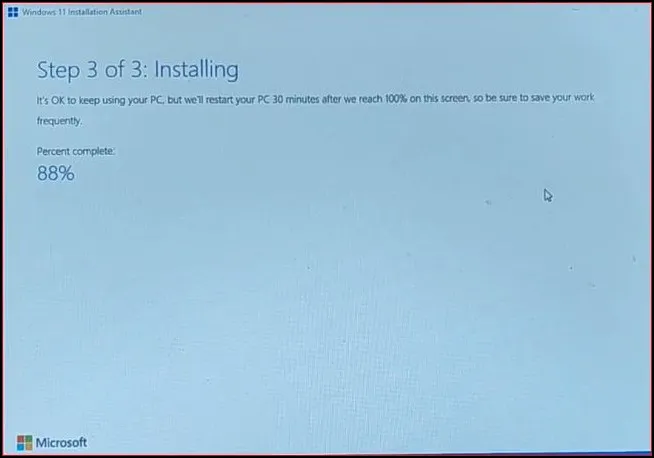
- After the installation process finishes, the Windows 11 setup screen will surely appear. Moreover, this indicates that the system is ready for initial configuration. As per the screen instructions, complete the initial setup. Follow the steps regarding configuration as shown on display.
- After completing the setup, you should open the Settings app and navigate to Windows Update section. This will help you check for any additional updates that might be available on your system.
This method actually upgrades your computer straight to Windows 11 version 25H2, definitely skipping the middle step of version 24H2.
Confirm Windows 11 25H2 after Installation
Once your PC boots into Windows 11:
- Press Windows + R
- Type winver
- Press Enter
A popup containing Windows 11 Version 25H2 will appear indicating the upgrade.
If you meet the requirements (and hopefully you do), an upgrade is absolutely worthwhile. And it will improve your system performance considerably as well. When you finally do so properly, you’ll be able to upgrade to Windows 11 25H2 without losing your files or apps and receive the fast new Windows.
Frequently Asked Questions (FAQs)
Will I lose my files if I upgrade to Windows 11 25H2?
No. When you upgrade to Windows 11 25H2 using the official Microsoft method, your personal files, installed apps, and settings remain safe.
How long does it take to upgrade to Windows 11 25H2?
In most cases, the upgrade to Windows 11 25H2 takes between 1 to 2 hours. The exact time depends on your internet speed and system performance.
Is Windows 11 25H2 a free upgrade?
Yes. If your Windows 10 is genuine and your PC meets the requirements, you can upgrade to Windows 11 25H2 at no extra cost.
Can I go back to Windows 10 after upgrading?
Yes. Microsoft allows you to roll back to Windows 10 within 10 days after upgrading, as long as you don’t delete system files.
Do I need to reinstall my software after the upgrade?
No. All your existing programs and drivers remain installed after the upgrade is completed.