
Ever thought about giving Linux a go, only to feel that it is too complicated? Or perhaps someone told you it was for coding, but you didn’t want to risk your Windows PC?
Well, good news! It’s running true Linux legacy and virtualization software, called Windows Subsystem for Linux (WSL) — no need to dual-boot stepping into your Linux environment or mess around with virtual machines. In this step-by-step guide, you will learn how to enable Windows Subsystem for Linux in Windows 11, even if you are not a pro. Trust me, it’s not as difficult as it sounds.
What is Windows Subsystem for Linux (WSL)?
Let’s start with the basics.
Windows Subsystem for Linux (WSL) is a Windows 11 feature that allows you to run Linux directly on your Windows PC — no rebooting, dual boot configuration, or virtual machine are necessary.
This is incredibly useful if you’re interested in programming, web development, or just want to give the Linux command line a try.
System Requirements to Enable Windows Subsystem for Linux in Windows 11
To use WSL on Windows 11, your system needs to meet these minimum requirements:
- 64-bit processor with 1 GHz or faster
- 4GB RAM minimum (8GB recommended)
- 64GB storage
- BIOS-level hardware virtualization support
- Windows 11 Home or higher
The virtualization component is where most people get stuck, so before you start banging your head against the wall just make sure you’ve enabled that feature in your BIOS settings.
Getting Your Windows 11 System ready
Checking if virtualization is enabled in BIOS
Enable virtualization in the BIOS Before getting started, you need to enable virtualization in your BIOS. Restart your PC and hit the key that comes onscreen (the most common is typically F2, F10—for some Lenovo machines it’s F12) and your system enters the BIOS settings. Since they are different across brands, look for something along the lines of “Virtualization Technology,” “VT-x,” or “AMD-V,” and make sure they’re set to enabled. This is the foundation on which WSL will work on your system. This is essential to enable Windows Subsystem for Linux in Windows 11.


Verifying Windows 11 version compatibility
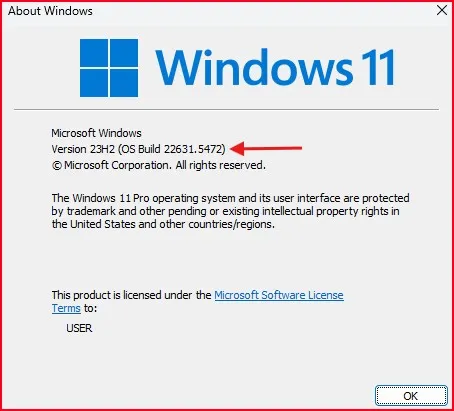
For those who interested, note that WSL is only available with Windows 11 build 22000 or newer. To see which version you have, press Win+R, type “winver” and press Enter. Your build number is displayed in the pop-up window. If you’re running an older build, visit Settings > Windows Update to get the latest one. WSL functionality is constantly being improved by Microsoft, so it is always a good idea to keep updated.
Freeing up necessary disk space
WSL will take roughly 1GB of free space for the bare-minimum installation, but you’re going to want more for Linux distributions. 1-2GB per distro are what you need at least. Find your free space by opening File Explorer, right-clicking your C: and then selecting Properties. Run Disk Cleanup if you’re low on disk space before you try to install.
Backing up important data before proceeding
Although installing WSL is relatively harmless, you should always save all critical files in case something goes wrong and you need to do it again. Use Windows Backup, OneDrive or an external drive to save your documents. This is just a safety precaution that will prevent you from potentially losing any valuable files if something goes wrong while you are setting up WSL. You can also use System Restore Point.
Installing WSL Through Windows Features
If you prefer not to use command-line tools, here’s how to do it with the Windows Features interface:
1. Accessing the Windows Features Dialog
Not everyone loves command lines. If you’re more of a GUI person, Windows has your back. Just hit the Start button, type “Turn Windows features on or off” and click the matching result. A small window pops up with checkboxes for all optional Windows components. No fancy terminal commands needed here!
2. Selecting the WSL Components to Install
In the Features dialog, scroll down until you spot “Windows Subsystem for Linux” Check that box to enable the basic WSL functionality. Want the full experience? Also check “Virtual Machine Platform” – it’s required for WSL2’s improved performance. These two checkboxes are your ticket to Linux paradise on Windows 11.

3. Managing the Installation Process
Once you choose the components you want to install, choose “OK” and Windows does the rest of the work. System will download required files, might need to restart. Don’t skip this step! Once it’s done, go ahead and restart your PC (if it doesn’t do so automatically), and you’ll be ready to install Linux distributions from the Microsoft Store. It can take a couple of minutes to install, but the wait is worth it for a fully working Linux environment.
How to Install WSL in Windows 11 Using Command Line
Prefer the faster method? Here’s how:
Opening PowerShell with administrator privileges
Want the fastest way to get WSL running? The command line is your friend. Right-click the Start button and select “Windows PowerShell (Admin)” or search for PowerShell, right-click, and choose “Run as administrator.” That blue window might look intimidating, but it’s about to become your installation superhero.

Running the WSL installation command
Once PowerShell is open with admin rights, simply type this magic command: wsl --install and press Enter. This single command handles everything – downloading the WSL package, enabling required components, and setting up the default Ubuntu distribution. No clicking through endless setup screens required!

Note: If you already have WSL installed and you’re updating to WSL 2 (which is faster and more powerful), run the following command: wsl –set-default-version 2

Verifying successful installation through command line
After the installation is complete and the PC has rebooted, the verification is a snap. Open PowerShell again and enter wsl -l -v to see a list of your installed Linux distributions with their version numbers. You should see Ubuntu listed with version WSL2. Try typing wsl to jump straight into your Linux environment – if you see a new prompt ending with $, congratulations! You’re now running Linux inside Windows 11.
Choosing and Installing Linux Distributions
1. Browsing available distributions in Microsoft Store
Once WSL is enabled, you’ve got a world of Linux distros at your fingertips. Pop open the Microsoft Store and search for “Linux” to see all your options. Ubuntu remains the crowd favorite, but Debian, Kali, and openSUSE are solid choices too. The beauty is you can install multiple distributions and switch between them as needed.

2. Installing Ubuntu, Debian, or other popular distrosk
Getting your preferred Linux flavor running is surprisingly simple. Just click “Get” on your chosen distro in the Store and wait for the download to finish. Ubuntu makes a great starting point for beginners with its user-friendly interface and massive community support. Debian offers rock-solid stability, while Kali is perfect for security enthusiasts wanting to explore penetration testing.
3. Setting up your Linux user account and password
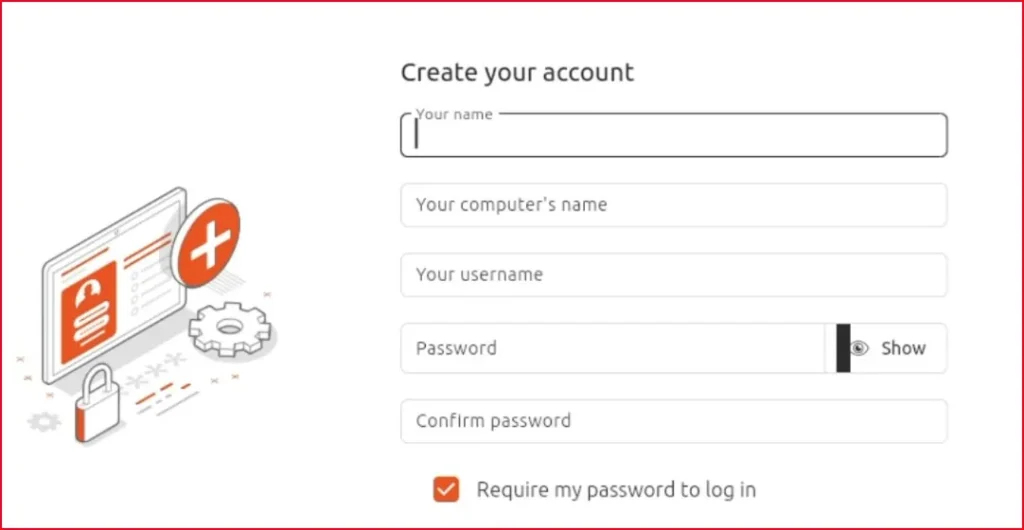
When you first fire up your new Linux distro, you get a console window that invites you to create a user name and password. This is independent from your Windows login and has its own list of permissions. Choose something you will remember—you are going to need it for your sudo commands. If you don’t see any characters when you type your password, don’t worry – that’s how it’s supposed to be in typical Linux terminals.
4. Updating and upgrading your Linux distribution
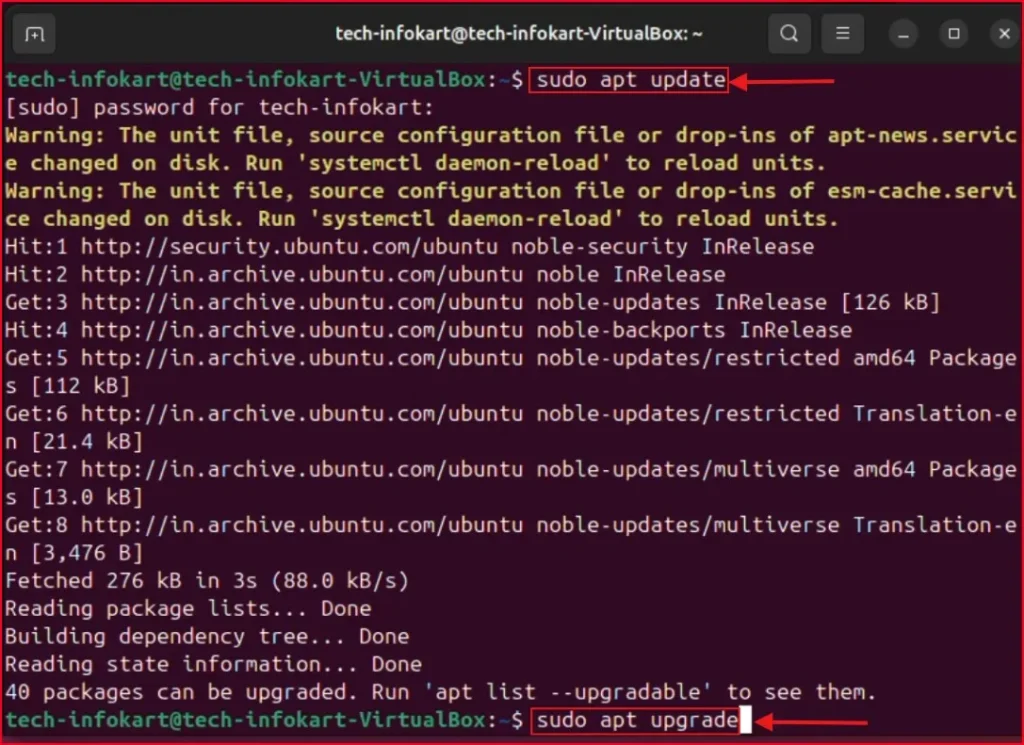
New installation must be updated. Open your terminal and run sudo apt update and sudo apt upgrade for Debian-based distros such as Ubuntu. This will get the most recent package info and install available updates. Keep your system safe and sound by performing regular maintenance. I find it helpful to do this weekly or when installing new software.
Configuring and Optimizing WSL
1. Setting WSL 2 as your default version
Want blazing speed and better performance? Make WSL 2 your default with a simple command. Open PowerShell as administrator and type:
wsl --set-default-version 2This ensures all future Linux distros you install will automatically use WSL 2’s virtualization benefits instead of the older WSL 1 architecture.
2. Allocating memory and CPU resources
Need to control how much of your system WSL can use? Create a .wslconfig file in your Windows user directory (C:\Users\<YourUsername>) and add these settings:
[wsl2]memory=4GBprocessors=2Tweak these numbers based on your system specs – more RAM means smoother Linux operations, but don’t go overboard if your PC is resource-constrained.
3. Configuring file system integration
File system integration in WSL can make or break your experience. Access Windows files from Linux through the /mnt/c/ path, but remember – performance takes a hit when working across systems.
For best results, keep project files in your Linux file system when doing dev work. Create a .wslconfig file with these optimizations:
[automount]enabled = trueoptions = "metadata,umask=22,fmask=11"This improves file permissions handling and makes Windows/Linux file sharing smoother.
4. Setting up GUI application support
Yes, you can run Linux GUI apps directly in Windows 11! First, make sure you’ve got the latest WSL update. Then install an X server package in your Linux distro:
sudo apt updatesudo apt install -y x11-appsLaunch a Linux GUI app by simply typing its name in the terminal. The app window appears right on your Windows desktop – no separate server configuration needed. Perfect for tools like Firefox, Visual Studio Code, or GIMP.
5. Enabling advanced networking features
Power users, listen up! WSL 2 networking got a major upgrade. Enable advanced features by adding these lines to your .wslconfig:
[wsl2]networkingMode=mirroreddnsTunneling=truefirewall=trueThis gives your Linux environment direct access to your network, making container development and server hosting much simpler. Now you can expose ports from WSL without complex port forwarding rules.
Final Thought:
By now, you’ve seen how simple it is to enable Windows Subsystem for Linux in Windows 11 and explore a full Linux environment — right from your desktop.
Whether you’re learning to code, need a Linux machine for work, or just like checking out new things, WSL is a fast and convenient way to get started.
And the best part? If you decide you don’t like it you can always uninstall it. But I bet you won’t.
Related Post
What is Windows Subsystem for Linux (WSL) and Why Do We Use It
FAQs – Enable Windows Subsystem for Linux in Windows 11
Is WSL free to use?
Yes, it’s built into Windows 11 and completely free.
Can I install multiple Linux distributions with WSL?
Absolutely! You can install and switch between Ubuntu, Debian, Kali, and others.
Do I need a powerful PC to use WSL?
Not really. 4GB RAM and a modern CPU are enough for most users.
What’s the difference between WSL 1 and WSL 2?
WSL 2 uses virtualization for better performance and compatibility. Always go with WSL 2 if possible.
Can I uninstall WSL later?
Yes! You can remove WSL and any installed Linux distro anytime via Settings or PowerShell.