
Do you often find yourself carrying around several USB drives, one for installing Windows 10, another drive for Windows 11, and another for installing Linux? That lead to a real mess managing all of those separate drives. Especially when you are trying to troubleshoot, install, or test multiple operating systems — keeping track of all those USB sticks can be a problem.
But here’s the good news- you don’t have to use multiple USBs anymore, you can create a multiboot USB to put all your bootable ISOs on a single USB!
This simple process will save you time, eliminate clutter, and make your life much easier. This guide will detail each step on how to create a multiboot USB and control all the operating systems without any difficulty.
What is a Multi-Boot USB Drive?
A multi-boot USB will help you save time, space and your energy. If you are someone who work under technology domain, An IT developer or just want to try out new OS. Then, One USB drive having multiple bootable ISOs are a life saver. Here’s why:
- Convenience: You never have to carry around multiple USB drives for separate tasks.
- Flexibility: Copy any ISO you want on the USB drive; you don’t need to reformat to boot into additional ISOs.
- Convenience: Quickly give access to operating systems, recovery tools or utilities in a single location
Tools and Software, You’ll Need
Before we get into the process, ensure you have the below:
Choosing the Right USB Drive: Before you start, select a suitable USB drive. Consider these factors for optimal performance:
- Storage Capacity: At least 32GB is recommended, but 64GB or more provides better flexibility(based on the size of the ISOs)
- Data Transfer Speed: For faster read/write operations, choose USB 3.0 or higher.
Bootable ISO Files: Download the ISO files that we want to use (such as Windows, Linux distros, or recovery tools).
An app for creating multi-boot USBs: We’ll be using a free and popular app named Ventoy.
Step-by-Step Guide: How to create a Multiboot USB drive with Ventoy
Step 1: Download and Install ventoy
Ventoy is a free software that allows you to create a multi-boot USB extremely easily. Here’s how to get started:
- Visit the official ventoy website.
- Click on the Download option and Download the latest version of the tool suitable for your operating system.
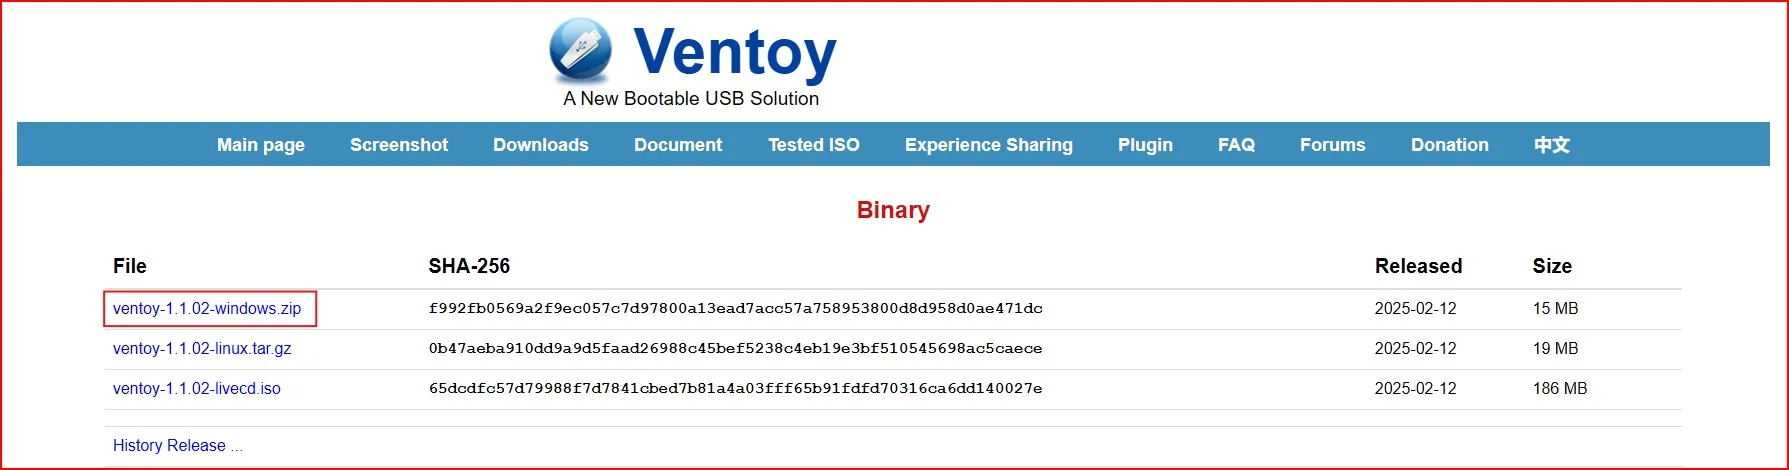
- Extract the downloaded ZIP and save it in a folder on your computer.

- Run the Ventoy2Disk executable file to launch the tool.

Step 2: Format the USB Drive
Once ventoy is open:
- Insert your USB drive into the computer.
- Ventoy will automatically recognize USB drive. Choose it from the drop-down menu if not.
- Press the Install button. This will format the drive and set it up for ventoy.
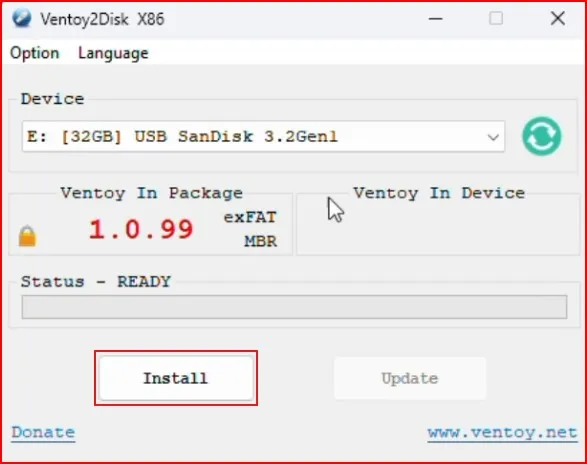
Note: This will delete everything from the drive. You are also requested to back up any important files.
Once the installation is complete, your USB drive is ready for multi-boot ISOs.
Step 3: Copy ISO Files to USB Stick
This is the easiest part! Ventoy doesn’t require any complex setup for adding ISOs. Simply:
- Open your USB drive in File Explorer (or Finder on macOS).
- Simply drag and drop your ISO files on the USB drive.

Note: You may structure ISOs into folders for better arrangement, yet Ventoy will still find them all.
- That’s it! Now we are ready to boot with multiple ISOs in the USB.
Before you begin, make sure you have the ISO files for the operating systems you want to include. If you’re looking to download the Windows 11 24H2 ISO, check out this detailed guide.
Step 4: Boot from the Multi-Boot USB Drive
To try out your new multi-boot USB drive:
- Restart the system and go to the BIOS / Boot menu (typically keys like F2/F12/DEL on startup).
- Choose your USB drive from the boot device list.
- You will see ventoy’s menu and all of the ISO files you added.
- You have to navigate with the arrow keys and choose which of the ISOs you want to boot from and hit Enter.
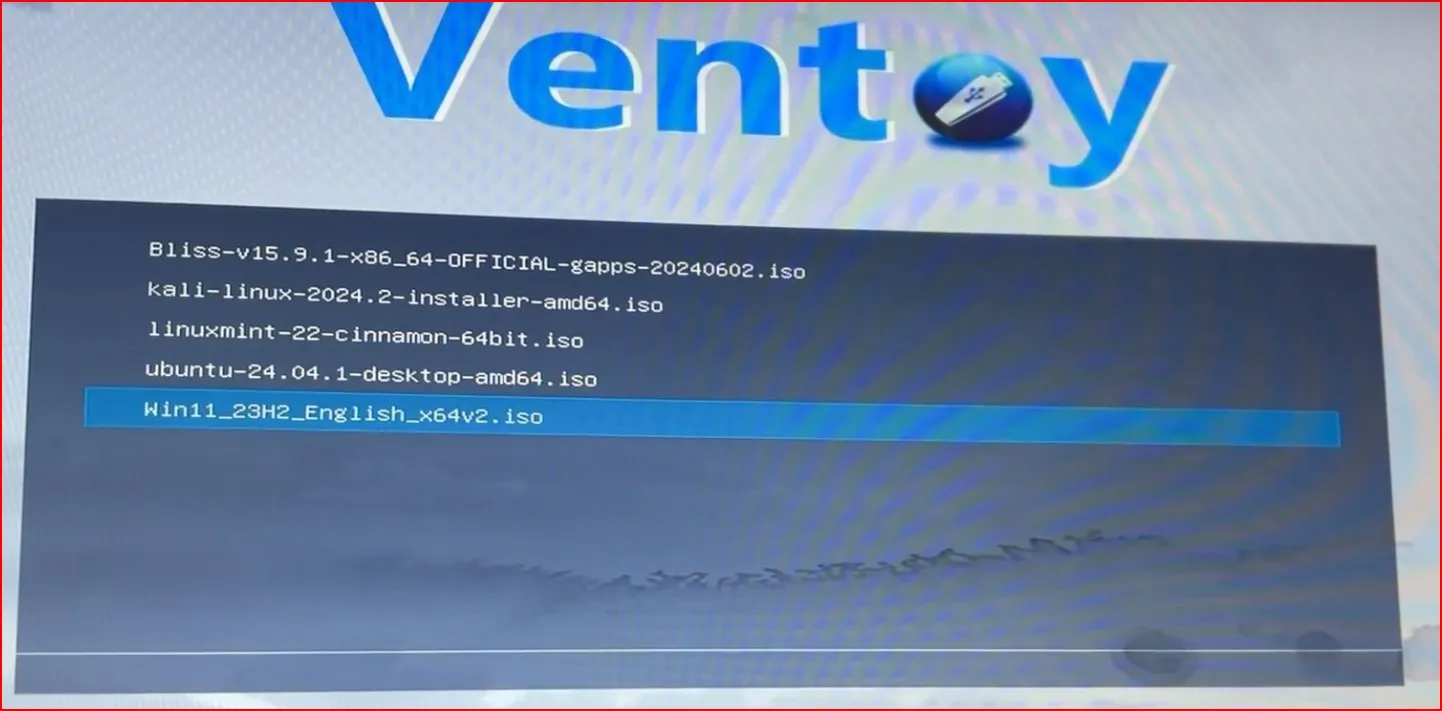
If you’d rather watch a detailed video tutorial on how to create a multiboot usb with ventoy, check out my YouTube video below:
Ventoy Tips and Tricks
Ventoy is a highly powerful tool and comes with a fair number of parameters. Here are some ways to get the most out of it:
Support for Persistence:
- If you use Linux distributions, Ventoy supports persistence. This allows saving your changes and files even across reboots.
- Now to have persistence create a .json file for the specific ISO and place it in the Ventoy folder. Check Ventoy’s documentation for details.
Theme Customization:
- You have the option to customize the Ventoy boot menu appearance by editing the ventoy.json file.
- Give your USB Drive a personality by adding custom themes, changing the fonts, or adding a background image.
UEFI and Legacy Support:
- Ventoy works with UEFI and Legacy boot modes, that means no worries about compatibility.
Regular Updates:
- Ventoy is under active development, with new releases being made often. Remember to update Ventoy in your USB stick for your new ISOs to be compatible.
If you ever decide to repurpose your USB drive, you can easily turn it back into normal storage. Check out this guide to learn how to do it step-by-step.
Other Tools for create a Multi-Boot USB Drives
Ventoy is one of the easiest tools to use, however, you have other choices to explore:
YUMI (Your Universal Multiboot Installer)
You can use a user-friendly tool that lets you create a multi-boot USB drives. It’s great for including Linux distributions and antivirus tools.
WinSetupFromUSB:
It is perfect for Windows users because is specifically designed to create multi-boot USB drives with Windows and Linux ISOs.
SARDU:
A more complex solution for create a multiboot usb, but with a steeper learning curve than Ventoy.
Conclusion
And that’s it! So now you know how to create a Multiboot USB Drives using Ventoy. Using a single USB drive, you can access multiple operating systems, recovery tools, and utilities, giving you more time and less hassle to get on with what you actually want to do.
So go ahead, download your favourite ISOs and create a multiboot usb for your own purpose. It is a great utility for any tech guy or anyone who wants to play around with endless possibilities of bootable media.
If you really loved this guide, please share it with your beloved friends. Got questions or tips of your own? Leave them in the comments below. Happy booting!
Frequently Asked Questions (FAQs)
Can I Add More ISOs Later after create a Multiboot USB?
Yes! With Ventoy, you can just drag and drop extra ISO files onto the USB drive whenever you want even after create a multiboot usb.
Is there a way I could expunge any unnecessary ISOs?
Absolutely. Cleaning up is the same process as removing any other files from a USB drive; just delete the ISO files.
What to Do If One of the ISO’s Fails?
Ensure that Ventoy is compatible with the ISO. To see if it’s supported, refer to the Ventoy compatibility list.
Is storage on the USB drive available for other files?
Yes, the USB drive can have regular files in addition to ISOs. Ventoy doesn’t mess with files that aren’t ISO.