
If you want to run more than one operating system on your Windows 11 PC, VMware Workstation Pro is a great tool to use.
Before You Begin
Before we start installing, let’s make sure you have everything ready:
- Windows 11 PC with at least 4GB RAM (recommended: 8GB or more)
- VMware Workstation Pro installer (download from Broadcom site)
- Adequate disk space (at least 1GB)
VMware Workstation Pro stands out as a popular choice for creating and managing virtual machines. In the past, you could download them directly from their website. You must now register with Broadcom before you can receive it. This new step may cause the new step to disappear. But I will guide you through every part of the process. We’ll cover everything from getting the software to installing VMware Workstation Pro on your Windows 11 machine.
Step 1: Access the VMware Workstation Pro Download Page
To begin, open your preferred browser and search for “VMware Workstation Pro.” This should direct you to the official VMware website. Once you’re on the website, navigate to the “Products” section, scroll down a bit, and find “Workstation Pro.”

Click on “Download Fusion or Workstation” to begin the process.
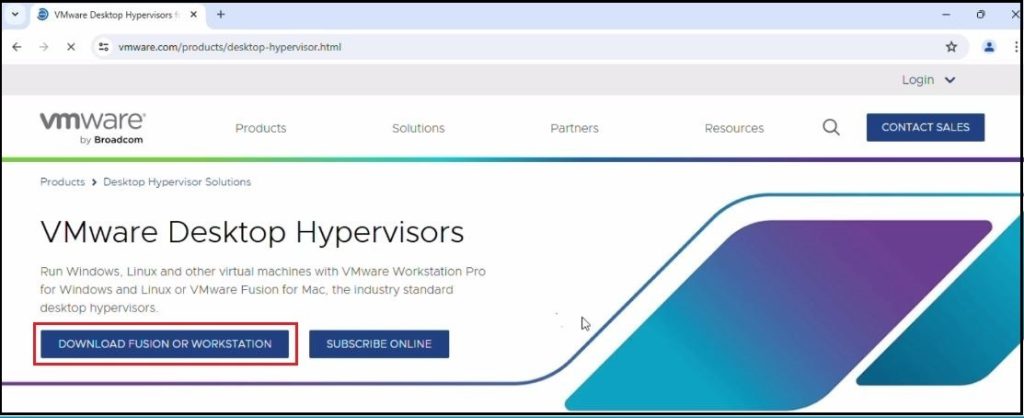
VMware Workstation Pro stands out as a go-to choice for creating and managing virtual machines. In the past, users could grab it straight from VMware’s website. However, the process has seen some changes. Broadcom’s acquisition of VMware in November 2023 brought about a new requirement. Now, you’ll need to sign up on Broadcom’s platform before you can get your hands on the software. This shift might throw some people off newcomers. But no need to stress—I’m here to guide you through each step. We’ll cover everything from downloading to setting up VMware Workstation Pro on your Windows 11 system.
Step 2: Registering at Broadcom
Step 2: Registering at Broadcom
Since VMware is now under Broadcom, you’ll need to create a Broadcom account to download the software. Thus, you must first register:
In the upper right corner of the page, hit the “Login” arrow and choose “Register” from the options that appear.
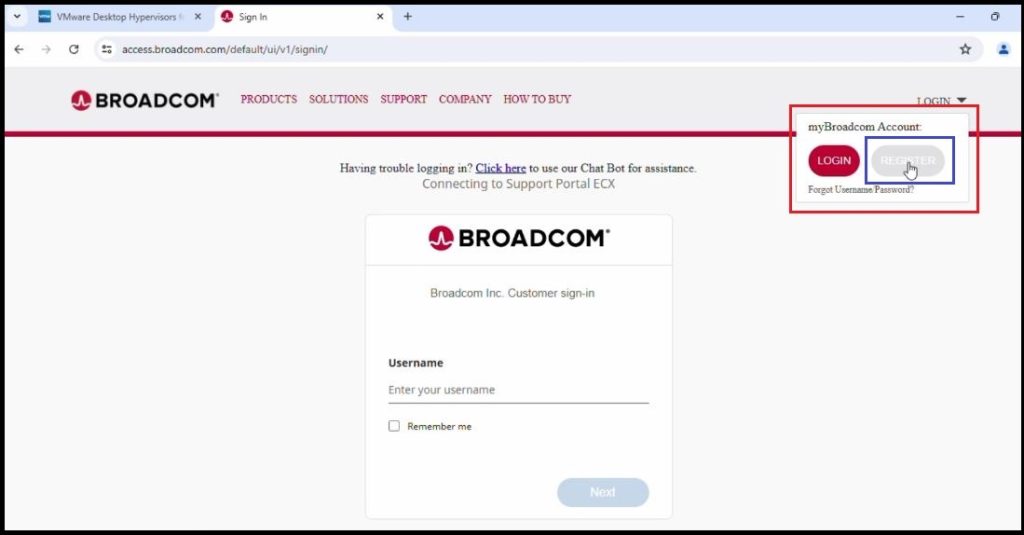
Enter a working email address and finish the human verification step then hit “Next.” You’ll get a verification code in your inbox. Type in the code, and hit “Verify & Continue.” Complete the needed details and hit “Create Account.” Once you’ve set up your account, you’ll see “Registered Successfully” and the chance to unlock more services. You can hit “I’ll do it later.”
Now, log in to your newly created Broadcom account with your email and password.
Step 3: Download VMware Workstation Pro
After logged in, navigate back to the “Download Fusion or Workstation” section, which will now take you to the “My Downloads” page. Here’s how to proceed:
In the left panel, select “My Dashboard” and in the search box, type “VMware Workstation Pro.”
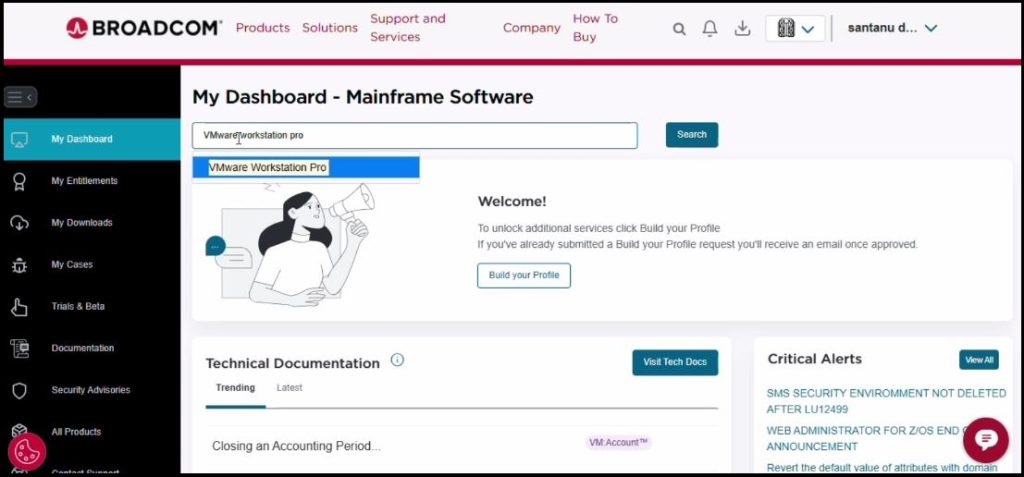
Once the search results appear, click on the relevant title, and you’ll be taken to the product details page.

Scroll down until you find the download links for “Workstation Pro 17.5.2” (the latest version at the time of writing). You’ll see two links: a “Download” link and a “Documentation” link. Click on the “Download” link only.

Now this page will open, and here you need to click the VMware Workstation Pro 17.0 for Personal Use (Windows) option.

And here you will get different versions or releases. You need to click the latest version available, as of date, it is the latest version which is 17.5.2. Click on that.
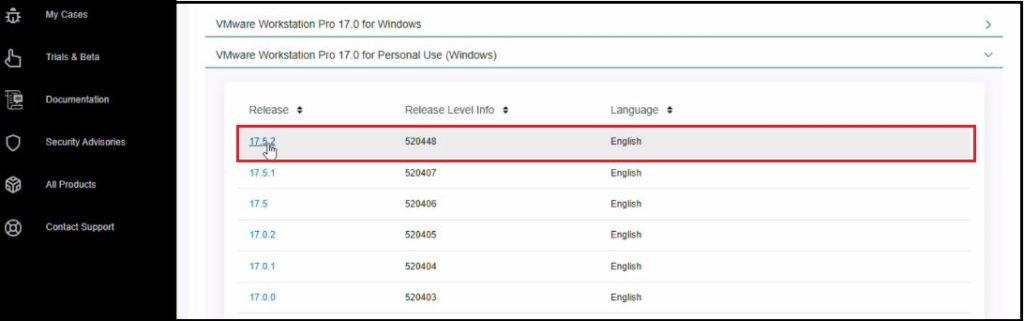
It will open another page and here check the “I agree to terms and condition” option to make the installer downloadable. After that in right side you will find Download button.

Once you click on this it will say additional verification is require, so you have to click on yes.
Step 4: Trade Compliance Verification
Before you can begin the download, you’ll need to fill out a “Trade Compliance Verification” form. This form requires basic details like your address, city, state, country, and postal code. Fill out the form quickly, and click “Submit.”

After that, it will take you back to the download page once again. And here again, you need to click on this download button. When you hover your mouse here, it shows HTTPS Download this time, you need to click on this.
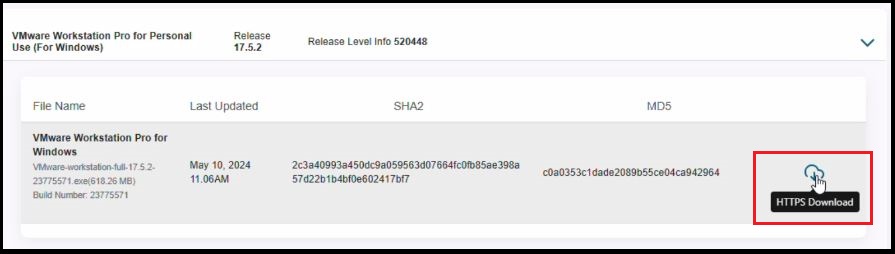
Finally, the download has started. The installer file is around 600 MB, so the download time will depend on your internet speed. For beginners, this process might seem a bit tricky, which is why I created this guide to simplify things.
Watch the Full Tutorial on YouTube
If you want a simple step-by-step guide, watch my YouTube video where I show you how to install VMware Workstation Pro on Windows 11.:
Step 5: Installing VMware Workstation Pro
Once the download is complete, it’s time to install VMware Workstation Pro. Follow these steps:
- Locate the Installer File: Go to the folder where the installer file was saved and double-click to launch it.
- VMware Setup Wizard: When the setup wizard appears, click the “Next” button.

3. License Agreement: Accept the terms of the license agreement and click “Next.”
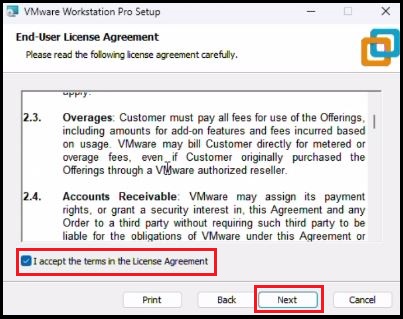
4. Custom Setup Options: You can choose to install the “Enhanced Keyboard Driver” and add VMware Workstation to your system PATH. Once done, click “Next.”

5. Updates and Program Participation: Uncheck the boxes for “Check for product updates on startup” and “Join the Customer Experience Improvement Program” if you prefer, then click “Next.”
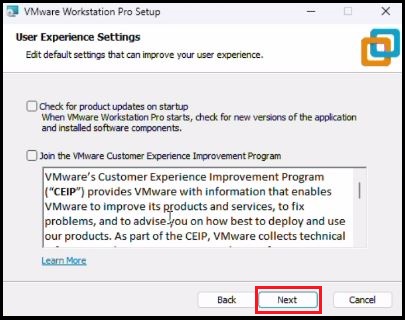
6. Shortcut Creation: Check both boxes to create shortcuts for VMware Workstation Pro on your desktop and start menu, and click “Next.”

7. Installation: Click “Install” to begin the installation process.
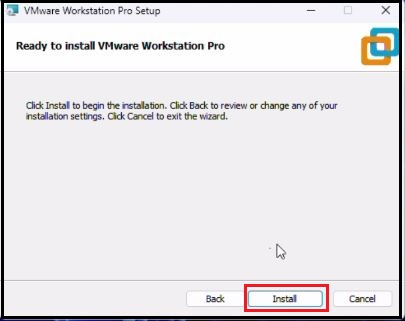
After installation is complete, click “Finish” to exit the setup wizard.
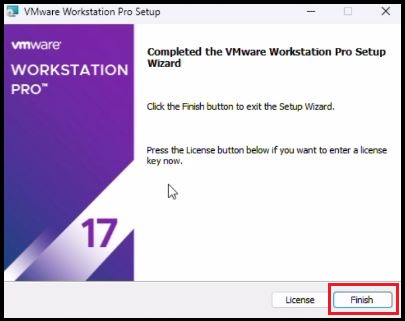
You’ll be prompted to restart your system. I recommend restarting your PC to finalize the installation.
Step 6: Launch VMware Workstation Pro
Once your system restarts, you can launch VMware Workstation Pro from either your desktop or start menu. The first time you open it, you’ll see a license page. Here, you have two options: enter a commercial license or use the software for personal use. Since the app is free for personal use, select the option to “Use VMware Workstation 17 for Personal Use.” You don’t need to enter a product key for personal use. Click “Continue”

Finally click on “Finish.

VMware Workstation Pro will now launch without any issues.
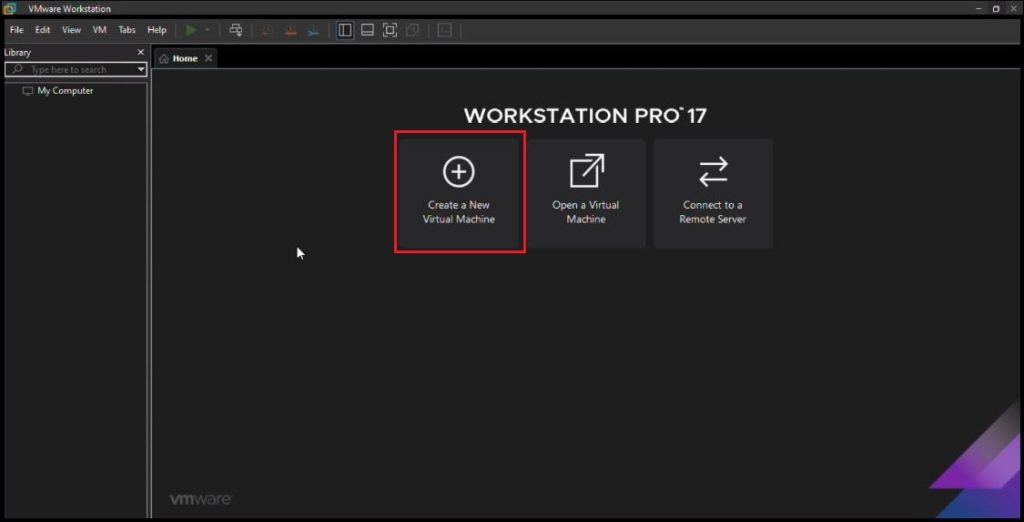
Note: Before installing VMware, make sure to enable virtualization on your PC.
Conclusion
Now that you have VMware Workstation Pro installed, you’re all set to create virtual machines and try out different operating systems without messing up your main Windows 11 setup. The new Broadcom registration does add a few extra steps, but I hope this guide made it easy for you. If you have any questions, just drop a comment below. And don’t forget to share this guide with anyone else who might need a hand with their installation!
For a step-by-step visual guide, check out this YouTube video where I demonstrate how to Install VMware Workstation Pro on Windows 11.
FAQ:
Q1. Can I download VMware Workstation Pro directly from VMware’s site?
No, you now need to register on the Broadcom website to access the download.
Q2. Is VMware Workstation Pro free?
It’s free for personal use, but a license is required for commercial use.
Q3. What is the latest version of VMware Workstation Pro?
As of now, the latest version is 17.5.2.
Q4. Do I need to restart my PC after installation?
Yes, it’s recommended to restart your system to complete the installation.
Q5. What system requirements are needed for VMware Workstation Pro?
You’ll need a Windows 11 system with at least 4GB of RAM and 1.2GB of disk space for the software.
Q6. Why is Broadcom involved in the download process?
VMware was acquired by Broadcom, and now registration is required through Broadcom’s platform.
Q7. Do I need an internet connection to install VMware Workstation Pro?
Yes, an internet connection is required to download the installer and for registration.
Q8. What happens if I don’t agree to the license terms?
You won’t be able to proceed with the installation without agreeing to the license terms.
Q9. Can I use VMware Workstation Pro for free without a license key?
Yes, for personal use, no license key is needed.
Q10. How long does the download take?
It depends on your internet speed, as the installer is around 600MB in size.