
Want to transfer photos, documents, videos or other files from your Windows computer to Mac, but don’t want to use a USB flash drive? The good thing is, we can transfer files between Windows and Mac wirelessly by using the same Wi-Fi network you have at home.
Students, office workers, or home users make frequent use of file sharing to work on assignments and share documents; you need it because it saves time while eliminating the need for external storage devices.
In the following steps, I will walk you through how to transfer files between Windows and Mac wirelessly in both directions PC to Mac or vice versa using native features built into both operating systems.
Before You Begin
Before setting up file sharing, make sure:
- Your Windows PC and Mac are connected to the same Wi-Fi network.
- Both devices are powered on.
- You have administrator access on both systems.
- File sharing is enabled on the computer that will share files.
Once these requirements are met, you’re ready to start.
Method 1: Transfer Files from Windows to Mac
Let’s begin by sharing a folder on your Windows computer and accessing it from your Mac.
Step 1: Set Your Network as Private in Windows
On your Windows 11 PC:
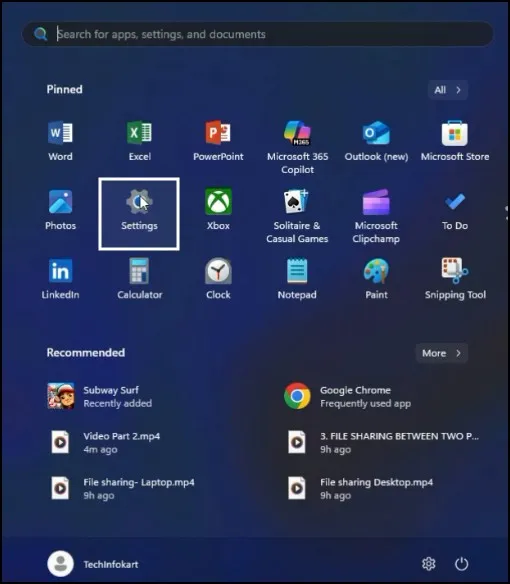
- Click Start and open Settings.
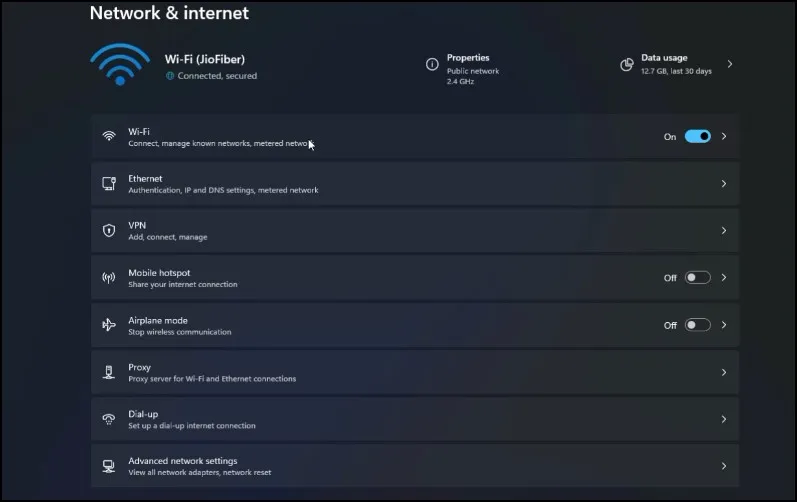
- Select Network & Internet.
- Click Wi-Fi.
- Select your connected Wi-Fi network.
- Ensure Network Profile Type is set to Private.
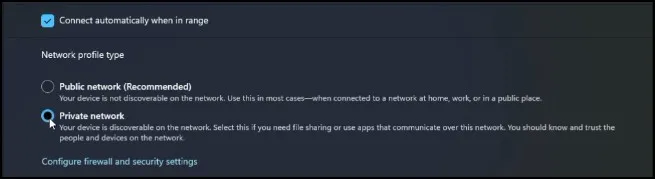
A private network allows devices on the same network to discover and communicate with each other.
Step 2: Enable Network Sharing
Next, enable the sharing features required for file access.
- Go back to Network & Internet.
- Select Advanced Network Settings.
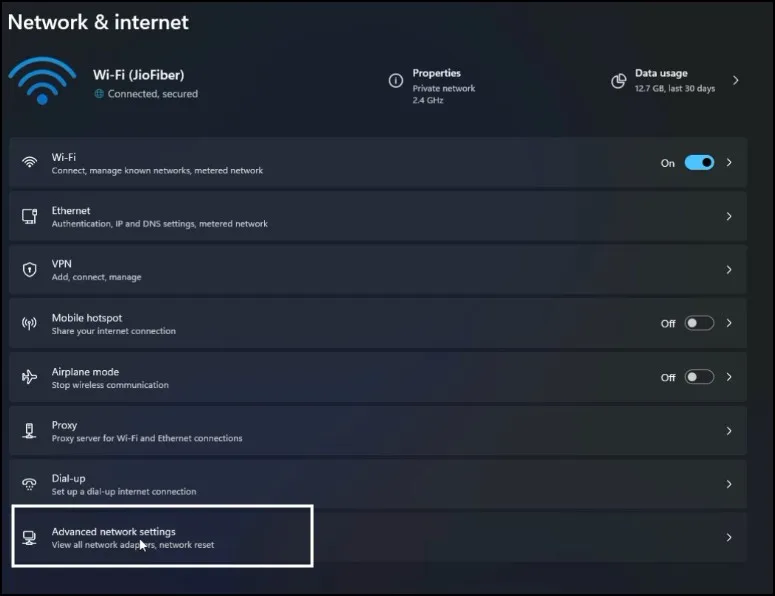
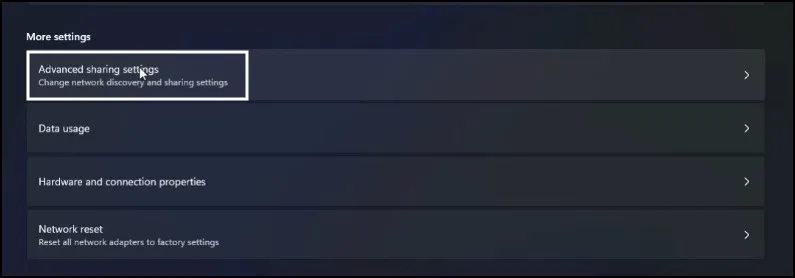
- Click Advanced Sharing Settings.
Under Private Networks:
- Turn ON Network Discovery
- Turn ON File and Printer Sharing
Under All Networks:
- Turn OFF Password Protected Sharing
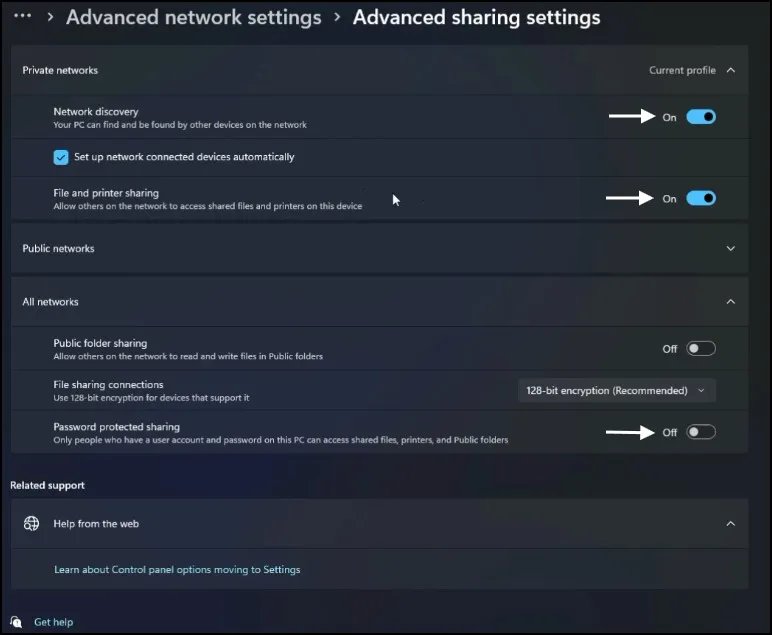
After making these changes, close the Settings window.
Step 3: Share a Folder
Now choose the folder you want to share with your Mac.
- Locate the folder.
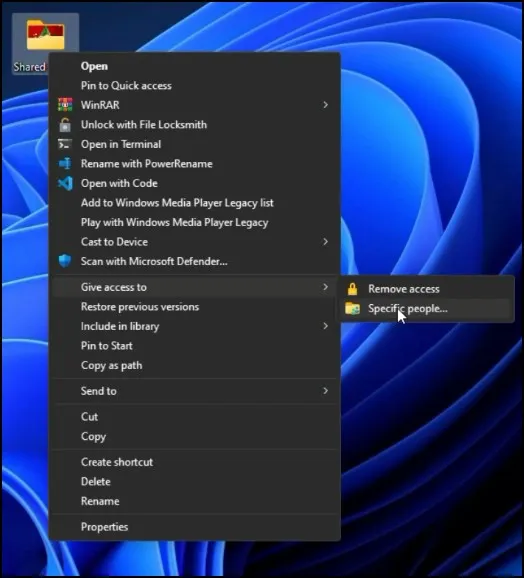
- Right-click it.
- Select Show More Options.
- Click Give Access To → Specific People.
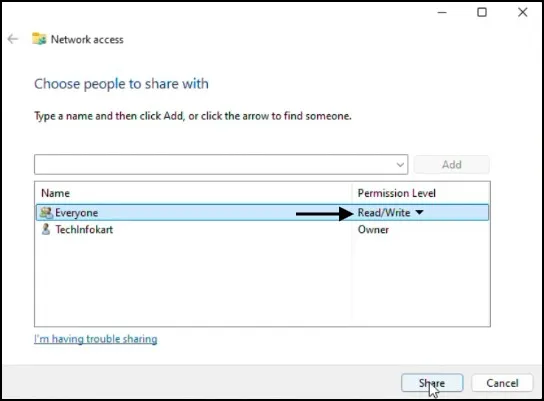
- Select Everyone from the dropdown menu.
- Click Add.
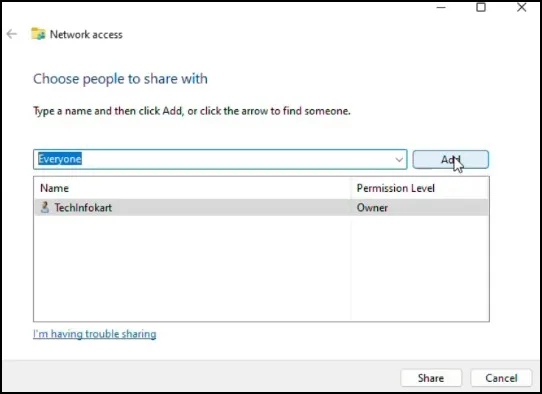
- Change the permission level to Read/Write.
- Click Share.
- Select Done.
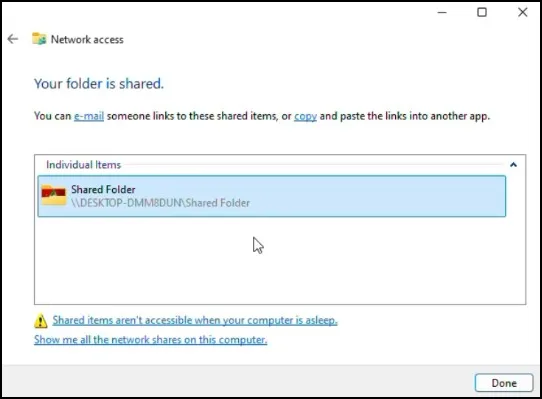
The folder is now available on your network.
Step 4: Find Your Windows PC IP Address
Your Mac needs the Windows computer’s IP address to connect.
- Click the Windows search box.
- Type cmd and open Command Prompt.
- Enter: ipconfig
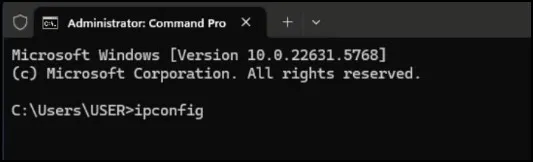
- Press Enter.
- Look for IPv4 Address.
It will look similar to: 192.168.1.25
Write down this address.

Step 5: Connect from Mac
Switch to your Mac.
- Click Go in the top menu bar.
- Select Connect to Server.
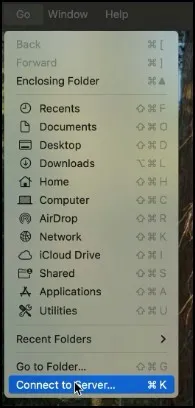
- Enter: smb://Your-Windows-IP-Address
Example:
smb://192.168.1.25
- Click Connect.
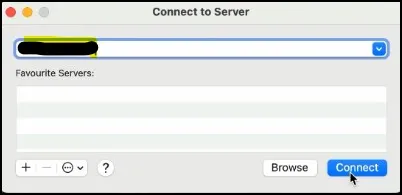
- Click Connect again if prompted.
- Select Guest and click Connect.
You should now see the shared folder from your Windows PC.
Open it and copy any files you need to your Mac’s Desktop, Documents folder, or another location.
Congratulations! You have successfully transferred files from Windows to Mac wirelessly.
You can learn more about it in the official Apple guide on connecting to shared computers and servers.
Method 2: Transfer Files from Mac to Windows
Now let’s do the opposite and share files from your Mac.
Step 1: Enable File Sharing on Mac
On your Mac:
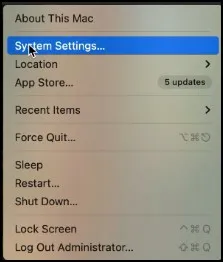
- Click the Apple menu.
- Open System Settings.
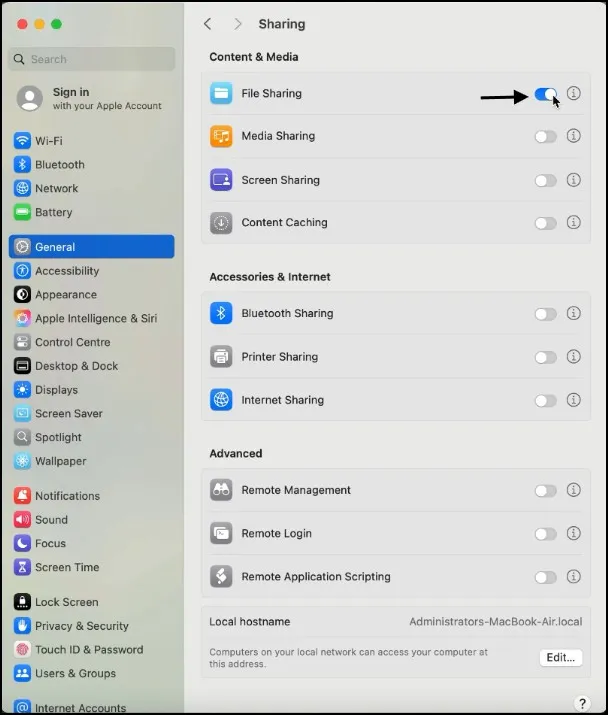
- Go to General.
- Find File Sharing and turn it ON.
Next:
- Click the information (i) button next to File Sharing.
- Select Options.
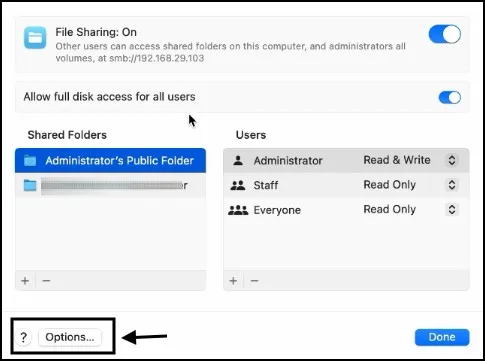
- Ensure Share files and folders using SMB is enabled.

SMB (Server Message Block) is the protocol Windows uses to access shared folders.
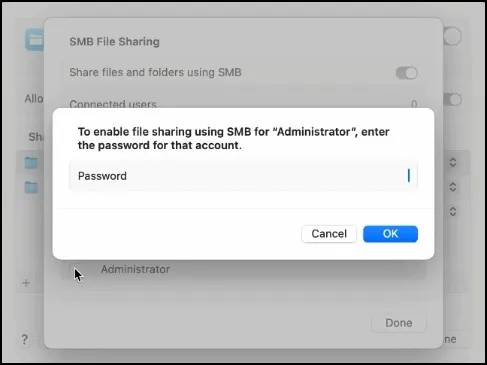
Step 2: Enable SMB Access for Your Account
Under the user list:
- Check your administrator account.
- Enter your Mac password when prompted.
- Click OK.
- Click Done.
This allows Windows to access files shared from your Mac.
Step 3: Note the Mac’s IP Address
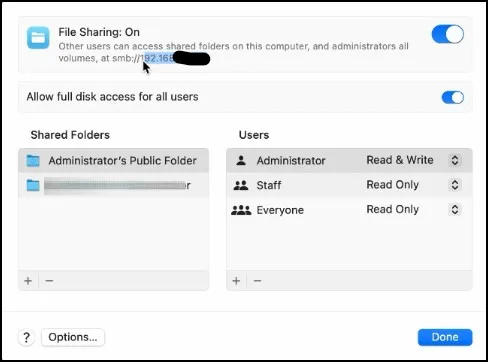
While still in the File Sharing settings, you’ll see the Mac’s network address.
It will typically appear as an IP address such as:
192.168.1.30
Write it down.
Step 4: Access the Mac from Windows
Return to your Windows PC.
- Open File Explorer.
- Click inside the address bar.
- Type:
\\Mac-IP-Address
Example:
\\192.168.1.30
- Press Enter.
Windows will connect to your Mac and display available shared folders.

Open the shared folder, browse the files, and copy them to any location on your Windows PC.
You have now successfully transferred files from Mac to Windows wirelessly.
Final Thoughts
Knowing use transfer files between Windows and Mac wirelessly can help you with file sharing significantly. After configuration, you can access shared folders on either computer and transfer files whenever you want in no time.
The best part is that both Windows and macOS already include the necessary tools, so you won’t need to install any additional software.
Whether you want to transfer files from Windows to Mac or share files between Windows and Mac in the opposite direction, the process is straightforward and works well for home, school, and office environments.
Also Read: How to Transfer Files Between Two Computers Wirelessly in Windows 11
Frequently Asked Questions
Can I transfer files between Windows and Mac without a USB drive?
Yes. You can transfer files wirelessly over your Wi-Fi network. No USB drive or external storage device is required.
Do Windows and Mac need to be connected to the same Wi-Fi network?
Yes. Both devices must be connected to the same local network.
Do I need to install any third-party software?
No. Windows and macOS include built-in file sharing features, so you can transfer files without installing additional applications.
Can I transfer large files between Windows and Mac wirelessly?
Yes. You can transfer documents, photos, videos, and other large files. However, transfer speed will depend on the strength and speed of your Wi-Fi connection.
Is wireless file sharing between Windows and Mac secure?
Yes. When connected to a trusted home or office network, file sharing is generally secure.