
We keep everything on our computers- documents, photos, work and personal files. But one sudden crash, malware infection or machine failure can wipe out all those files in seconds. That’s why making a full system backup of your Windows 11 PC will be the smartest thing you can do.
Simply put, a full system backup (sometimes referred to as a “system image”) is an exact copy of everything on your computer at any time: the Windows operating system with all its installed programs, references to where they’re located and things like device drivers (or whatever you want to call it) and all your data — documents, pictures, music … etc. If something ever does go wrong, you can restore your PC to exactly how it was at the time of your last backup.
What is a full system backup and why you should create it
Back up your full system making a backup of your PC is one of the smartest things you can do with Windows 11, as it ensures that you’re better prepared for any unexpected disasters such as; hardware failure, ransom ware attack or accidental file deletions. System image allows you to recover your entire computer as it was when the backup was made. It’s like a safety net: Whatever goes wrong, you can just pop back right into work without wasting time, losing anything or losing your peace of mind.
How to use an in-Built tool to create a Full System Image Backup in Windows11
Windows 11 may be Microsoft’s newest operating system, but it still features the trusty old ‘Backup and Restore (Windows 7)’ tool from earlier editions of Windows. It might be an old tool, but this is still the simplest method to produce a full system backup in Windows 11.
To access this hidden gem:
- Click the Start menu or press the Windows key
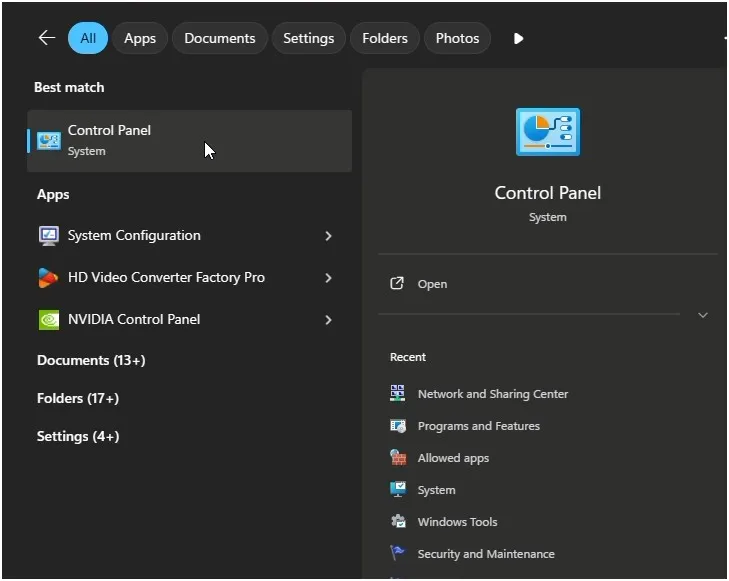
- First, type “Control Panel” and hit Enter to open the Control Panel.
- When Control Panel open, click on “Backup and Restore (Windows 7)”
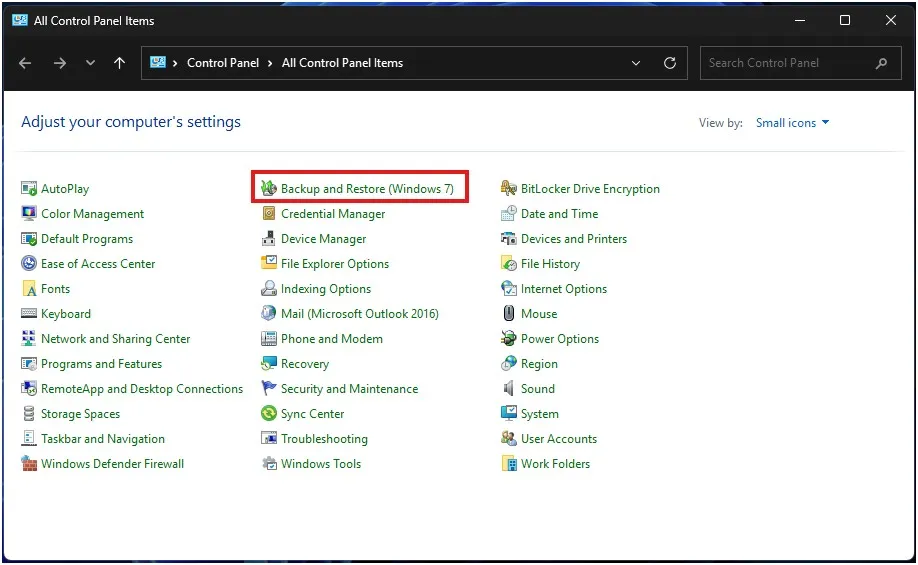
Though the interface might appear quite old fashioned compared with Windows 11’s contemporary design, it works perfectly well when making full system images. Based on a few discussions in Windows Community, many users are using this method for its reliable and simple or clean style.
Search for ‘Create a system image’ in the left-hand panel and click on it.
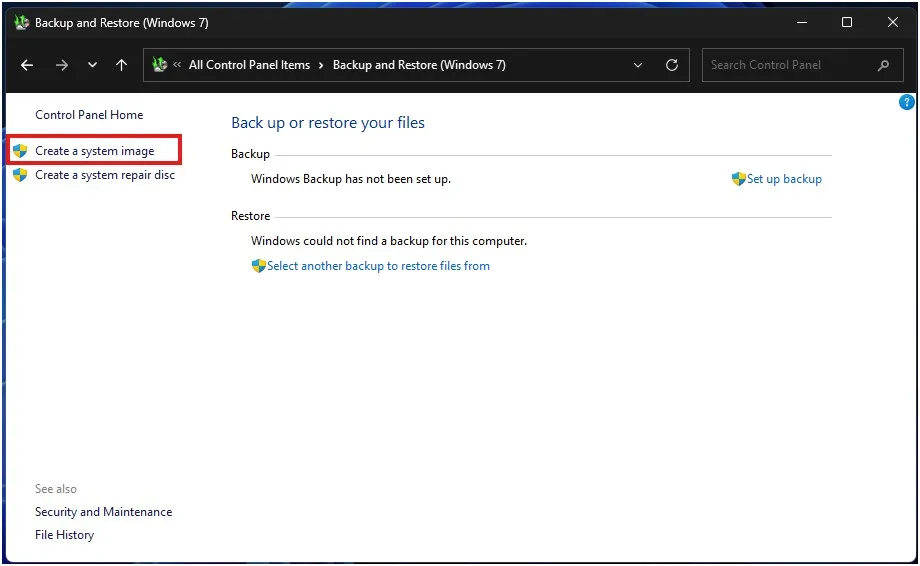
When prompted where to save your Windows 11 full backup, select one of these options:
- “On a hard disk” (recommended for most users)
- “On one or more DVDs” (for smaller systems without external drives)
- “On a network location” (useful for business environments)
Choose your external drive from the dropdown list and click “Next”
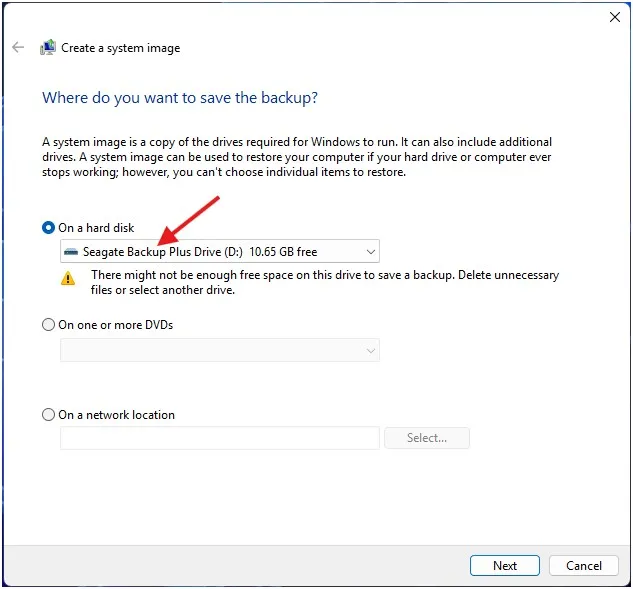
Choose the drives you wish to back up (the system will automatically select your C: drive, and some necessary system-reserved partitions), then click on “Next”
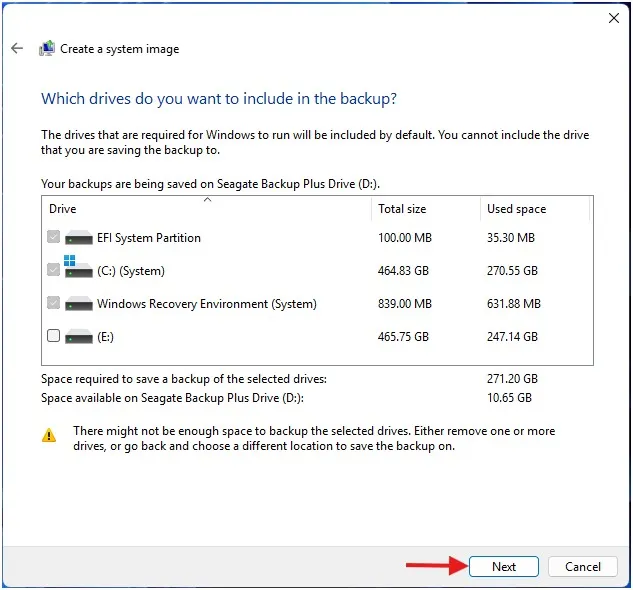
Once you’ve decide your picks, click on “Start backup” to start the process.
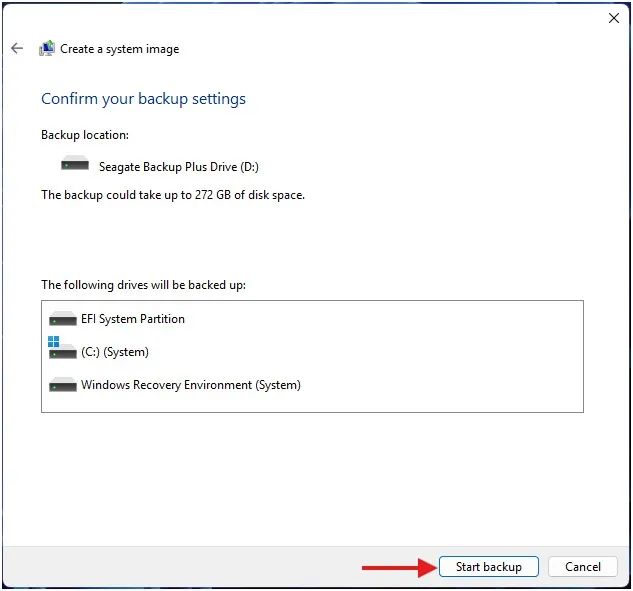
The operation can take from 30 minutes to a few hours depending on your system size and drive speed.
Important: Don’t remove your drive during a backup or shut down your computer.
This type of full system backup for Windows 11 can be anywhere from 15GB up to more than 100GB, according to Windows Central, so you’ll need some patience.
Windows is now generating the system image. You’ll then see a bar show you the progress.
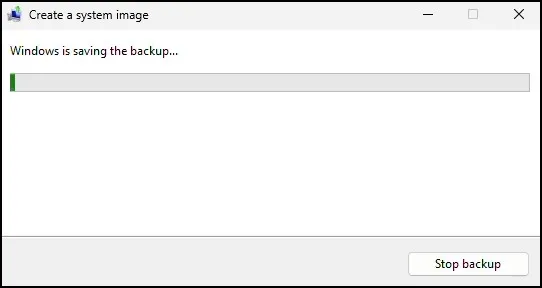
When it’s over, you’ll see a message that says:
“The backup completed successfully.”
Creating a System Repair Disc or USB Drive
After your full system backup completes, you’ll need a way to access it if Windows 11 fails to boot. This is where a system repair disc or recovery drive becomes crucial:
- Windows typically prompts you to create a system repair disc after completing a system image
- For a USB recovery drive (recommended for modern computers without optical drives):
- Press Start and type “Create a recovery drive”
- Select the option from search resultsEnsure “Backup system files to the recovery drive” is checked
- Plug in a USB diskthat is 8GB or larger (this disk will be wiped)
- You will get the instruction to finalize the process and follow those which are on screen.
This recovery media includes specialized tools for restoring your Windows 11 full backup during emergencies. Store it in a safe place alongside your external backup drive.
How to Restore Your System Image
In the event that something makes your PC unbootable, you can restore it with the backup image.
Here’s how:
- Plug in the external drive where you save your system image.
- Plug in your Windows installation USB or recovery drive, and boot from it.
- Click Repair your computer on the Windows setup screen.
- Go to Troubleshoot → Advanced Options → System Image Recovery.
- Select your most recent backup and follow the on-screen prompts.
Windows will return your entire system to that backup snapshot.
We tend to take our computers for granted, expecting they will work perfectly — until one day they don’t. One bad update, hard drive crash or virus and years of data can disappear in an instant.
A full system backup is like taking a snapshot of your digital life. It’s time-consuming, but the result is more than worth it: It provides peace of mind that if something goes wrong, you can get your files, programs and Windows setup back quickly.
Also Read: How to Create a System Restore Point in Windows 11
Frequently Asked Questions (FAQ)
How big is a full system backup?
Usually, it’s about 60–80% of your total used space on the system drive.
Can I use the same drive for multiple backups?
Yes, but make sure it has enough space. Windows can keep multiple images, but older ones may be replaced automatically.
Does the system image include my personal files?
Yes. It includes everything on the system partition — OS, applications, and files.
Can I restore this image to another PC?
Not recommended. System images are tied to the original hardware configuration.
How often should I create a system image?
Once every few weeks or before major Windows updates.