
If you’re using a laptop or PC with a small hard drive, you’ve probably noticed that Windows 11 seems to “eat up” a lot of storage space. Even after uninstalling apps or deleting files, your C: drive may still feel cramped. One of the reasons is something called Reserved Storage. t’s a feature that quietly keeps a few gigabytes aside so Windows has enough room for updates and temporary files.
That sounds useful, right? But here’s the catch: if you’re using a laptop with a small SSD (say 64GB or 128GB), losing 7GB or more to something you don’t really see or use can feel frustrating. he good news is, you can disable reserved storage Windows 11 and instantly free up space without harming your system.
What is Reserved Storage in Windows 11?
Think of reserved storage as Windows setting aside some “emergency space” on your hard drive. Windows 11 reserved storage allocates approximately 7GB of your disk space to ensure smooth system updates and prevent storage-related crashes. When the main storage becomes full, the reserved space itself activates to maintain system stability further. We are seeing that this feature only makes your computer slow when you have less disk space, as Windows keeps managing this buffer area all the time.
This means if your hard drive itself is 1TB, you might not worry further about storage space. We are seeing that devices with only 64GB or 128GB storage lose a big part of space that you could use for your own files.
Microsoft created this feature so your computer always has room for:
- Windows Updates (so they don’t fail midway)
- Temporary files
- System caches
If you’re curious and want to read Microsoft’s own explanation, check out their official blog post here.
When Disabling Reserved Storage Makes Sense
You should surely disable reserved storage Windows 11 when your older computer has limited disk space. Moreover, this step becomes essential for smaller SSDs where every gigabyte matter. Further, if you maintain your system regularly and use external backup solutions, removing this storage buffer can further free up significant space. The cleanup process itself becomes more effective with proper maintenance.
Users who manually manage updates and have good storage habits often benefit from reclaiming this reserved space.
Pros of Keeping Reserved Storage Enabled
- Updates won’t fail due to low disk space
- System runs smoother because Windows has space to breathe
- Fewer “low storage” pop-up warnings during updates
Cons of Keeping It Enabled
- Takes up several GB of space you might badly need
- Not customizable—you can’t set the size (Windows decides for you)
So, if you’re struggling with storage and every GB counts, you may want to disable reserved storage Windows 11.
Before You Begin
A couple of quick notes:
- You need Administrator access on your PC.
- You can’t disable it so long as updates are active. If it errors out, restart your machine and do it again.
Step 1: Check if Reserved Storage is Enabled
First, let’s see whether reserved storage is even turned on in your system.
Option 1: Using PowerShell
- Right-click on Start and choose Windows Terminal (Admin).
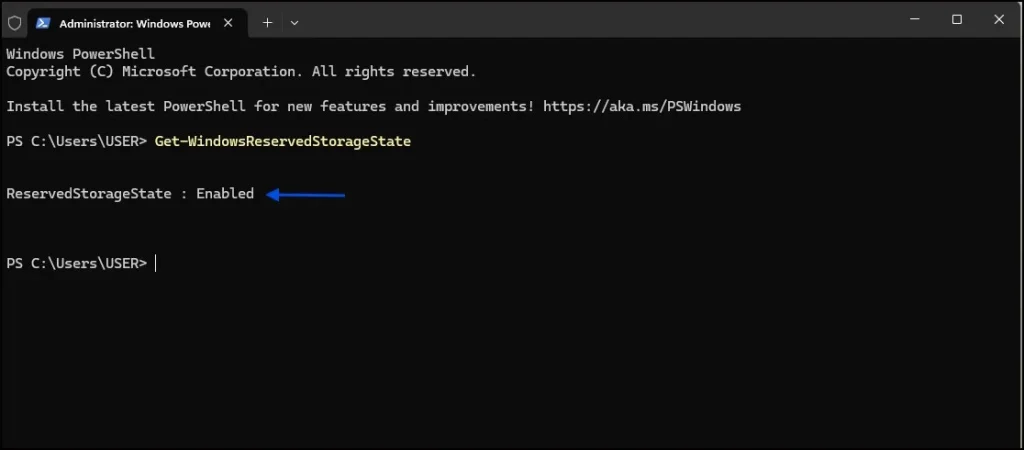
- Type this command and press Enter: Get-WindowsReservedStorageState
You’ll see either Enabled or Disabled.
Option 2: Using DISM
- Again, open Windows Terminal (Admin).
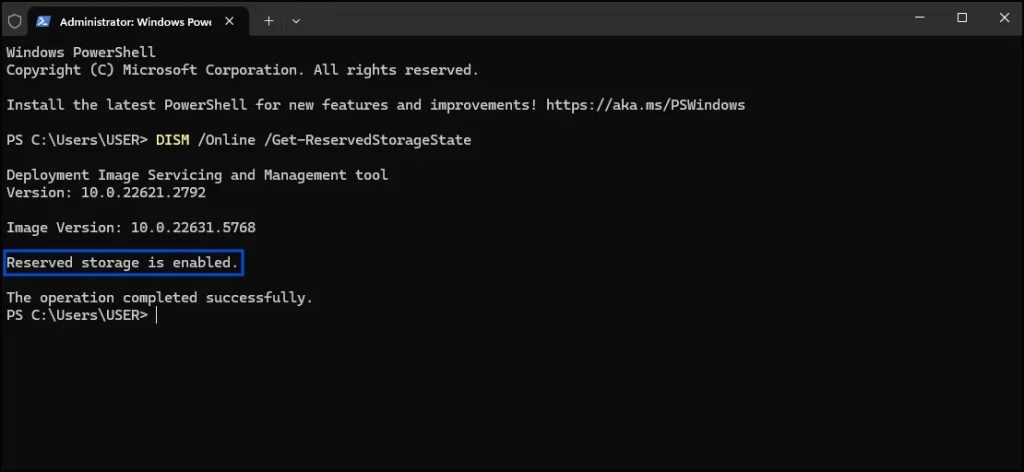
- Run: DISM /Online /Get-ReservedStorageState
It will tell you the current state.
Step 2: See How Much Space Reserved Storage Is Using
If you’re curious how much storage Windows is holding back:
- Open Settings using Windows + I
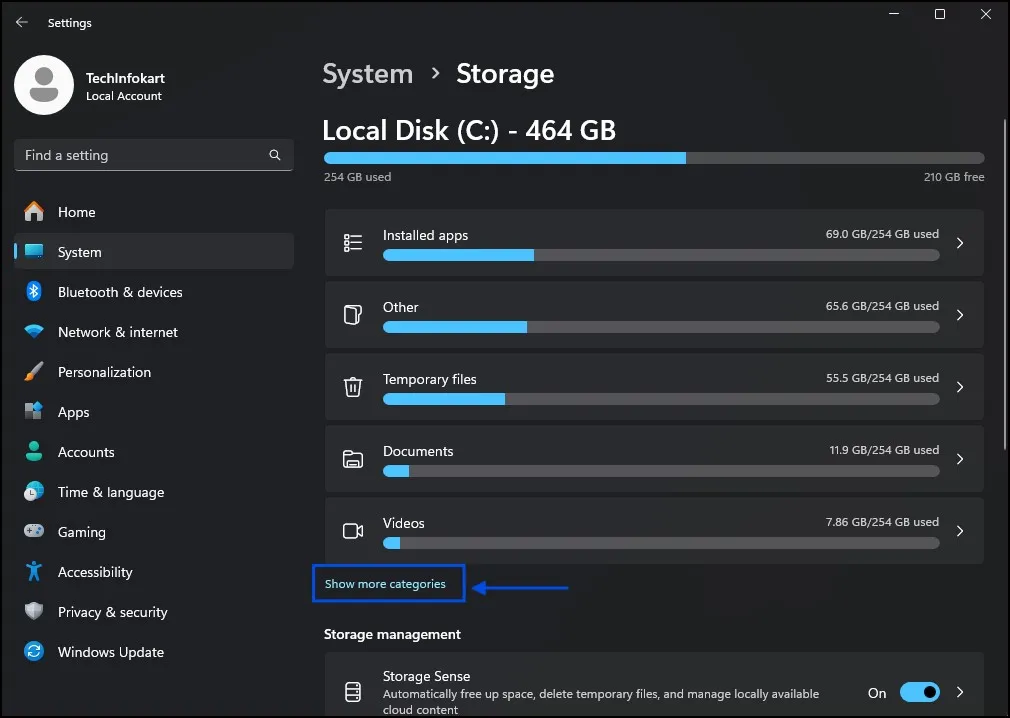
- Go to System > Storage.
- Scroll down and click Show more categories.
- Select System & reserved.
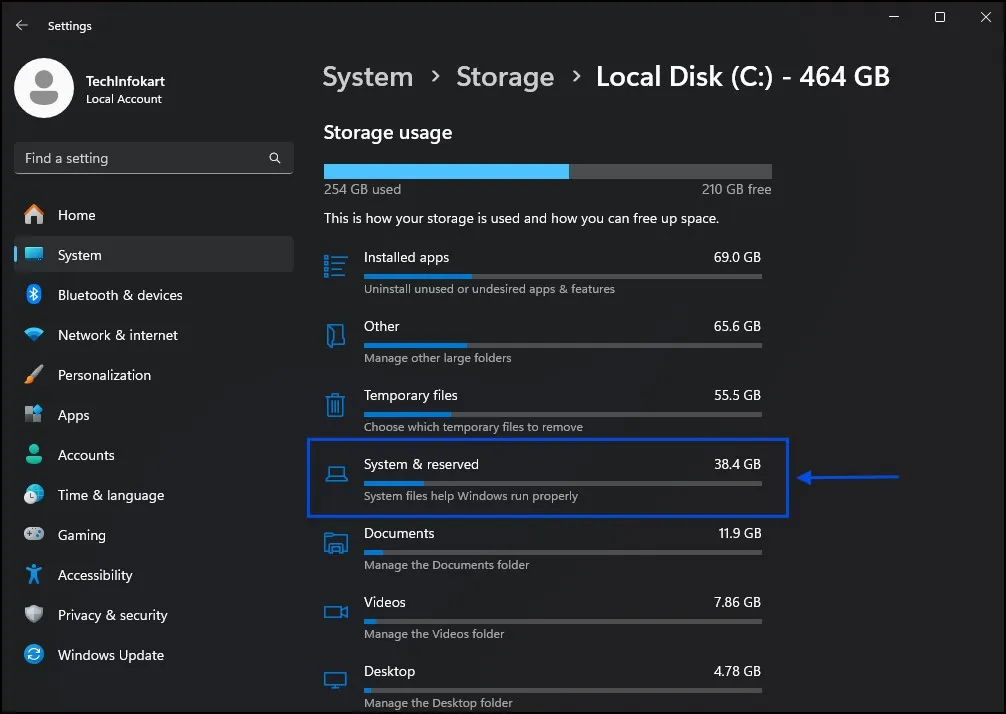
Here you’ll see how much space is being reserved. For most people, that’s around 7GB — but it can be more if you’ve installed multiple languages or optional features.
Prerequisites
Always be sure to create a system restore point before making changes to your system or registry. Think of it like a safety net—if something goes wrong while you’re in the process of trying to disable reserved storage Windows 11, you can always roll your PC back to its previous state without having to worry about losing any files you have.
Step 3: Disable Reserved Storage in Windows 11
Here’s the part you’ve been waiting for—how to disable reserved storage Windows 11.
- Open Windows Terminal (Admin).
- Type this command: DISM /Online /Set-ReservedStorageState /State:Disabled
- Press Enter.
- Restart your computer.
That’s it! Reserved storage is now turned off, and you should see extra free space on your drive.
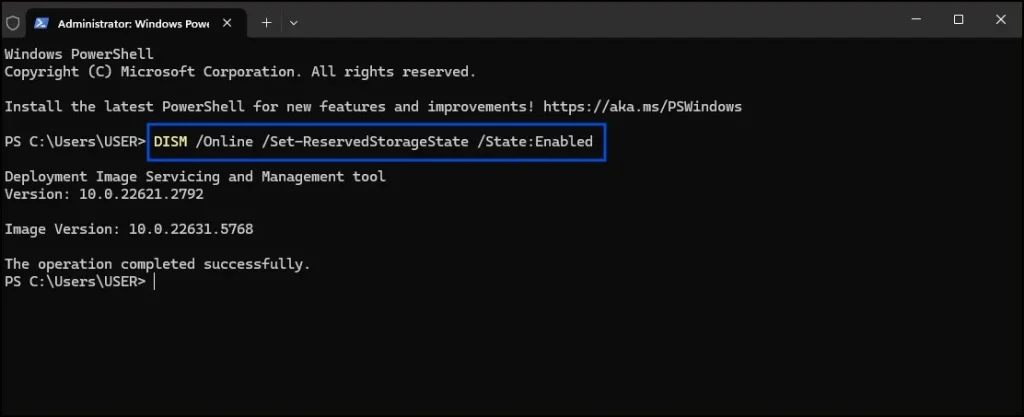
Step 4: Re-Enable Reserved Storage (If Necessary)
If you eventually find that updates are failing or running into problems, you can quickly switch it back on.
- Open Windows Terminal (Admin).
- Type in the following command: DISM /Online /Set-ReservedStorageState /State:Enabled.
- Restart your computer.
Alternative Method (For Advanced Users)
If you prefer the Windows Registry method (not recommended for beginners):
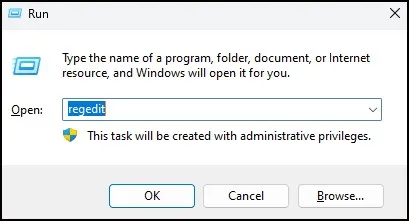
Press Windows + R, type regedit and press enter.
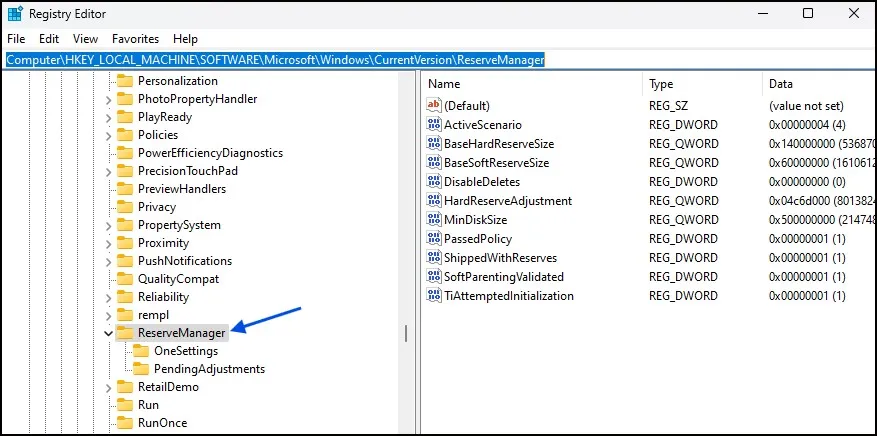
Navigate to: HKEY_LOCAL_MACHINE\SOFTWARE\Microsoft\Windows\CurrentVersion\ReserveManager
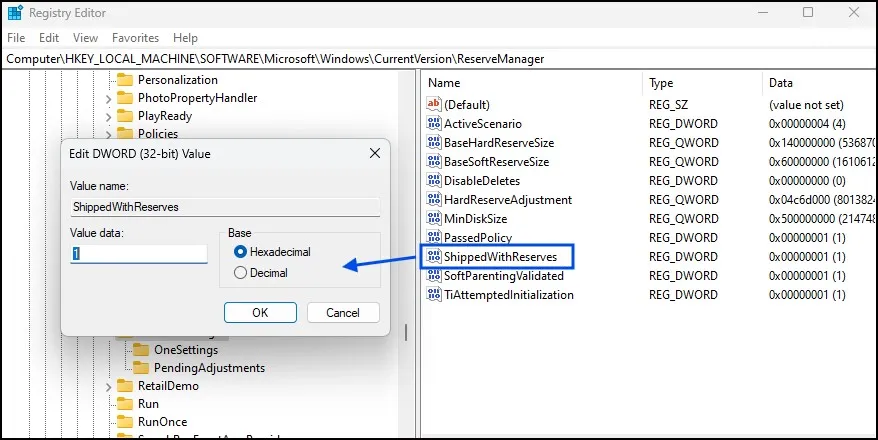
Look for ShippedWithReserves.
Set this value to 0 to turn off, or 1 to turn on.
Restart your PC.
Once again, I highly recommend the DISM approach as it’s an official method from Microsoft.
Final Thoughts
If you know your device really has enough space, you can save the reserved storage till the end. Furthermore, this will help Windows run smoothly and eliminate any performance issues.If you actually have a small SSD where every GB matter, learning to disable reserved storage Windows 11 will definitely help you save space.
The good thing is, we are seeing that this change can only be reversed back. As per the system design, you can enable it again with one command regarding any trouble situations.
Basically, check your system and decide what works the same for you. You actually don’t need to be a computer expert to manage your PC’s storage. Anyone can definitely learn these simple steps. Small steps like these can further make a big difference in the process itself.
FAQs on How to Disable Reserved Storage Windows 11
Is it safe to disable reserved storage Windows 11?
Yes, it’s safe. Windows gives you an official way to do it. Just remember that updates may sometimes need extra space.
How much space do I get back if I disable reserved storage Windows 11?
Usually around 7GB, but it can be more depending on your system setup.
What command do I use to disable reserved storage Windows 11?
Use this command in Windows Terminal (Admin):
DISM /Online /Set-ReservedStorageState /State:Disabled
Can I enable it again after I disable reserved storage Windows 11?
Yes, you can turn it back on anytime with the same DISM command, just change “Disabled” to “Enabled.”
Will my computer slow down if I disable reserved storage Windows 11?
Not directly, but if your storage is always low, updates may fail or run slower.