
If you’ve ever wanted to run Linux, test homebrewed applications, or try another operating system without rebooting your machine into the new environment, you’ve probably played around with virtual machines. However, when you attempt to add them Windows asks for something called Hyper-V.
In this tutorial I will show you, how to enable Hyper V in Windows 11 step by step. You don’t need a lot of technical knowledge to play along.
What Is Hyper-V in Windows 11?
Hyper V, a feature of Windows 11 for virtualization, is installed by default. It takes your computer and makes it able to create and run virtual machines.
A virtual machine functions like a computer within your computer. You can try out another operating system, test apps, or just have fun without endangering your primary system.
That said, with Hyper-V support, Windows 11 is a good way to learn and experiment with.
System Requirements for Hyper-V
Before you enable Hyper V, verify that your system supports the feature.
Your PC Must Have:
- Windows 11 Pro, Enterprise, or Education edition
- 64-bit processor with virtualization support
- Minimum 4 GB RAM (better, if you have 8 GB)
- Virtualization enabled in BIOS/UEFI
Note: Hyper-V isn’t included on Windows 11 Home by default.
Step 1: Check If Virtualization Is Enabled
First, let’s see if your computer supports virtualization.
- Press Ctrl + Shift + Esc to open Task Manager
- Click on the Performance tab
- Select CPU from the left side
- Look for Virtualization: Enabled
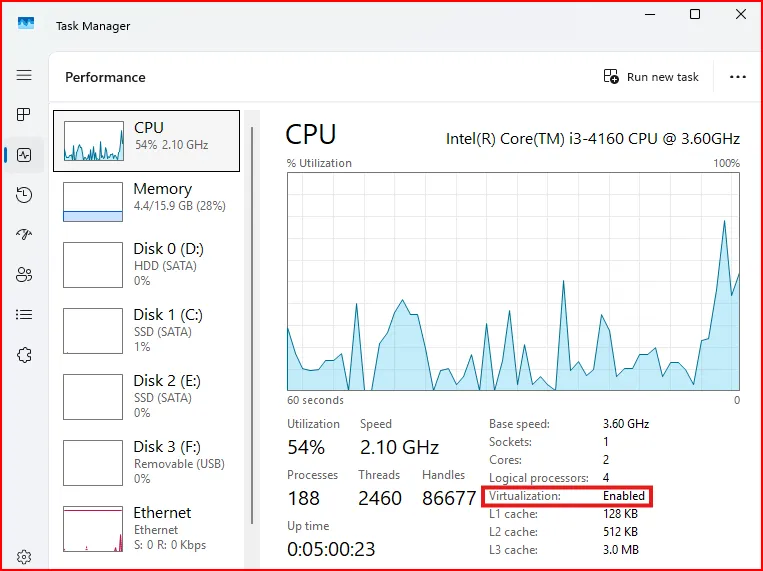
If it says “Disabled,” you’ll need to enable it from BIOS first.
Step 2: Enable Virtualization from BIOS (If Needed)
If virtualization is disabled, follow these steps:
- Restart your computer
- Press F2, F10, Delete, or Esc (depends on brand)
- Enter BIOS/UEFI settings
- Find Advanced, Advanced BIOS, or System Security settings
- Enable Intel VTx/VTd or AMD-V
- Save and exit
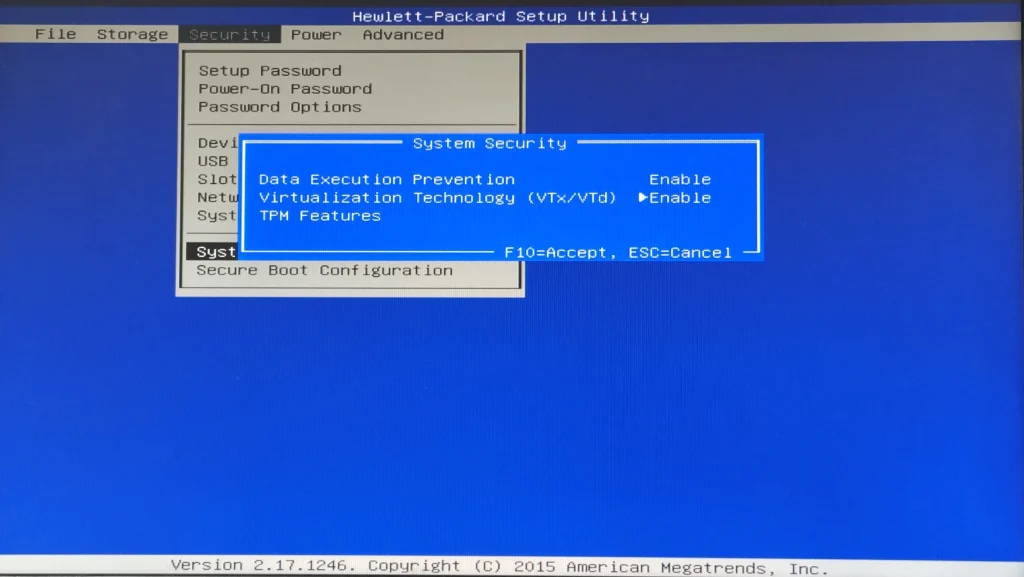
Your PC will restart with virtualization enabled.
Step 3: Enable Hyper V in Windows 11 Settings
Now let’s turn on Hyper-V.
- Press Windows + Rto open Run box
- Type optional features and press Enter
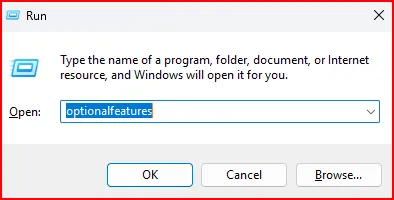
- The Windows Features window will open
- Find Hyper-V in the list
- Check the box next to it
- Click OK
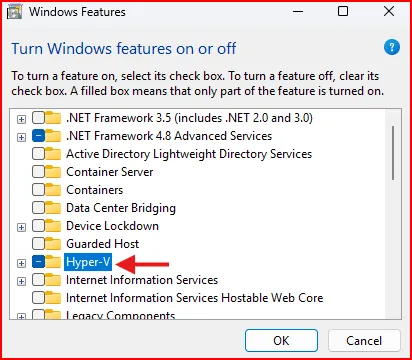
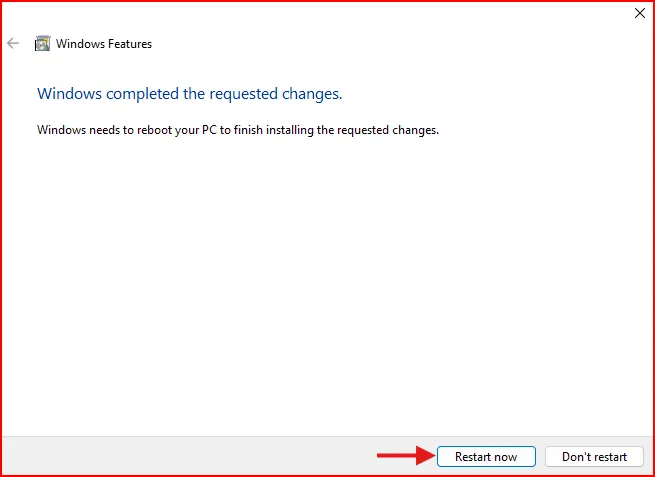
Windows will install the required files. After that, restart your computer.
Step 4: Open Hyper-V Manager
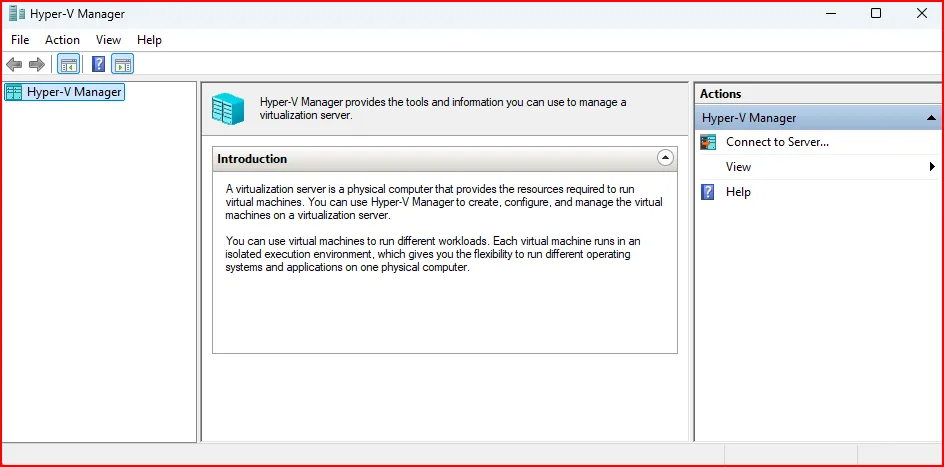
Once your PC restarts, Hyper-V is ready to use.
- Click on the Start menu
- Type Hyper-V Manager
- Open it from the results
This is where you can create and manage virtual machines.
Final Thoughts: Enable Hyper-V in Windows 11 with Confidence
And that’s how to enable Hyper V in Windows 11, step by step. You can see that it’s easy to do as long as you follow the directions correctly. With Hyper-V you don’t have to be afraid of trying new systems with new software, and keeping your skills up without breaking stuff. Begin experimentally, take small steps and have some fun. It turns out your Windows 11 PC is more powerful than you realize, so use it like a pro.
Also Read: How to Enable Hyper-V in Windows 11
Frequently Asked Questions (FAQs)
Can I enable Hyper-V on Windows 11 Home?
No, Hyper-V is not officially supported on Home edition. You need Pro or higher.
Does Hyper-V slow down my computer?
No, not normally. It only uses resources when virtual machines are running.
Is Hyper-V safe to use?
Yes, it is built into Windows and is very secure when used properly.
Can I run Linux using Hyper-V?
Yes, you can easily run Ubuntu, Kali Linux, and other distributions.
Do I need internet to use Hyper-V?
No, but you may need internet to download operating systems.