
We’ve all been there: You open up a website and it won’t load and it isn’t your damn connection’s fault. Or perhaps you’re experiencing issues with old IP addresses or weird browsing problems? Don’t panic It may just be a problem with your DNS cache.
In this blog post, I’m going to share with you how to flush DNS cache in Windows 11 and solve those annoying internet problems in no time at all. It is a harmless, simple trick, and often works like magic — and there’s a wonderful part. It only takes a few seconds.
What is DNS and DNS Cache
DNS, short for Domain Name System, is like the internet’s phone book. It converts domain names to IP addresses so that your computer can connect to websites. When you visit a website, Windows stores its DNS information, including its IP address, in a local database known as the DNS cache. It makes your browser load up websites faster the next time you visit them.
Why You May Want to Flushing the DNS Cache
- Performance Issues: Cached DNS entries may not be relevant or current after some period of time, and connections could slow or fail.
- Security Concerns: Flushing the DNS cache can be useful in that it reduces the risk of DNS spoofing attacks.
- Troubleshooting: Often the cache can be cleared to fix connection-related issues.
Flushing your DNS cache is not only a good security practice but will also help if you’re accessing the most updated version of a site.
Want a deeper look into how Windows handles DNS caching? You can refer to this technical overview from Microsoft.
3 Easy Ways to Flush DNS Cache in Windows 11
There’s more than one way to flush DNS cache in Windows 11. Below are three simple methods — pick whichever one suits you best.
Method 1: Flush DNS cache Using Command Prompt
This is the most common and reliable method.
- Click the Search icon and type cmd.
- Right-click on Command Prompt and select Run as administrator.
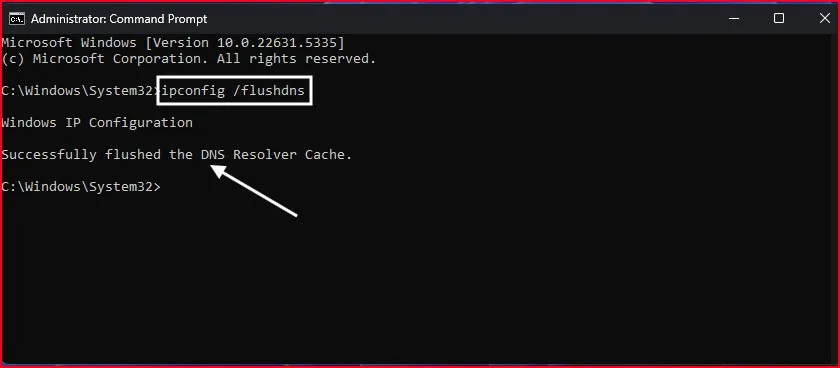
- After you have the Command Prompt window open, you’ll need to enter a specific command: Type: ipconfig /flushdns and press Enter.
- You should see a confirmation message, “Successfully flushed the DNS Resolver Cache.”
And you’re done!This command tells Windows to instantly remove any stored DNS entries from the local cache.
You can learn more about the ipconfig command from Microsoft’s official documentation here: ipconfig | Microsoft Docs
Method 2: Flush DNS cache Using PowerShell
Prefer using PowerShell? No problem! It offers another quick option
- Open Search and type powershell.
- Right-click Windows PowerShell and select Run as administrator.
- After thatPowershellwill open, and you should then type: Clear-DnsClientCache and press Enter.
- PowerShell doesn’t provide a confirmation message as Command Prompt does, however, so you won’t see any kind of success message. It’s okay—the DNS cache was flushed

Method 3: Flush DNS cache Using the Run Dialog
This method is for those who like shortcuts!
- Press Windows + R on your keyboard.
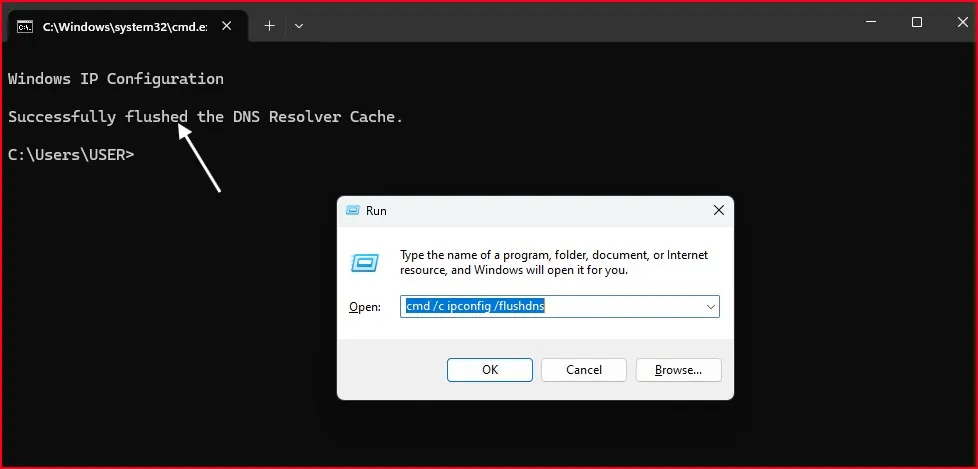
- Type the following command: cmd /c ipconfig /flushdns and press Enter.
- A black window will appear briefly and then disappear. That means your DNS cache has been flushed.
Tip: If you want the window to stay open so you can read the message, try this instead: cmd /k ipconfig /flushdns
When Should You Flush DNS Cache?
You don’t need to do this every day. But here are some situations where flushing the DNS cache is helpful:
- After changing DNS settings (like switching to Google DNS or Cloudflare)
- When a website doesn’t load properly
- If your browser shows outdated content
- After malware cleanup or antivirus scans
It’s a harmless operation and can often fix internet-related issues in seconds.
Sometimes, a cluttered DNS cache can slow things down, but it’s not always the only culprit. If you’re noticing lag across your system, you might want to also check out How to Fix High Disk Usage in Windows 11 for a deeper cleanup.
Final Thoughts
That’s it! Now you know how to flush DNS cache in Windows 11 using three easy methods. Whether you like to work with Command Prompt, PowerShell, or the Run dialog, there are beginner-friendly options that are easy to use.
If you ever have strange internet problems, this is among the first things to try. It’s quick, it’s safe, and it often resolves the issue right away.
Feel free to bookmark this post for later, and if you enjoy the information, do share it with your friends or let me know in a comment below.
Also, if you’re facing slow internet even after flush DNS cache, don’t miss my post on How to Fix Slow Internet Speed in Windows 11. It covers a few more tricks that can make a real difference.
Frequently Asked Question (FAQ)
Will flushing DNS cache delete my browsing history?
No. Flushing the DNS cache only removes stored IP addresses for websites, not your browser history or cookies.
Is it safe to flush DNS cache in Windows 11?
Yes, it’s completely safe. It just forces your computer to get the latest DNS information.
How often should I flush DNS cache?
Only when needed — if you’re facing internet issues, after changing DNS servers, or doing a system clean-up.
Will this speed up my internet?
It may not make your connection faster, but it can fix browsing issues and make sites load properly.
Can I use PowerShell instead of Command Prompt?
Yes! Just open PowerShell as administrator and type the same command: ipconfig /flushdns