
Have you ever wanted to try another OS on your Windows 11 PC without risking your primary OS? VMware Workstation Player allows you to set up virtual machines where you can try out different operating systems, play around with software or even learn new skills in a safe and isolated environment. All IT professionals, developers, and even enthusiasts need virtualization in this digital age. With its various competitor programs out there, VMware Workstation Player is a standout as a solution for easily powering multiple operating systems from a single machine.
This guide explains how to do that in the best way so that you have to install VMware Workstation Player on Windows 11 and get some quick tips to understand virtualization.
What is VMware Workstation Player?
The VMware Workstation Player is a virtualization tool that enables you to create and run virtual machines on your computer. That means you can run another operating system, like Linux, macOS or even a previous version of Windows, directly alongside Windows 11.
It’s ideal for testing out new software, getting familiar with other operating systems, or using older apps that don’t run quite right in Windows 11.
Why Use VMware Workstation Player on Windows 11?
Windows 11 is built for modern workloads, but there are plenty of scenarios where you need to run another OS. Whether you’re a developer, tech enthusiast or someone just exploring, VMware Workstation Player makes it super easy to try out virtual machines without affecting your main system.
P.S: If you are looking for a guide to set up VirtualBox then check my post for VirtualBox Setup on Windows 11. Another great alternative for virtualization, particularly if you lean toward open-source tools.
If you love playing around with virtual machines, then you probably heard of VMware’s two well-known tools – VMware Workstation Pro and VMware Workstation Player. VMware Workstation Player is a free product, and though its advanced features and capabilities make Workstation Pro a better option for professionals, at the same time, VMware Workstation Player is a great solution for beginners and in terms of occasional use.
If you are curious about VMware Workstation Pro, I have already written an in-depth guide on the installation of VMware Workstation Pro for Windows 11: “How to Easily Install VMware Workstation Pro on Windows 11: The Ultimate Guide 2024“. If you’re looking at the Pro version\, definitely check out that guide.
System Requirements to install VMware Workstation Player
Before diving into the installation process, let’s make sure your system meets the minimum requirements:
• Operating System: Windows 11 or 10 (64-bit)
• Processor: 64-bit CPU with support for virtualization which can be VT-x for Intel or AMD-V for AMD.
• RAM: Minimum of 4gb (8 or more preferred for smoother operations)
• Hard Disk Space: 1GB required for application, plus space for v).M (20GB+ recomended).
Note: Before proceeding, ensure that virtualization is enabled from your BIOS/UEFI settings.
Downloading VMware Workstation Player
Here’s how to download VMware Workstation Player:
Option 1: VMware Official Website
1. Visit the VMware Website
Visit the official page of VMware Workstation Player’s official page.
2. Find the Free Version
VMware Workstation Player is usually free for personal use, though, but you might not always find it easy. You can look for “VMware Workstation Player Free for Non-Commercial Use.”
Option 2: Trusted Third-Party Sources
If you are unable to see the free version on VMware’s site, then you can look out for trusted third-party sites like: FileHippo and Softpedia.
Downloading the latest version of VMware Workstation Player is frequently available on these platforms. However, always check the identity of the file before installing.
Important Note:
When downloading from third-party sources,
• Always use antivirus scanner on the file.
• Don’t download from unknown or sketchy sites.
• Verify the file size and version for authenticity.
How to Install VMware Workstation Player On Windows 11
After downloading, install VMware Workstation Player with the following steps:
Step1: Locate the Installer
Locate the downloaded file (probably in your “Downloads” folder) and double-click it to begin installation.
Step2: Run the Setup Wizard
You might get a User Account Control prompt asking if you want to allow this app to make changes to your device. Click ‘Yes‘.
The VMware Workstation Player Setup Wizard will open. Click ‘Next‘ to proceed.
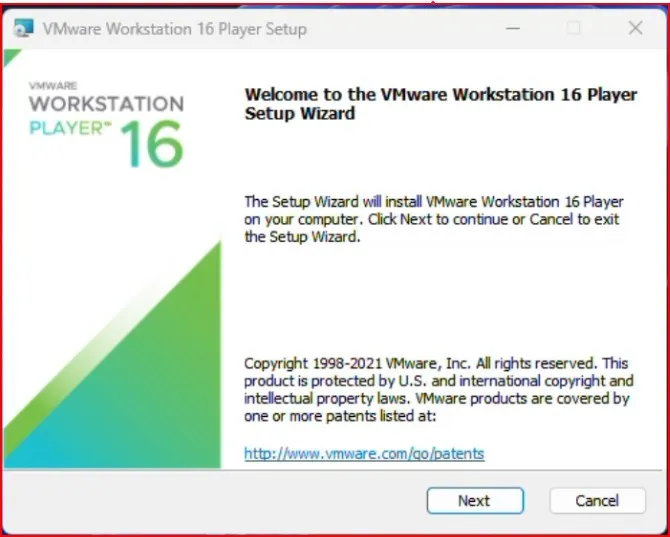
Step3: Accept the License Agreement
Next, you’ll need to accept the license agreement. Read through it if you like, then click the ‘I accept the terms in the License Agreement‘ checkbox, and click ‘Next‘.
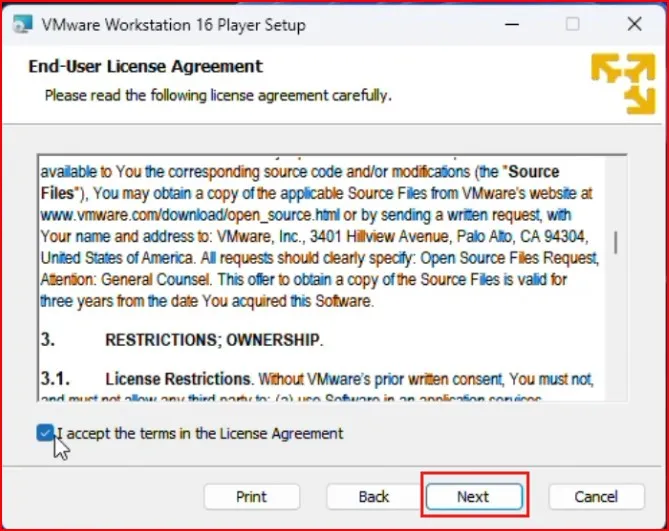
Step4: Choose Installation Options
Here, you can choose the installation path. By default, the software gets installed in C:\\Program Files (x86)\\VMware\\VMware Workstation Player. You can modify it if you need to, but 90% of the users don’t need to change it. I recommend leaving everything at the default settings. Click ‘Next‘
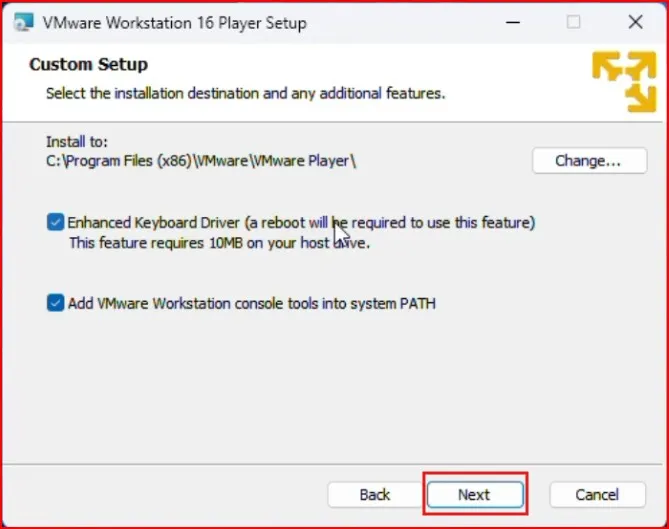
Enable product updates and you can also choose whether to join the VMware Customer Experience Improvement Program. These are optional. Select your preference and click ‘Next‘ to proceed.
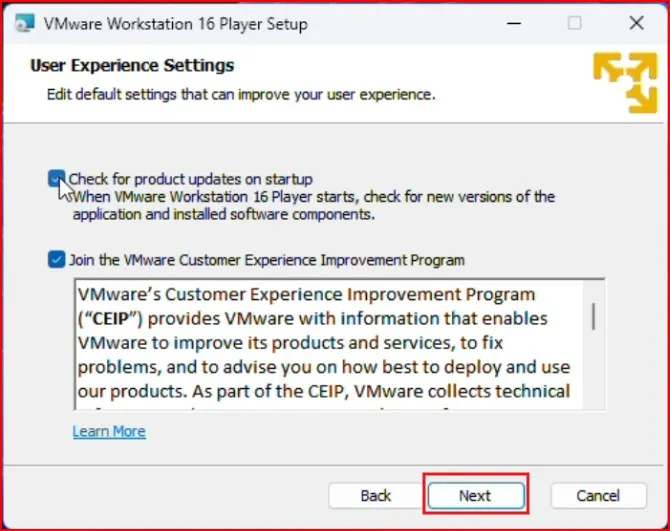
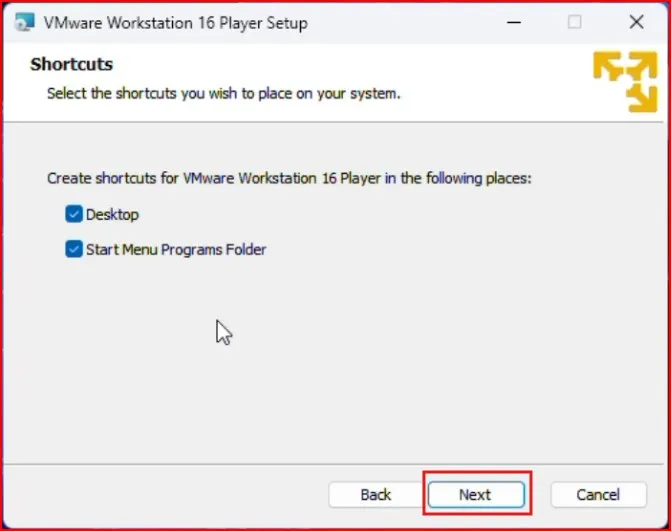
Step5: Create Shortcuts
Select whether you want desktop and Start menu shortcuts. Click ‘Next‘ to move forward.
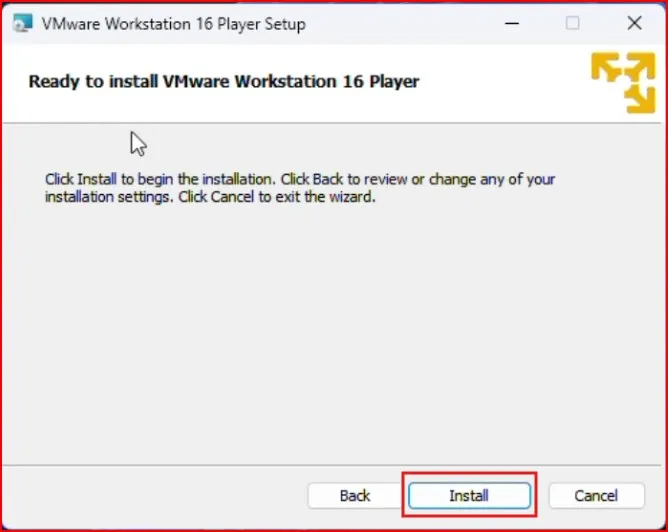
Step6: Install the Software
Finally, click ‘install‘ to begin the installation process. The installation might take a few minutes to complete.
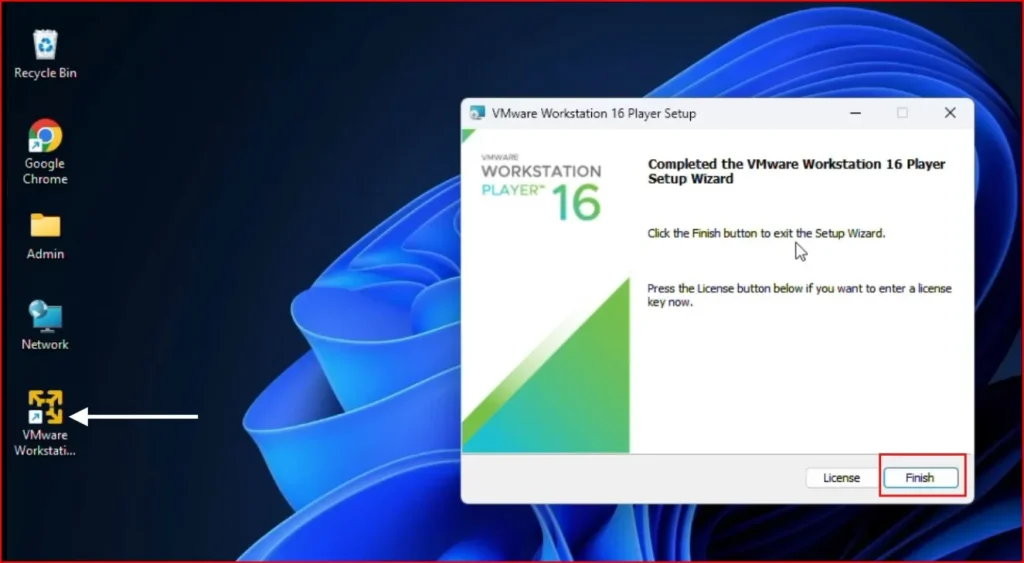
Step7: Complete the Installation
Once finished, you’ll see a completion message. Click “Finish” to close the setup wizard.
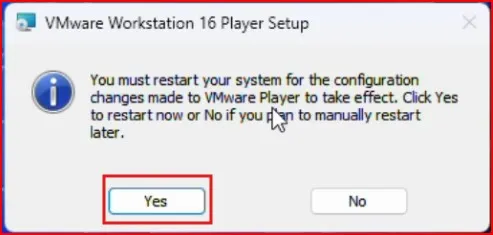
Then you’ll be prompted to restart your PC for the changes to take effect. If you prefer, you can choose to restart later as well.
VMware Workstation Player Configuration
Once it is installed, you can set up VMware Workstation Player:
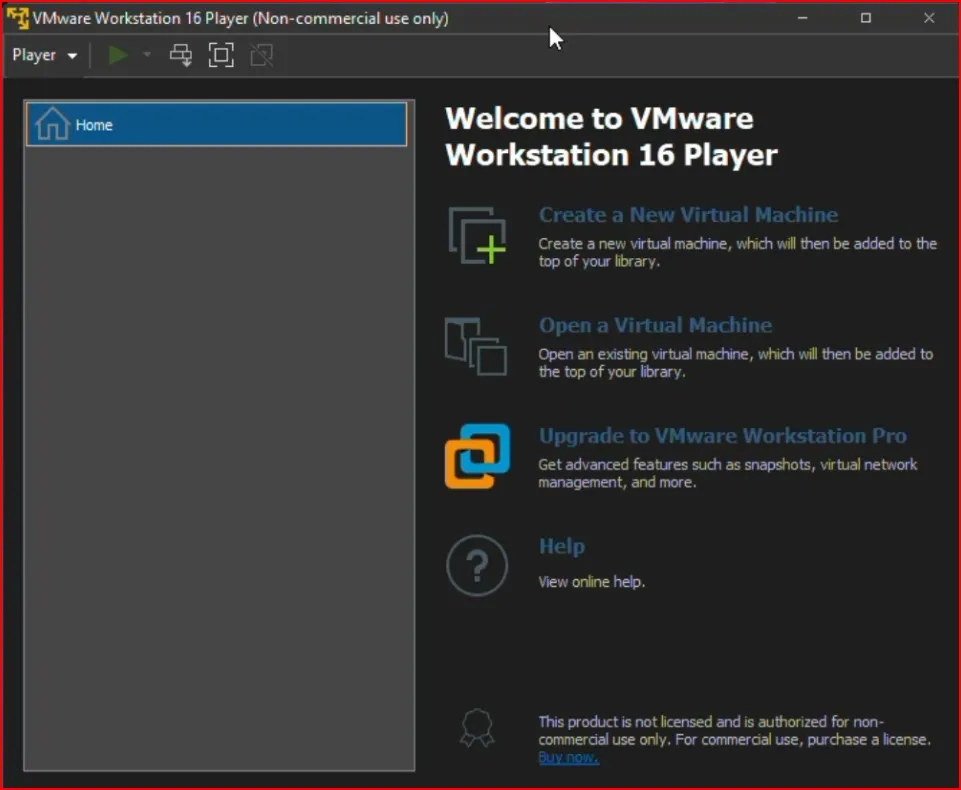
1. Launch the Application
Launch VMware Workstation Player from Desktop/Start menu.
2. Create a Virtual Machine
- Press Create a New Virtual Machine
- Choose the ISO image of the OS you are going to install.
- Proceed through the steps allocating memory, disk space and settings.
3. Optimize Performance
Allocate enough CPU threads and RAM to your virtual machine without overloading your host machine.
Benefits of Using VMware Workstation Player on Windows 11
- Use multiple operating systems on a single computer.
- You can test new software in an isolated space without endangering your primary system.
- Run old applications or older OS versions without any hassle.
That’s it! VMware Workstation Player is now installed and ready to use. If you need further guidance, watch my detailed YouTube video tutorial:
Conclusion
Installing VMware Workstation Player on Windows 11 is a simple and effective way to explore other operating systems or run virtual machines for testing purposes. Just follow the steps carefully, and you’ll have it set up in no time.
If you have any questions or run into issues, feel free to drop a comment. Don’t forget to check out my guide on VirtualBox Setup on Windows 11 for another excellent virtualization option. If this guide helped you, please like, share, and let others know. Happy virtualizing!
Frequently Asked Question (FAQ)
Is VMware Workstation Player free to use?
Yes, VMware Workstation Player is free for personal and non-commercial use. For commercial use, you will have to purchase a license.
Can I install VMware Workstation Player on Windows 11 Home edition?
Yes, you can install VMware Workstation Player runs on both Windows 11 Home and Pro editions, provided your system meets the minimum requirements.
Can I run multiple virtual machines at the same time on VMware Workstation Player?
Yes, but the performance depends on the hardware resources (RAM, CPU, etc.) available on your PC. Ensure your system has enough resources to handle multiple VMs.
Do I need an ISO file to create a virtual machine in the VMware Workstation Player?
Yes, you will require an ISO file for the operating system you wish to install in your virtual machine such as Linux, Windows, etc.
VMware Workstation Player vs VirtualBox: Which is better?
VMware Workstation Player and VirtualBox are both great virtualization tools. VirtualBox is open-source and thus more flexible, with more advanced features, but VMware is often seen as being faster and easier to use. That depends on your individual needs.
Does VMware Workstation Player support 32-bit operating systems?
No, VMware Workstation Player needs 64-bit processor and operating system.